To create a notch in a beehive inner cover, you simply remove a small section from the center of the wooden rim on one of the shorter sides. This is typically done with a handsaw or jigsaw to cut out a piece about a half-inch deep and a few inches wide, creating a small opening when the cover is in place.
The notch in an inner cover is more than just a modification; it is a strategic tool for managing your hive's ventilation and creating an upper entrance, which is critical for moisture control in winter and reducing traffic congestion during peak season.
The Purpose of an Inner Cover Notch
Before making a cut, it's essential to understand why a notch is a valuable feature for your hive. Its function changes depending on the season and your management goals.
Creating an Upper Entrance
The notch provides an alternative entrance and exit for the colony. This is particularly useful during winter when the main bottom entrance may be covered by snow or dead bees.
It also helps reduce congestion at the main entrance during a heavy nectar flow, allowing forager bees to move in and out more efficiently.
Improving Hive Ventilation
Proper ventilation is crucial for a colony's health. The notch acts as a vent, allowing warm, moist air produced by the bees' respiration to escape the hive.
This function is most critical during the winter. Without this escape route, moisture can condense on the cold inner cover, drip down onto the cluster, and chill the bees, which can be fatal.
How to Create the Notch: A Simple Guide
If your inner cover is solid, modifying it is a simple task that requires only basic tools and a few minutes of your time.
Step 1: Gather Your Tools
You will need a saw (a simple handsaw, jigsaw, or even a multi-tool will work), a measuring tape or ruler, and a pencil.
Step 2: Measure and Mark
Place the inner cover on a flat surface. On one of the shorter sides of the wooden rim, find the center point. Mark out a section that is approximately a half-inch deep and about 2 to 3 inches wide.
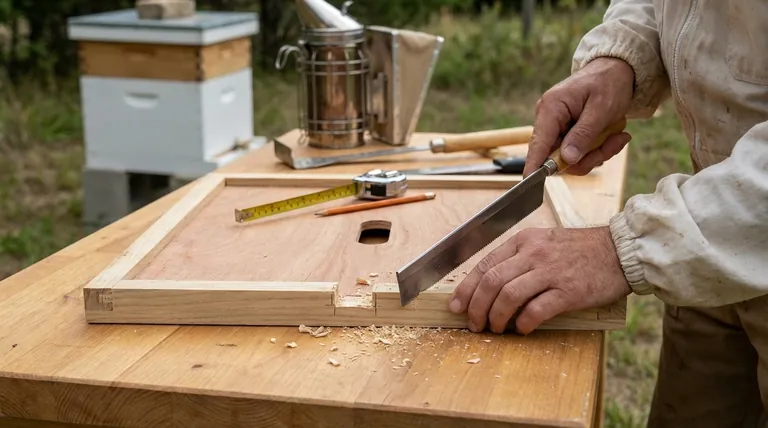
Step 3: Make the Cut
Secure the inner cover so it does not move. Carefully saw along your marked lines to remove the small block of wood from the rim. The result is a clean, simple notch.
Understanding the Trade-offs
While beneficial, using a notch requires a basic understanding of its implications. It is not a "set it and forget it" feature.
Potential for Heat Loss
In colder climates, an upper entrance can allow too much heat to escape. Some beekeepers manage this by orienting the notch facing down in winter, which still allows for some air exchange without creating a direct opening.
An Entry Point for Pests
For a small or weak colony, an extra entrance can be another point to defend against pests like wasps or robbing bees. If your colony is not strong, you may consider closing the notch temporarily until they can adequately defend the space.
Making the Right Choice for Your Hive
The decision to add and use a notch depends entirely on your climate and beekeeping goals.
- If your primary focus is winter survival: The notch is a non-negotiable tool for releasing moisture and preventing deadly condensation inside the hive.
- If your primary focus is managing high traffic: An upper entrance via the notch can significantly reduce congestion during a strong nectar flow, improving foraging efficiency.
- If you are a beginner: Adding a notch is a standard, recommended practice that provides you with more options for managing ventilation and hive access throughout the year.
Ultimately, modifying your equipment to suit the specific needs of your colony is a hallmark of thoughtful beekeeping.
Summary Table:
| Purpose | Key Benefit |
|---|---|
| Winter Ventilation | Prevents deadly condensation by allowing moist air to escape. |
| Upper Entrance | Reduces traffic congestion and provides an alternative entry/exit. |
| Seasonal Management | Offers flexibility for different climate and beekeeping goals. |
Ready to optimize your apiary with professional-grade equipment?
As a commercial beekeeper or distributor, efficient hive management is key to your success. HONESTBEE supplies durable, high-quality beekeeping supplies and equipment in bulk, designed to meet the rigorous demands of commercial operations. From inner covers to full hive setups, our wholesale-focused solutions help you maintain healthier colonies and improve your bottom line.
Contact our team today to discuss your equipment needs and discover how we can support your business growth.
Visual Guide

Related Products
- Inner Beehive Cover for Beekeeping Bee Hive Inner Cover
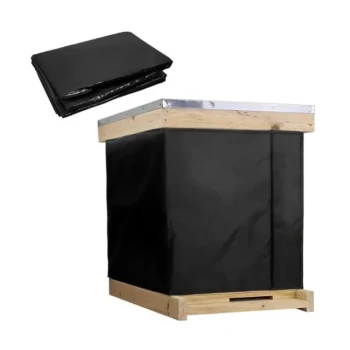
- Professional Insulated Winter Hive Wrap for Beekeeping
- Telescopic Beehive Outer Cover Lid Roof with Galvanised Sheeting for Langstroth Hive and Beehive Outer Cover
- Professional Insulated Plastic Bee Hives
- Stainless Steel Round Beehive Air Vents for Ventilation
People Also Ask
- What is the function and placement of an inner cover in a beehive? Essential Hive Management Guide
- What is the purpose of the inner and outer covers in a beehive? Essential for Hive Health & Management
- What is the purpose of the oval-shaped hole in the inner cover? Key to Ventilation and Harvesting
- What is the purpose of the inner cover in a beehive? A Key to Hive Health & Easy Management
- What is the purpose of an inner cover in a beehive? Essential for Hive Health & Easy Management