Toggle Categories
Get Instant Support
Choose your preferred way to connect with our team
-
Get Free Quote Fill out form for detailed pricing
-
Send Email Detailed inquiry support
-
WhatsApp Quick mobile chat
Response Time
Within 8 hours on working days, 24 hours on holidays


Hive Management
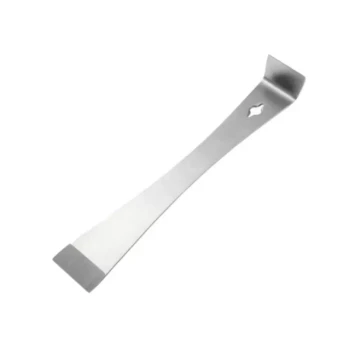
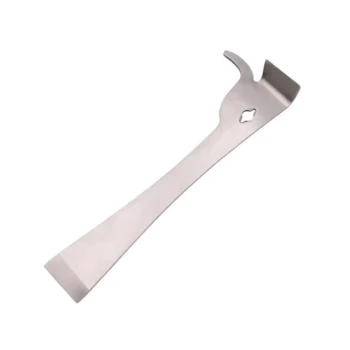
Professional Stainless Steel Pry-Bar Hive Tool
Item Number: HT-2
Stainless Steel J Hook Hive Tool for Beekeeping
Item Number: HT-3

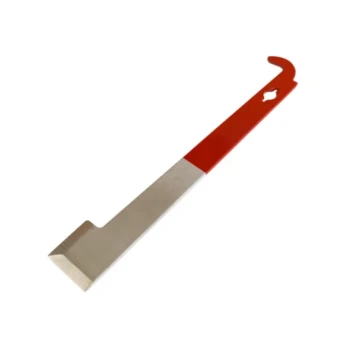
Professional Steel Pry-Bar Hive Tool with Painted Grip
Item Number: HT-6
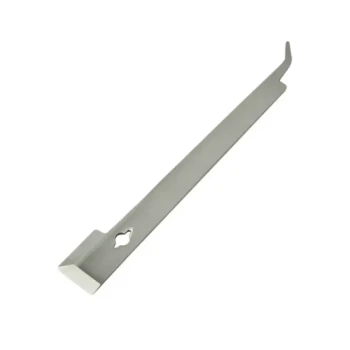
Professional Stainless Steel J-Hook Hive Tool
Item Number: HT-8
Professional Multi-Function Stainless Steel Hive Tool
Item Number: HT-9
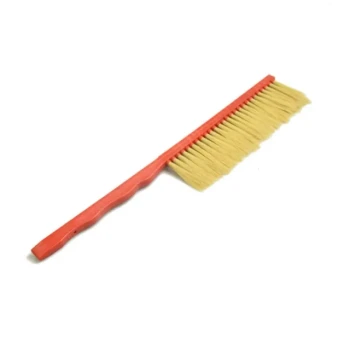
Plastic Handle Single Row Artificial Fiber Bee Brush
Item Number: BB-1
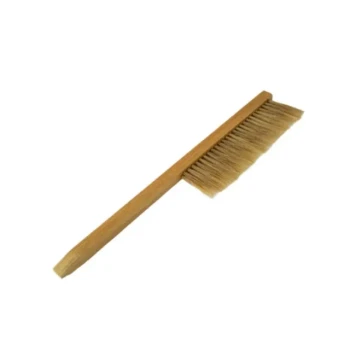
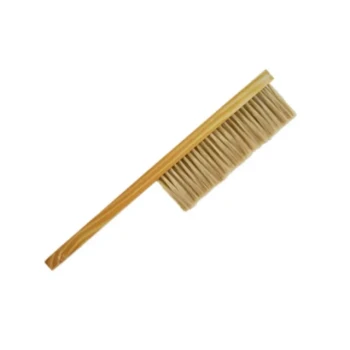
Classic Wooden Bee Brush with Double-Row Boar Bristles
Item Number: BB-6
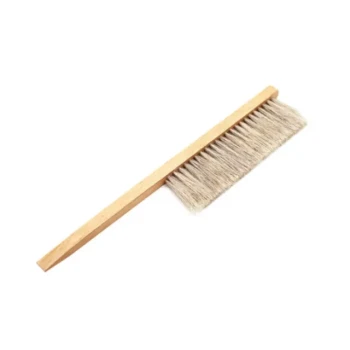
Wooden Bee Brush with Double-Row Horsehair Bristles
Item Number: BB-5
Double Row Artificial Fiber Bee Brush for Beekeeping
Item Number: BB-4

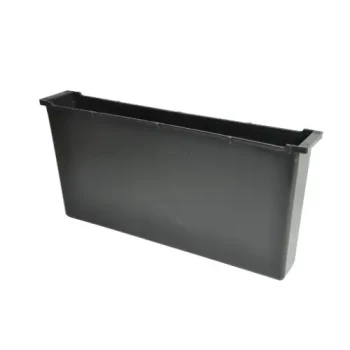
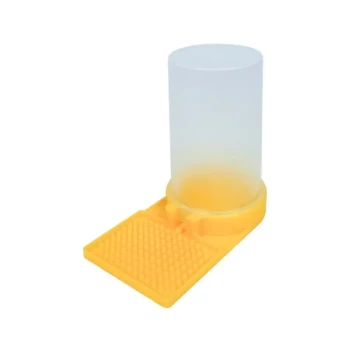
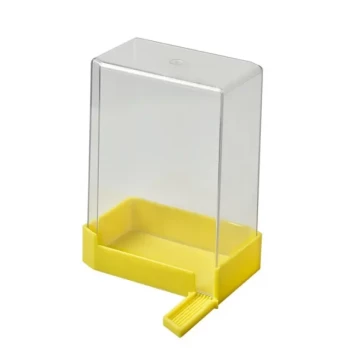
White Plastic 0.5L Beekeeping Entrance Feeder for Bees
Item Number: BF-1


Reusable Clear Small Hive Beetle Traps for Beehives Beetle Trapping Tools
Item Number: HBT-1

Plastic Beetle Blaster Trap Beekeeping Tools and Supplies
Item Number: HBT-2

Black Plastic Beetle Barn Hive Beetle Trap for Beehives
Item Number: HBT-3

Reusable Aluminium Beetle Trap for Small Hive Beetles Silver Bullet
Item Number: HBT-4

Removable Washable Hive Beetle Trap Attractants for Small Hive Beetles
Item Number: HBT-5


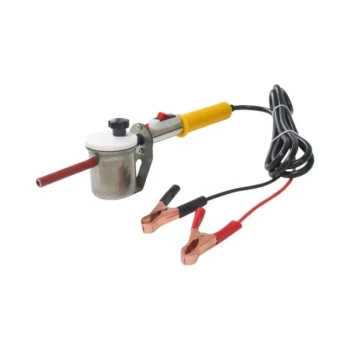
Oxalic Acid Vaporizer 12V for Bee Varroa Mite Treatment
Item Number: OAV-3

Varroa Easy Check Mite Tester Kit Counter Alcohol Wash Jar
Item Number: VEC-1
HONESTBEE Professional Entrance Bee Feeder Hive Nutrition Solution
Item Number: BF-11

Professional In-Hive Frame Bee Feeder by HONESTBEE
Item Number: BF-12

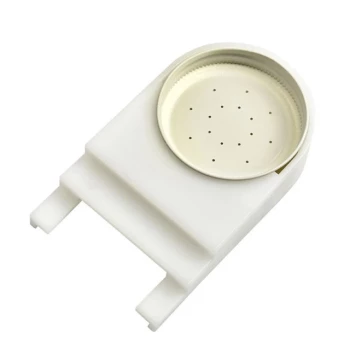
HONESTBEE Round Hive Top Bee Feeder for Syrup
Item Number: BF-14
Classic Boardman Entrance Bee Feeder Hive Front Feeding Solution
Item Number: BF-15
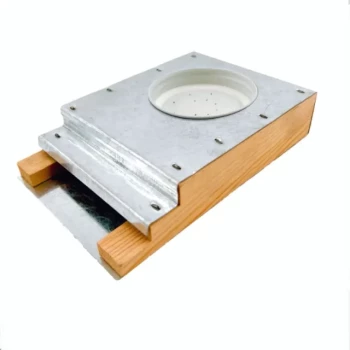


Professional Hive Top Bee Feeder for Beekeeping
Item Number: BF-18

HONESTBEE Square Top Hive Bee Feeder Top Bee Feeder
Item Number: BF-19
Professional Hive Front Entrance Bee Feeder
Item Number: BF-20
REQUEST A QUOTE
Our professional team will reply to you within one business day. Please feel free to contact us!
Related Articles

How Oblong Holes in Hive Entrance Reducers Improve Security and Efficiency
Discover how oblong hole entrance reducers enhance hive security and bee traffic flow compared to traditional round-hole designs.
Beyond Honey: The Strategic Calculus of the Pollen Trap
Pollen traps offer a protein reserve for colony growth but introduce risks. Learn the strategic calculus for using this powerful beekeeping tool.
Why Your Bee Brush Might Be Costing You Honey—And the Professional's Approach to a Calmer, More Productive Apiary
Discover why overusing a bee brush agitates hives and hurts your yield. Learn the professional technique for calmer inspections and more efficient harvests.
The Art of Gentle Intervention: A Guide to Pollen Trap Mechanics and Bee Psychology
Explore pollen trap design from a systems perspective, balancing harvest efficiency with the psychology and health of your bee colony.
Control vs. Versatility: The Engineering Psychology of Hive Tools
Explore the trade-offs between a frame lifter and a standard hive tool, and how tool choice impacts beekeeper confidence and colony safety.
How to Ensure New Beehive Survival: Feeding Strategies and Colony Milestones
Learn essential feeding strategies and colony milestones to ensure new beehive survival. Tips on sugar syrup ratios, pollen patties, and progress monitoring.
Beyond Lifting: The Frame Gripper and the Psychology of Control in Beekeeping
A frame gripper isn't just for lifting; it's a tool for control, minimizing hive stress and boosting beekeeper confidence for safer apiary management.
Anatomy of a Hive Tool: The Simple Physics of Calm Beekeeping
Explore how a hive tool's geometry—flat, bent, and hooked—provides mechanical advantages for efficient, gentle, and stress-free hive management.
How to Optimize Autumn Syrup for Stronger Hives and Higher Honey Yields
Optimize autumn syrup with 1.6:1 sugar ratio for stronger hives, faster curing, and higher winter survival rates. Essential beekeeping tips inside.
The Unsung Interface: Why a Simple Hive Tool Defines Beekeeping
The beekeeper's hive tool isn't just a pry bar; it's a crucial interface designed to respectfully overcome the bee's powerful propolis engineering.
How to Secure Beehives in Winter: Tie-Down Straps as a Lifeline for Colonies
Learn how tie-down straps protect beehives from winter storms, prevent colony loss, and boost survival rates. Essential for beekeepers.
Leverage and Finesse: The Ergonomic Imperative of the Hive Tool
Discover why the 8-10 inch hive tool is the professional standard, balancing the physics of leverage with the psychological need for control.
How to Maintain Genetic Diversity in Queenless Bee Colonies: Practical Strategies for Small Apiaries
Learn science-backed strategies to maintain genetic diversity in queenless bee colonies for small apiaries. Prevent inbreeding with tactical relocation and drone management.
The Unseen Cost of a Single Point of Failure: A Beekeeper's Guide to Hive Tools
Discover why relying on a single hive tool creates a critical failure point in apiary management and how a multi-tool system boosts resilience.
An Extension of the Hand: The Physics and Psychology of the Beekeeper's Hive Tool
Explore the hive tool's design, from the physics of prying propolis to the psychology of a calm inspection. A simple tool for a complex system.
Leverage, Force, and Finesse: An Engineer's Guide to Hive Tool Selection
Choosing between a standard and J-hook hive tool isn't about preference, but understanding the physics of leverage for efficient, gentle beekeeping.
How Beekeepers Can Prevent Pest Infestations in Honey Bee Feeders
Learn actionable strategies for beekeepers to prevent pest infestations in honey bee feeders through design, placement, and maintenance.
The Physics of Flow: How a Single Hive Tool Redefines the Beekeeper's Workflow
Discover how a multi-functional hive tool reduces cognitive load and streamlines workflow, turning hive management into a single, fluid motion.
How Round Hive Top Feeders Solve 3 Critical Beekeeping Challenges
Round hive top feeders enhance beekeeping efficiency by reducing drowning risks, preventing robbing, and optimizing pollen distribution. Learn strategic usage tips.
Precision in Propolis: The Compounding Gains of a Modified Hive Tool
A modified hive tool isn't just sharper; it's a device for precision that reduces hive stress and compounds a beekeeper's efficiency at scale.