To properly paint beekeeping equipment, your primary goal is to protect the exterior wood from weather while leaving the interior untouched for the health of the bees. You must use a quality primer followed by exterior-grade paint, paying special attention to vulnerable areas like joints and end-grain, which absorb moisture. Critically, you must avoid painting any surface the bees live on or the mating edges where hive boxes stack together.
The most common mistake in preparing a beehive is treating it like a piece of furniture. Your goal is not a perfect, uniform coating, but a strategic, weatherproof shield that protects the exterior wood while preserving a raw, natural environment on the interior for the colony.
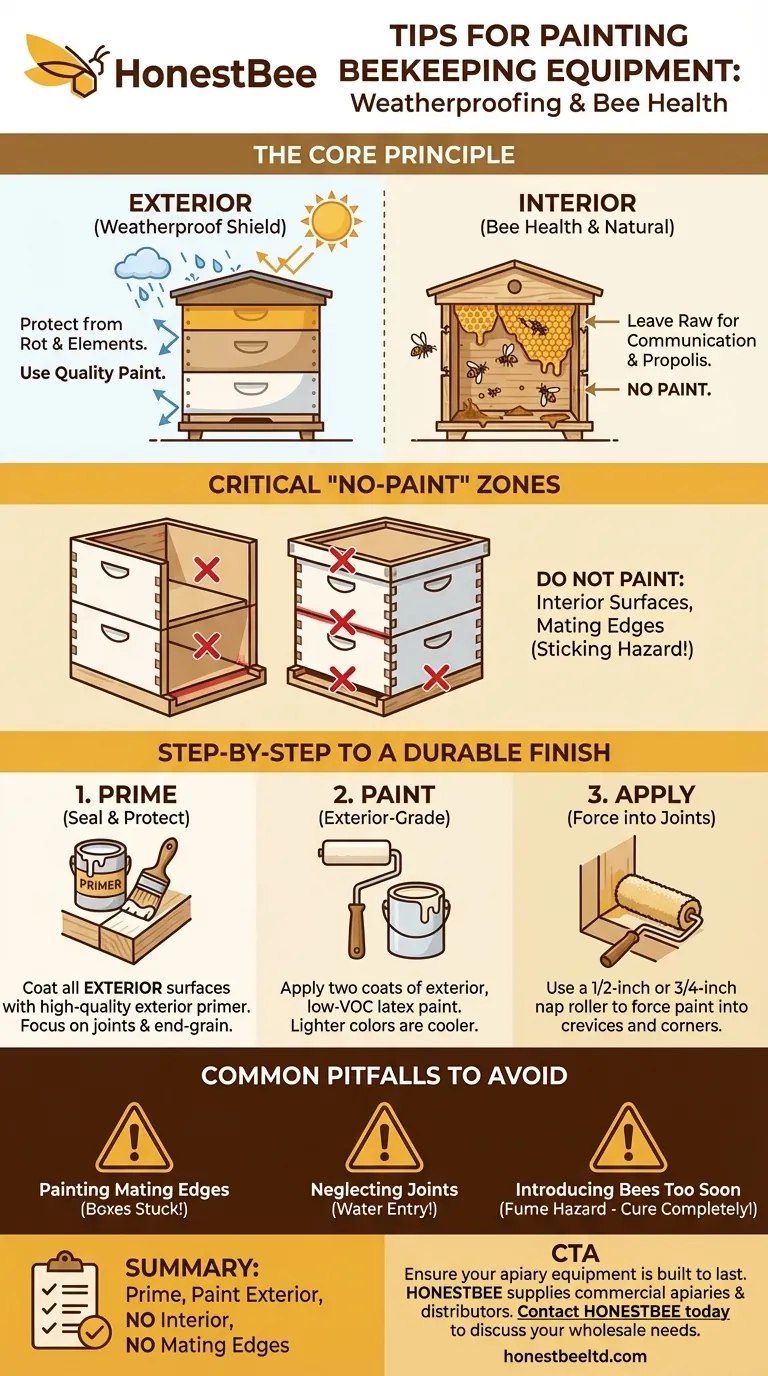
The Core Principle: Weatherproofing vs. Bee Health
Painting your hive is a crucial step for longevity, but it must be done with the bees' needs as the top priority. The fundamental rule is to separate the outside world from the inside world.
Why Painting Is Non-Negotiable
Wooden beehives, most often made of pine, are highly susceptible to rot and deterioration when exposed to rain, snow, and sun.
A proper paint job is not for aesthetics; it is a necessary protective layer. It seals the wood, prevents moisture from soaking in, and can add years to the functional life of your equipment.
The Critical "No-Paint" Zones
Do not paint the inside of the hive. Bees use the raw wood surface for communication and to apply propolis, a resinous substance they use as a sealant and sterilizing agent. Paint can interfere with these natural behaviors and may introduce chemicals into their living space.
Equally important, do not paint the top or bottom edges of the hive bodies and supers. These are the surfaces where the boxes make contact. Paint here will act like glue under the heat and pressure of a full hive, making it incredibly difficult to separate the boxes for inspections.
A Step-by-Step Guide to a Durable Finish
A long-lasting finish relies on proper preparation and the right application technique. Rushing this process will only lead to peeling paint and moisture damage later.
Step 1: Prime Everything First
Before applying any color, coat all exterior surfaces with a high-quality exterior primer. This is the most important step for durability.
Primer seals the porous wood, especially the joints and end-grain, which are the most vulnerable points for moisture absorption. A good coat of primer ensures your top coat of paint will adhere properly and provide a much stronger barrier.
Step 2: Choose the Right Paint
Use a standard exterior-grade, low-VOC (Volatile Organic Compound) latex paint. Lighter colors are generally recommended as they help keep the hive cooler in direct sunlight.
To save money, you can often buy "mistake paint" from hardware stores at a significant discount. Just ensure it is an exterior latex formula. Two coats of paint over your primer will provide a robust finish.
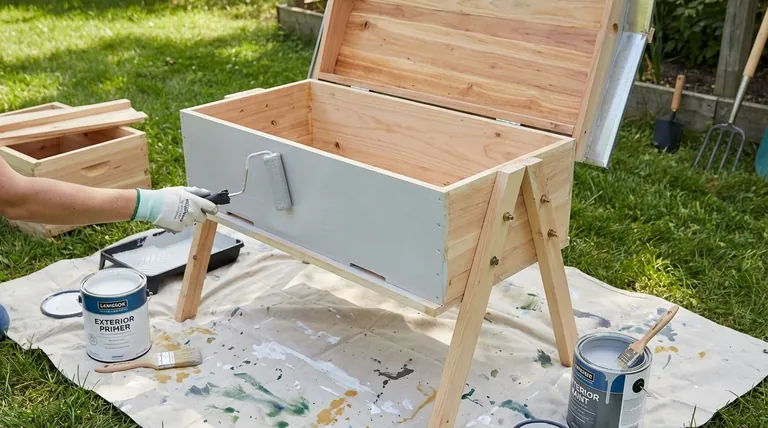
Step 3: Use the Best Application Technique
The most effective method for painting hive boxes is using a roller with a 1/2-inch or 3/4-inch nap. This thicker nap is excellent at forcing paint into the finger joints and crevices where moisture is most likely to penetrate.
For maximum efficiency, you can stack your hive bodies and supers and paint them all at once. Focus your effort on the handles and the corner joints. A brush is still useful for detailed areas like the bottom board or telescoping cover.
Understanding the Common Pitfalls
Avoiding a few key mistakes is just as important as following the correct steps. These errors can compromise the hive's structure or make your job as a beekeeper much harder.
Pitfall: Painting the Mating Edges
As mentioned, painting the top and bottom rims of the boxes is a critical error. The boxes will effectively be glued together. When you try to pry them apart with your hive tool, you will likely damage the wood and break the seal you worked so hard to create.
Pitfall: Neglecting the Joints
Simply rolling paint over the flat surfaces is not enough. The finger joints at the corners of each box are end-grain wood, which acts like a sponge for water. You must force primer and paint deep into these joints with your roller or a brush to seal them completely.
Pitfall: Introducing Bees Too Soon
Fresh paint releases chemicals as it cures. You must allow the painted equipment to dry and cure completely before installing a colony of bees. Give it at least several days in a well-ventilated area to ensure all fumes have dissipated.
Final Checklist for a Perfectly Painted Hive
Apply these principles based on your primary goal for the equipment.
- If your primary focus is longevity: Use a quality exterior primer and apply at least two top coats, paying extra attention to forcing paint into all corner joints.
- If your primary focus is bee safety: Leave all interior surfaces and the top/bottom edges of the hive boxes completely bare and unpainted.
- If your primary focus is efficiency: Stack your hive bodies and supers to paint them simultaneously with a high-nap roller for quick, effective coverage.
Ultimately, a well-painted hive is a long-lasting home that provides a safe, protected space for your colony to thrive.
Summary Table:
| Step | Key Action | Critical Detail |
|---|---|---|
| 1. Prime | Coat all exterior surfaces. | Use a high-quality exterior primer to seal vulnerable joints and end-grain. |
| 2. Paint | Apply top coat. | Use exterior-grade, low-VOC latex paint; lighter colors are better. |
| 3. Apply | Use a roller. | A roller with a 1/2-inch or 3/4-inch nap forces paint into joints effectively. |
| 4. Avoid | Identify no-paint zones. | Never paint the interior or the top/bottom mating edges of hive boxes. |
Ensure your apiary equipment is built to last. Proper painting is just one part of successful hive management. HONESTBEE supplies commercial apiaries and beekeeping equipment distributors with the durable, high-quality supplies needed for thriving operations. From hive boxes to protective gear, our wholesale-focused offerings help you maintain healthy colonies and efficient practices.
Contact HONESTBEE today to discuss your wholesale beekeeping supply needs and protect your investment.
Visual Guide
Related Products
- Wholesales Dadant Size Wooden Bee Hives for Beekeeping
- Stainless Steel Round Beehive Air Vents for Ventilation
- Metal Bee Hive Stand Bee Box Stand for Beekeeping
- Durable Plastic Hive Number Set for Beekeeping
- Wooden Bee Hive Frames for Beekeeping and Wholesale
People Also Ask
- How long do wooden bee hives last? Extend Your Hive's Lifespan Beyond 10 Years
- Why Increase Hive Installation Quantity in Commercial Apiaries? Offset Climate Risks with Scalable Infrastructure
- What are the strategic benefits of installing beekeeping hives at an elevation of 1 to 6 meters? Protect Your Assets
- What is the proper way to store unused bee hives? Expert Stacking Tips for Equipment Longevity
- What are the advantages of wooden bee hives? Superior Bee Health & Beekeeper Flexibility


