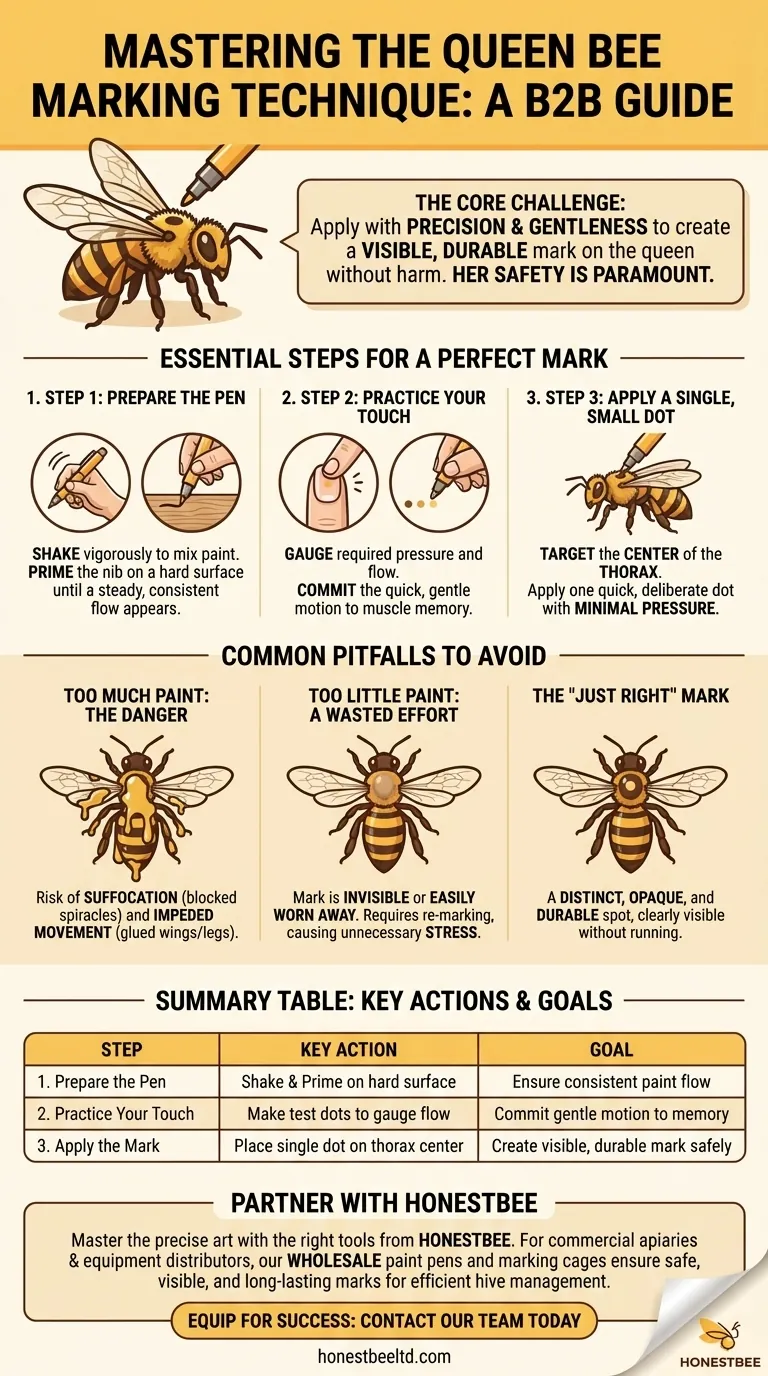
To ensure proper marking technique with a paint pen, you must first prepare the pen correctly. This involves shaking it vigorously to mix the paint and then priming the tip by pressing it on a hard surface until you see a steady, consistent flow of paint.
The core challenge is not just applying paint, but doing so with precision and gentleness to create a visible, durable mark on a queen bee without causing her any harm. Your technique must prioritize the queen's safety above all else.
The Essential Steps for a Perfect Mark
Successfully marking a queen is a simple process that relies on preparation and a steady hand. Following these steps methodically will ensure a good outcome for both you and the queen.
Step 1: Prepare the Pen
Before you even handle the queen, your pen must be ready. Shake it thoroughly to ensure the pigment is evenly distributed within the solvent.
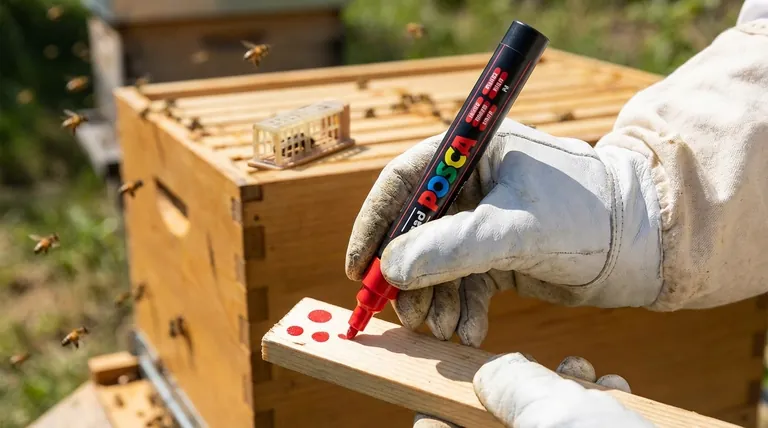
After shaking, press the nib of the pen firmly down on a hard, disposable surface like a piece of wood or your thumbnail. You may need to do this several times to break the initial seal and get the paint flowing smoothly to the tip. This is called priming the pen.
Step 2: Practice Your Touch
Once paint is flowing, practice making small dots on your test surface. The goal is to understand how little pressure is needed to create a small, opaque dot of paint.
This practice helps you gauge the paint flow and commit the required motion to muscle memory. You want to be able to apply a perfect dot with a single, quick, and confident touch.
Step 3: Apply a Single, Small Dot
With the queen held gently but securely, or contained within a marking cage, bring the primed pen to her back.
Your target is the thorax, the hard-shelled middle section of her body between the head and abdomen, where the wings are attached. Aim for the center of the thorax.
Apply one quick, deliberate dot of paint. The goal is to deposit the paint without applying significant pressure to the queen herself.
Common Pitfalls to Avoid
The difference between a successful mark and a failed one often comes down to the amount of paint used. This is a "Goldilocks" scenario—not too much, not too little.
Too Much Paint: The Primary Danger
Applying an excessive amount of paint is the most common and dangerous mistake. A large blob can run down the queen's sides, potentially blocking her spiracles (breathing holes) and suffocating her.
Excess paint can also glue her wings together or drip onto her legs, impeding her movement and ability to lay eggs.
Too Little Paint: A Wasted Effort
Using too little paint results in a mark that is transparent, incomplete, or easily worn away. A faint mark defeats the entire purpose of the exercise, as you will not be able to spot her easily within the hive.
This forces you to re-mark the queen later, causing unnecessary stress to her and the colony.
The "Just Right" Mark
The ideal mark is a single, small dot that is thick enough to be completely opaque but not so large that it risks running. It should be a distinct spot of color on the top of her thorax, clearly visible from above.
Making the Right Choice for Your Goal
Your marking technique directly impacts your beekeeping efficiency and the health of your colony's most vital member.
- If your primary focus is queen safety: Prioritize using the absolute minimum amount of paint required to create a visible dot and always target the center of the thorax.
- If your primary focus is mark durability: Ensure the pen is perfectly primed so the paint applied is opaque and well-mixed, not watery, for a mark that lasts the season.
Mastering this simple, gentle technique is a foundational skill for effective and responsible hive management.
Summary Table:
| Step | Key Action | Goal |
|---|---|---|
| 1. Prepare the Pen | Shake vigorously, then prime the nib on a hard surface. | Ensure a steady, consistent flow of paint. |
| 2. Practice Your Touch | Make test dots to gauge pressure and flow. | Commit the gentle, quick motion to muscle memory. |
| 3. Apply the Mark | Place a single, small dot on the center of the queen's thorax. | Create a visible, durable mark without harming the queen. |
Master the precise art of queen marking with the right tools from HONESTBEE. For commercial apiaries and equipment distributors, a perfectly marked queen is essential for efficient hive management and productivity. Our wholesale-focused operations supply durable, high-quality paint pens and marking cages designed for professional use, ensuring your marks are safe, visible, and long-lasting. Let us equip you for success—contact our team today to discuss your beekeeping supply needs.
Visual Guide
Related Products
- Queen Bee Marking Pen POSCA Queen Marking Pens for Beekeeping Bee Markers
- Queen Bee Marking Pen UNI Medium Point for Queen and Bee Marking
- One Hand Yellow Queen Marking Catcher Tube Cage Beekeeper Tool Accessory for Queen Bee
- Plastic Long Marker Device for Catching and Marking Bees Queen Bee Marking Tube and Cage
- Queen Bee Catcher Plastic Bee Marker Bottle with Piston Marking Tube
People Also Ask
- What role do specialized marking pens and color-coding systems play in honeybee tracking? Enhance Research Precision
- What specifications are required for a high-quality queen bee marking pen? Ensure Safety and Precision for Your Colony
- Why are specialized marking pens used for stingless bee queens? Essential Tools for Large-Scale Breeding Success
- How should a new paint pen be primed before marking a queen bee? Essential Tips for Safe & Clear Markings
- What is the purpose of a queen marking pen in beekeeping? Essential for Efficient Hive Management