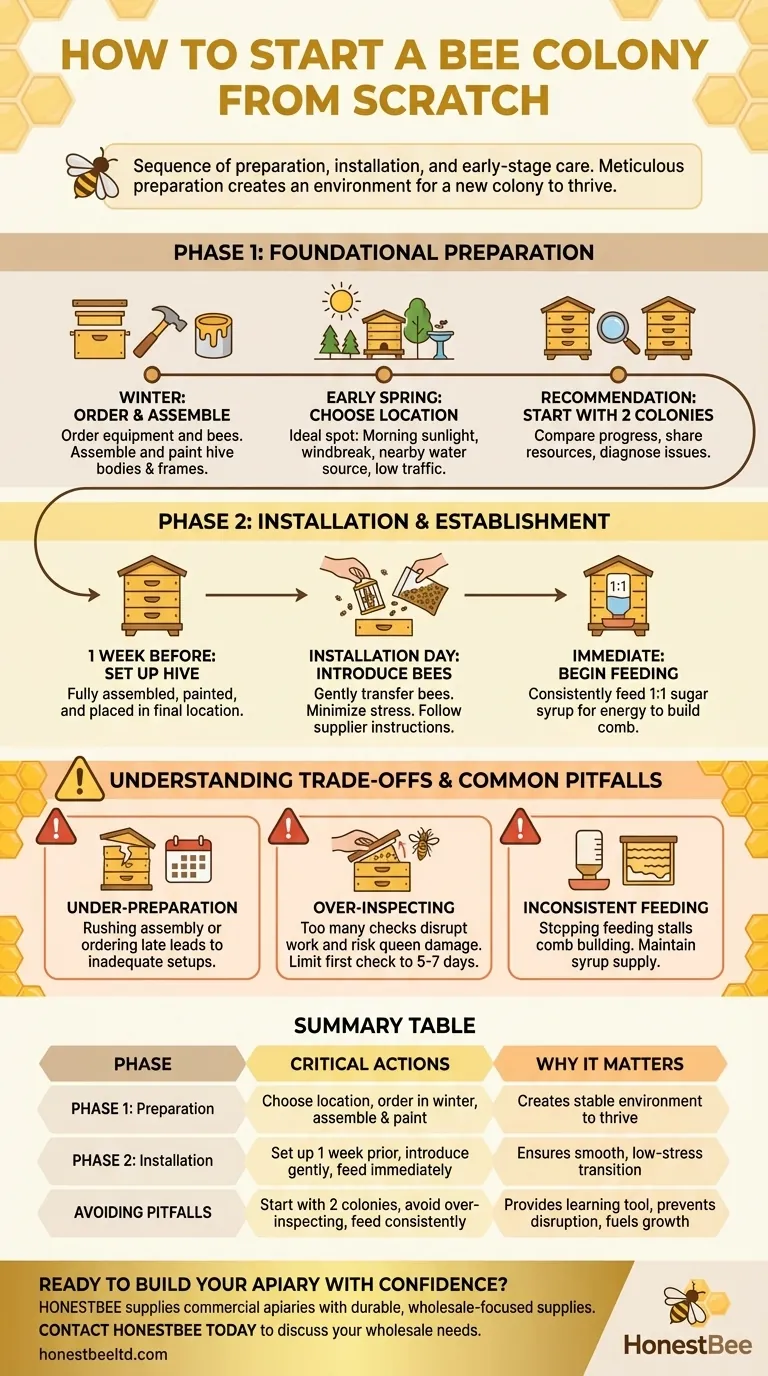
To start a bee colony from scratch, you must follow a clear sequence of preparation, installation, and early-stage care. The process involves selecting a proper site for your apiary, acquiring and setting up all necessary hive equipment well in advance, and then carefully introducing your new bees, providing them with immediate food to ensure they can establish themselves successfully.
The success of a new bee colony is determined long before the bees arrive. Meticulous preparation—from hive location to equipment assembly—creates an environment where a vulnerable new colony can thrive, rather than just survive.
Phase 1: Foundational Preparation
The work you do in the weeks and months before your bees are delivered is the most critical factor for their long-term health. Rushing this stage is a common and costly mistake.
Choosing the Right Location
Your apiary location directly impacts the colony's productivity and defensiveness. An ideal spot provides morning sunlight to encourage early foraging and helps dry out the hive to prevent mold.
It should also have a windbreak (like a hedge or fence) to protect it from harsh weather and a nearby water source (like a birdbath with stones) so bees don't have to travel far. Ensure the hive entrance doesn't face a high-traffic area.
Determining How Many Colonies to Start
While it seems counterintuitive, starting with two colonies is highly recommended for beginners. This is the single best tool for learning and problem-solving.
Having two hives allows you to compare their progress. If one hive is struggling, you can often diagnose the issue by observing the healthy one. It also enables you to share resources, such as frames of eggs or brood, to save a weak or queenless colony.
Ordering and Assembling Equipment
Beekeeping equipment, and the bees themselves, are often in high demand and can have long lead times. You should order your equipment and bees in the winter for a spring arrival.
This gives you ample time to assemble the wooden hive bodies, frames, and other components. Painting the exterior of the hive is also crucial for protecting the wood from the elements, and this requires time to cure properly.
Phase 2: Installation and Establishment
This is the active phase where you bring your planning to life. A calm, methodical approach is key to a smooth transition for the bees.
Setting Up the Hive Before Bees Arrive
Your hive should be fully assembled, painted, and placed in its final location at least a week before your bees are scheduled to arrive. This ensures any paint fumes have dissipated and that you aren't scrambling to assemble parts on installation day.
Introducing Bees to Their New Home
Whether you start with a "package" of bees or a "nuc" (a small nucleus colony), the goal is the same: to transfer them into their new hive gently. This typically involves placing the queen cage inside the hive and then shaking the rest of the bees in.
Follow the specific instructions provided by your bee supplier, but the universal principle is to move deliberately and calmly to minimize stress on the colony.
The Importance of Immediate Feeding
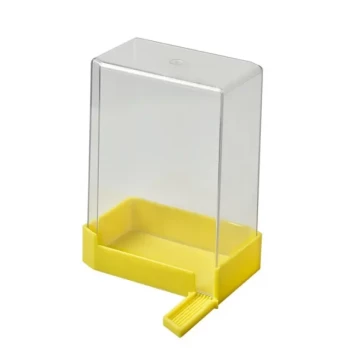
A new colony has no stored honey or pollen. They must build all their wax comb from scratch, an incredibly energy-intensive process. You must feed them consistently with a 1:1 sugar-water solution.
Think of this sugar syrup as the fuel for their initial construction project. A constant supply allows them to rapidly draw out comb, which the queen needs to begin laying eggs and establishing the next generation of bees.
Understanding the Trade-offs and Common Pitfalls
Success in beekeeping often comes from avoiding common mistakes. Understanding these risks ahead of time is your best defense.
The Risk of Under-Preparation
Waiting until the last minute to order or assemble equipment is the most common pitfall. This can lead to a stressful installation or force you to house your bees in a temporary, inadequate setup, which sets the colony back significantly.
The Danger of Over-Inspecting
New beekeepers are naturally curious, but opening the hive too frequently in the first few weeks can be disastrous. Each inspection disrupts the colony's work and risks damaging the fragile new wax or harming the queen. Limit your first inspection to a quick check after 5-7 days.
Inconsistent Feeding
Starting feeding and then stopping can stall the colony's momentum. The bees will interpret the lack of resources as a "dearth" and will slow or stop building comb. You must provide a continuous supply of syrup until they have drawn out comb on most of the frames in their first hive box.
Making the Right Choice for Your Goal
Your approach should align with your primary objective as a new beekeeper.
- If your primary focus is a successful first year: Start with two hives to provide insurance and a crucial learning tool for comparison.
- If your primary focus is minimizing stress on installation day: Have all equipment fully assembled, painted, and set up in its permanent location before you even pick up your bees.
- If your primary focus is rapid colony growth: Feed your new colony consistently until the first deep hive box is almost entirely filled with drawn-out comb.
Ultimately, successful beekeeping begins with respect for the colony's needs and a commitment to methodical, patient preparation.
Summary Table:
| Key Phase | Critical Actions | Why It Matters |
|---|---|---|
| Phase 1: Preparation | Choose location, order equipment/bees in winter, assemble & paint hive. | Creates a stable environment for the colony to thrive, not just survive. |
| Phase 2: Installation | Set up hive 1 week prior, gently introduce bees, begin immediate feeding. | Ensures a smooth, low-stress transition for the bees into their new home. |
| Avoiding Pitfalls | Start with 2 colonies, avoid over-inspecting, feed consistently with sugar syrup. | Provides a learning tool, prevents colony disruption, and fuels rapid growth. |
Ready to Build Your Apiary with Confidence?
Starting a new bee colony requires reliable, high-quality equipment. HONESTBEE supplies commercial apiaries and beekeeping equipment distributors with the durable, wholesale-focused supplies needed for a strong foundation. From hive bodies and frames to essential tools, we provide the equipment that supports beekeeping success from day one.
Contact HONESTBEE today to discuss your wholesale needs and ensure your new colonies get the best start possible.
Visual Guide
Related Products
- 5 Frame Wooden Nuc Box for Beekeeping
- Jenter Queen Rearing Kit Complete Set for Bee Breeding
- Modern Flat-Mount Hive Number Set for Beekeeping
- White Plastic 0.5L Beekeeping Entrance Feeder for Bees
- No Grafting Queen Rearing Kit: System for Royal Jelly Production and Queen Rearing
People Also Ask
- What is the procedure for moving bees from a 5-frame nuc to a 10-frame hive? 6 Steps for a Successful Colony Transfer
- What is the primary function of five-frame nuclei boxes? Master Early Colony Establishment for Stronger Hives
- What is the typical composition of frames in a nuc? A 5-Frame Blueprint for a Thriving Hive
- What frames should be moved into the queenless hive when requeening with a nuc? Ensure a Successful Queen Introduction
- What built-in detail do many 5-frame nuc boxes have on the lid? A Guide to Efficient Hive Top Feeding