The safest way to melt beeswax is to use a double boiler method. This involves placing the wax in a heat-proof container (like a pouring pot or glass bowl) set over a larger pot of gently simmering water, ensuring the wax melts slowly and evenly with indirect heat.
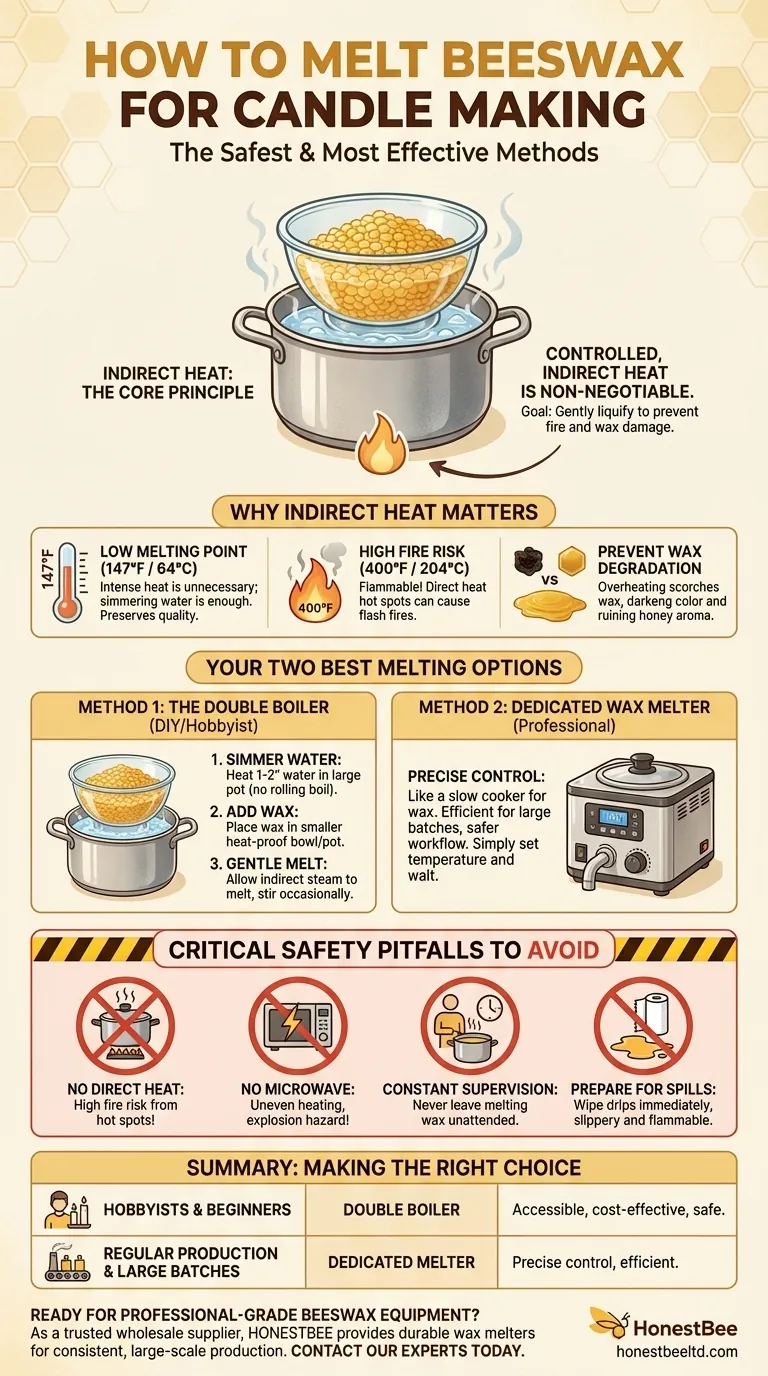
The core principle of melting beeswax is control. Because it has a low melting point but is also flammable at high temperatures, your goal is to apply gentle, indirect heat just until it liquifies, preventing both fire risk and damage to the wax itself.
Why Indirect Heat is Non-Negotiable
Directly heating beeswax on a stove is a common but critical mistake. Understanding the properties of beeswax reveals why indirect heat is the only safe and effective method.
The Low Melting Point
Beeswax does not require intense heat to melt. Its melting point is approximately 147°F (64°C), a temperature easily achieved with simmering water.
High heat is not only unnecessary but also detrimental to the quality of the wax.
The High Fire Risk
While beeswax melts at a low temperature, it is a flammable material. If its temperature reaches its flashpoint of around 400°F (204°C), the vapors can ignite.
Placing a pot directly on an electric coil or gas flame can create hot spots that far exceed this temperature, creating a significant fire hazard.
Preventing Wax Degradation
Overheating beeswax, even if it doesn't ignite, can scorch the wax. This can darken its color and damage its naturally sweet, honey-like aroma. Gentle melting preserves these desirable qualities.
Your Two Best Options for Melting Beeswax
Whether you are a hobbyist or a more serious maker, the choice of method comes down to using controlled, indirect heat.
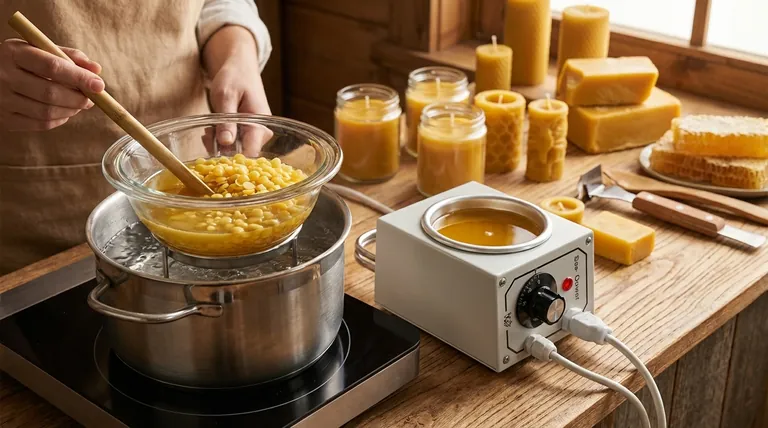
Method 1: The Double Boiler (DIY Approach)
This is the most accessible method for anyone starting out.
- Fill a large pot with 1-2 inches of water and bring it to a gentle simmer over medium-low heat. Do not use a rolling boil.
- Place your beeswax (in pellet, pastille, or chopped bar form) into a smaller, heat-proof pouring pot or a glass bowl that can rest on the rim of the larger pot without touching the water.
- Allow the simmering water to gently heat the container, melting the wax. Stir occasionally with a bamboo skewer or silicone spatula to ensure it melts evenly.
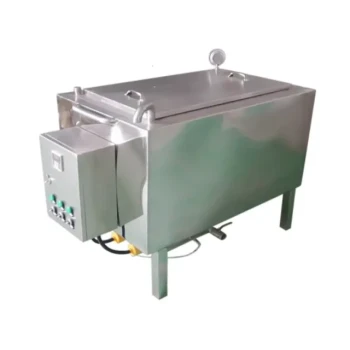
Method 2: The Dedicated Wax Melter (Professional Approach)
For those who plan to make candles regularly, a dedicated electric wax melter is a worthwhile investment.
These devices function like a slow cooker with a spout, built specifically for melting wax. They provide precise temperature control, eliminating the guesswork and allowing you to melt larger quantities safely and efficiently. Simply add your wax, set the temperature, and wait.
Critical Safety and Quality Pitfalls to Avoid
Mistakes during the melting process are the most common source of problems in candle making. Adhering to strict safety protocols is paramount.
Never Use Direct Heat
To be perfectly clear, do not ever place a pot containing beeswax directly onto a stovetop burner or open flame. The risk of a grease fire is far too high.
Do Not Use a Microwave
Microwaving wax is extremely dangerous. It heats unevenly, creating super-hot pockets that can flash ignite inside the microwave or when you move the container.
Constant Supervision is Required
Melting wax is not a "set it and forget it" task. Stay in the kitchen and monitor the process at all times until the heat is turned off and the wax has been poured.
Prepare for Spills
Have paper towels ready to wipe up any drips immediately. Spilled wax on a floor creates a slippery hazard, and spilled wax on a hot stove can be an ignition source.
Making the Right Choice for Your Project
Once the wax is fully melted, you can add other oils (like coconut oil, which helps prevent cracking in container candles) or fragrance and pour it into your prepared candle vessel.
- If your primary focus is making a few candles as a hobby: The double boiler method is your most accessible, cost-effective, and safest starting point.
- If your primary focus is consistent production or larger batches: Investing in a dedicated wax melter offers superior safety, control, and efficiency for your workflow.
- If your primary focus is processing raw wax from a beehive: A solar melter (for initial rendering) followed by the double boiler method (for refinement) is the standard beekeeper's process.
Mastering the melting process is the first step toward creating beautiful, safe, and high-quality beeswax candles.
Summary Table:
| Method | Best For | Key Benefit |
|---|---|---|
| Double Boiler | Hobbyists & Beginners | Accessible, cost-effective, and safe |
| Dedicated Wax Melter | Regular Production & Large Batches | Precise temperature control and efficiency |
Ready to produce high-quality beeswax candles safely and efficiently?
As a trusted wholesale supplier for commercial apiaries and beekeeping equipment distributors, HONESTBEE provides the durable, professional-grade equipment you need for consistent, large-scale production. Our wax melters and beekeeping supplies are designed to enhance your workflow's safety and output.
Contact our experts today to discuss your specific needs and discover how our products can support your business growth.
Visual Guide
Related Products
- Beeswax Melter for Candle Making Honey Bee Wax Melter
- Bee Floral Relief Silicone Mold for Artisan Soap Candle Making
- 3D Beehive Silicone Skep Wax Candle Molds for Candles
- 3D Square Honeycomb Pillar Silicone Candle Molds for Making Beeswax Candles
- Professional Stainless Steel Wax Melter for Beekeeping and Crafts
People Also Ask
- What types of beeswax melters are available for beekeepers? Choose the Right One for Your Operation
- What types of beeswax melters are available for different scales of beekeeping? Solar vs. Electric Melters Compared
- What is the best way to melt beeswax? Use a Solar Wax Melter for Simple, Pure Results
- What safety precautions should be taken when melting beeswax? A Guide to Flammable Wax Handling
- What are the three popular methods for melting beeswax? Safely Process Your Wax with Ease