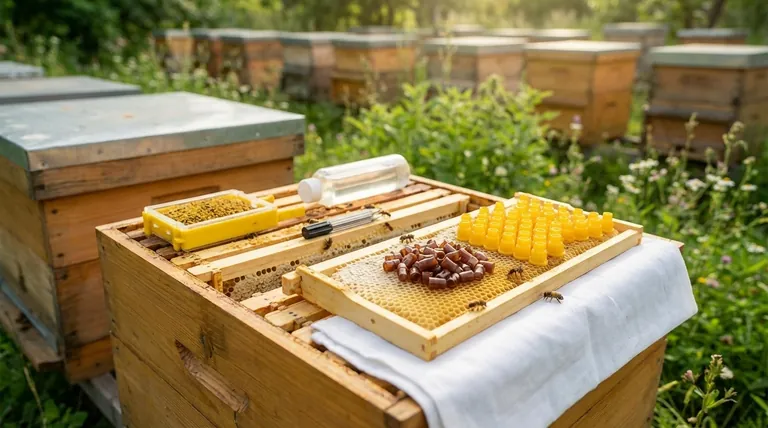
Preparing a starter colony for queen raising is a precise method of creating a temporary, intensely populated, and queenless environment. This setup leverages the bees' natural emergency response, compelling a high concentration of nurse bees to accept grafted larvae and feed them lavishly with royal jelly to create high-quality queen cells.
The core principle is to simulate a sudden, catastrophic loss of the queen within a hive overflowing with resources. This triggers a powerful, focused queen-rearing instinct, ensuring the maximum number of grafted cells are accepted and nourished.
The Goal: Creating a Queen-Rearing Emergency
To successfully raise queens, you must understand the biological triggers you are manipulating. The starter colony is not a normal hive; it is a carefully constructed incubator designed to maximize bee biology for a single purpose.
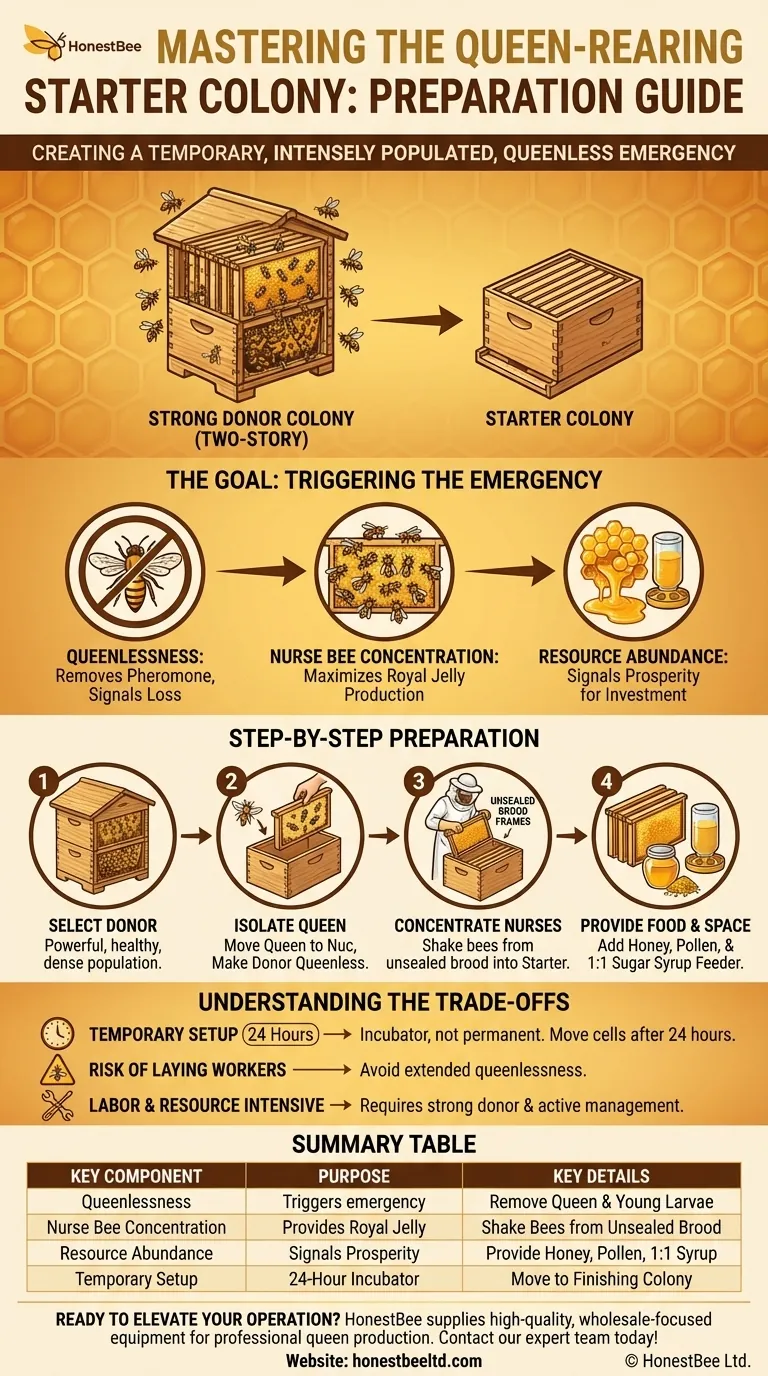
Why Queenlessness is the Primary Trigger
The entire colony is regulated by the queen's pheromones. Removing the queen and any eggs or young larvae she could have laid sends an immediate signal throughout the hive: the queen is gone. This lack of queen pheromone is the essential first step that initiates the emergency queen-rearing impulse.
The Critical Role of Nurse Bees
Young bees, typically those under two weeks old, are the "nurse bees" responsible for producing royal jelly. By shaking bees from frames of unsealed brood into the starter, you dramatically increase the ratio of nurse bees to other bees. This creates a surplus of royal jelly, ready to be fed to your grafted larvae.
Resource Abundance as a Key Signal
A strong queen-rearing response requires a signal of abundance. The colony needs to "feel" that it has more than enough resources to invest in the costly process of raising multiple new queens. Ample stores of pollen and honey, supplemented with fresh sugar syrup, provide this critical signal of prosperity.
Step-by-Step Starter Colony Preparation
Follow these steps to assemble a powerful starter colony. The process should be done efficiently to minimize stress on the bees.
1. Select a Strong Donor Colony
Your source for bees and resources must be a powerful, healthy hive. A strong, two-story colony is ideal because it has the population density and food stores necessary to create a successful starter without being significantly weakened.
2. Isolate the Existing Queen
Locate the queen in the donor colony. Carefully move the frame she is on, along with one or two other frames of brood, into a separate, temporary box (a nuc box is perfect for this). This action is what makes the remaining colony queenless.
3. Concentrate the Nurse Bees
In a new, empty hive box, place frames of unsealed honey and pollen on the outer walls. Then, take frames of unsealed brood from the donor colony, confirm the queen is not on them, and shake the adhering bees into your new starter box. Repeat this with several frames to create a dense, teeming population of young bees.
4. Provide Ample Food and Space
Ensure the starter box has frames of honey and pollen. Fill any remaining gaps with empty drawn comb. Most importantly, add a feeder of 1:1 sugar syrup. This stimulative feeding encourages nurse bees to engorge themselves and activates their glands for royal jelly production.
Understanding the Trade-offs
A starter colony is a specialized tool, not a standard beekeeping configuration. Understanding its limitations is key to using it effectively.
This is a Temporary Setup
A starter colony is an incubator, not a permanent hive. It is only used to initiate the queen cells, typically for about 24 hours. After this period, the started cells must be moved to a "finishing" colony to be completed.
Risk of Laying Workers
Keeping a colony queenless for an extended period can trigger the development of laying workers, which is detrimental to the hive. The short, 24-hour duration of the starter phase prevents this problem from arising.
It is Labor and Resource Intensive
This method requires strong donor hives, spare equipment, and a good understanding of bee biology. It is a highly effective but deliberate process that demands more active management than simply letting a hive requeen itself.
Making the Right Choice for Your Goal
The method you choose should align with your specific queen-rearing objectives.
- If your primary focus is maximum acceptance and high-quality cells: The dedicated, queenless starter colony described here is the professional standard for achieving the best results.
- If you are a hobbyist raising only a few queens: Simpler methods, such as placing a graft frame in the top box of a strong queenright colony (separated by an excluder), can work, though acceptance rates may be lower.
- If your goal is simply to requeen a single hive: Allowing the colony to raise its own emergency cells after you remove the old queen is the most natural, though least controlled, method.
By meticulously creating this controlled state of emergency, you direct the colony's powerful biological instincts to produce the highest quality queens possible.
Summary Table:
| Key Component | Purpose | Key Details |
|---|---|---|
| Queenlessness | Triggers emergency queen-rearing instinct | Remove queen and young larvae from the donor colony. |
| Nurse Bee Concentration | Provides royal jelly for grafted larvae | Shake bees from frames of unsealed brood into the starter box. |
| Resource Abundance | Signals prosperity for queen investment | Provide ample honey, pollen, and 1:1 sugar syrup feeder. |
| Temporary Setup | Acts as a 24-hour incubator | Move started cells to a finishing colony after one day. |
Ready to Elevate Your Queen Rearing Operation?
At HONESTBEE, we supply commercial apiaries and beekeeping equipment distributors with the high-quality, wholesale-focused supplies needed for professional queen production. From durable hive boxes and feeders to precise grafting tools, our equipment is designed to support the meticulous processes described in this guide.
Let us help you build a more productive and profitable operation. Contact our expert team today to discuss your specific needs and explore our wholesale catalog.
Visual Guide
Related Products
People Also Ask
- What is the procedure for moving bees from a 5-frame nuc to a 10-frame hive? 6 Steps for a Successful Colony Transfer
- What is the primary function of five-frame nuclei boxes? Master Early Colony Establishment for Stronger Hives
- What roles do five-frame nucleus boxes and ten-frame Langstroth hive boxes play in colony standardization?
- What is the most common type of standard nuc? The 5-Frame Nuc Explained
- What is the typical composition of frames in a nuc? A 5-Frame Blueprint for a Thriving Hive
