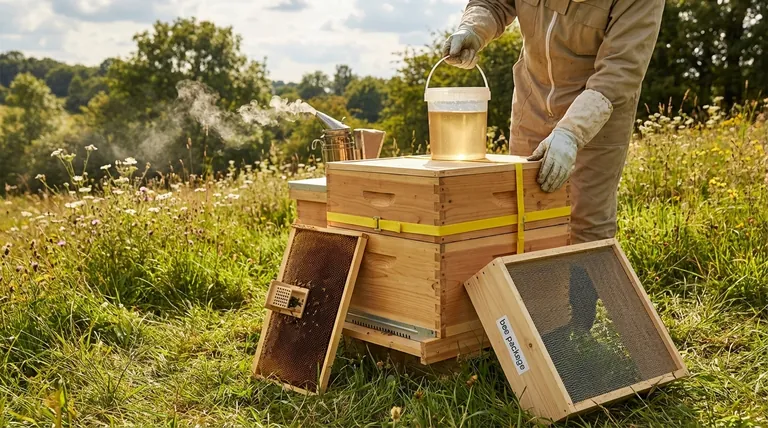
To start your first beehive, you will need to choose your hive equipment, acquire a colony of bees, and install them. The basic installation involves placing the bees and their caged queen inside a prepared hive box equipped with frames, providing a food source, and allowing them several days to acclimate before verifying the queen has been accepted.
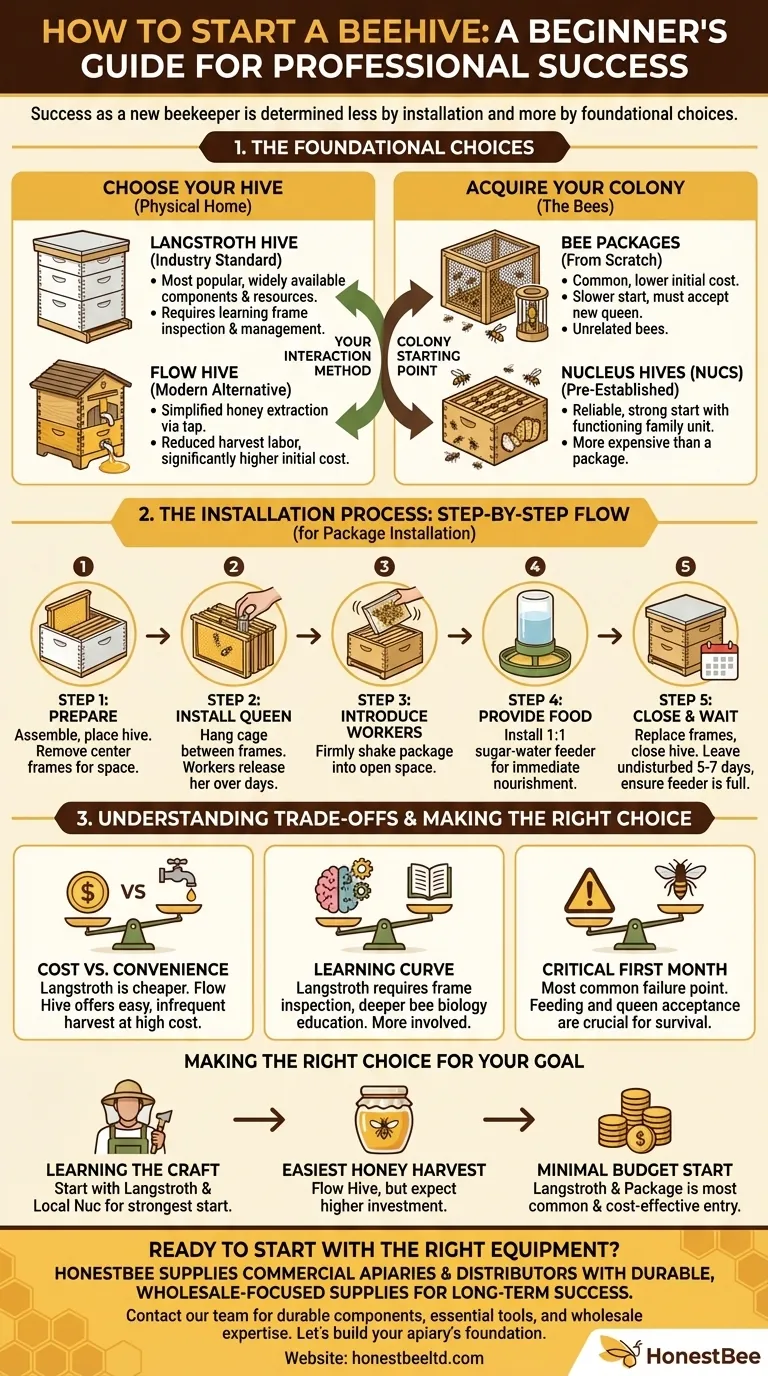
Your success as a new beekeeper is determined less by the simple act of installing bees and more by the foundational choices you make beforehand—specifically, the type of hive you choose and the way you source your first colony.
Choosing Your First Hive: The Foundational Decision
The physical home for your bees is the most significant initial investment you will make. The type of hive dictates how you will interact with the colony for years to come.
The Langstroth Hive: The Industry Standard
Most experts recommend a 10-frame Langstroth hive for beginners. This is the classic stackable white box that most people picture when they think of a beehive.
Its primary advantage is its ubiquity. Because it is the most popular design, components, replacement parts, and educational resources are widely and affordably available.
The Flow Hive: A Modern Alternative
The Flow Hive is a newer invention designed specifically to simplify honey extraction. It uses specialized frames that allow honey to be drained directly from a tap without opening the hive.
This design significantly reduces the labor and equipment needed for harvesting. However, this convenience comes at a much higher initial cost.
Acquiring Your First Colony
Once you have a hive, you need bees. You generally have two options for starting your colony.
Bee Packages
A package of bees is essentially a box of several thousand worker bees with a separate, caged queen. This is a common way to start a hive from scratch.
When you install a package, you are introducing a group of unrelated bees to a new queen. Their first task is to accept her, build comb, and begin raising brood.
Nucleus Hives (Nucs)
A nucleus hive, or "nuc," is a small, pre-established colony. It typically includes a laying queen, 3-5 frames of honeycomb, brood (baby bees), pollen, and honey.
Starting with a nuc gives your hive a significant head start, as the colony is already a functioning family unit. This is often the most reliable, though more expensive, option for a beginner.
The Installation Process: A Step-by-Step Guide
Installing a package of bees is a straightforward but delicate process. Your goal is to transfer the bees into their new home with minimal stress.
Step 1: Prepare the Hive
Ensure your hive box is assembled and placed in its final location. Remove about half of the frames from the center of the box to create an open space.
Step 2: Install the Queen
Your queen will be in a small cage, typically plugged with a piece of sugar candy. Gently hang this cage between two of the center frames in your hive. The workers will eat through the candy to release her over a few days, which helps ensure they accept her.
Step 3: Introduce the Worker Bees
Firmly shake the package of bees into the open space inside the hive. They will cascade down around the frames and the queen cage. Don't worry about being gentle here; a firm shake is most effective.
Step 4: Provide a Food Source
A new package has no food reserves and needs immediate nourishment to begin drawing out comb. Install a feeder filled with a 1:1 sugar-water solution. This is a non-negotiable step for a new colony.
Step 5: Close Up and Wait
Gently replace the frames you removed, close the hive, and leave the bees undisturbed for about five to seven days. Your only job during this time is to ensure their feeder remains full. After a week, you can perform a quick inspection to confirm the queen has been released and is laying eggs.
Understanding the Trade-offs
Every choice in beekeeping involves balancing benefits and drawbacks. Understanding these is key to avoiding common beginner frustration.
The Cost vs. Convenience Factor
A standard Langstroth hive kit is significantly less expensive than a Flow Hive. The Flow Hive's primary value is in its simplified harvest, which only happens once or twice a year.
The Learning Curve
Managing a Langstroth hive requires you to learn how to inspect frames, identify brood patterns, and recognize signs of hive health. While more involved, this process provides a much deeper education in bee biology.
The Critical First Month
The most common failure point for a new hive is in the first few weeks. Forgetting to feed a new package, or a colony failing to accept its new queen, can cause a complete collapse before it ever gets started.
Making the Right Choice for Your Goal
Your approach should be dictated by your primary motivation for keeping bees.
- If your primary focus is learning the craft of beekeeping: Start with a 10-frame Langstroth hive and source a local nucleus (nuc) colony for the strongest possible beginning.
- If your primary focus is the easiest possible honey harvest: The Flow Hive is designed for this purpose, but be prepared for a significantly higher initial investment.
- If your primary focus is starting on a minimal budget: A Langstroth hive started with a package of bees is the most common and cost-effective entry point.
Ultimately, providing your bees with the right home and a strong start sets the foundation for a rewarding journey into the world of beekeeping.
Summary Table:
| Hive Type | Best For | Key Advantage | Key Consideration |
|---|---|---|---|
| Langstroth Hive | Beginners, Budget-Conscious | Industry standard, widely available parts & resources | Requires learning frame inspection and management |
| Flow Hive | Easy Honey Harvest | Honey extraction via tap, minimal harvest equipment | Significantly higher initial cost |
| Colony Type | Best For | Key Advantage | Key Consideration |
| Package of Bees | Cost-Effective Start | Common, lower initial cost | Slower start, colony must accept the new queen |
| Nucleus Hive (Nuc) | Reliable, Strong Start | Pre-established colony with laying queen | More expensive than a package |
Ready to Start Your Beekeeping Journey with the Right Equipment?
As a new beekeeper, your success begins with high-quality, reliable equipment. HONESTBEE supplies commercial apiaries and beekeeping equipment distributors with the durable, wholesale-focused supplies you need for a strong start and long-term hive health.
We understand the critical choices you face—from selecting the right hive type to ensuring your new colony thrives. Partner with us to access:
- Durable Hive Components: Built to withstand the elements and protect your investment.
- Essential Beekeeping Tools: Everything from smokers to protective gear, designed for safety and efficiency.
- Wholesale Expertise: Guidance and products tailored for those serious about beekeeping.
Let's build the foundation for your apiary's success. Contact our team today to discuss your equipment needs and wholesale pricing.
Visual Guide
Related Products
- Wholesales Dadant Size Wooden Bee Hives for Beekeeping
- Stainless Steel Round Beehive Air Vents for Ventilation
- Metal Bee Hive Stand Bee Box Stand for Beekeeping
- Durable Plastic Hive Number Set for Beekeeping
- Wooden Bee Hive Frames for Beekeeping and Wholesale
People Also Ask
- What factors determine the necessary hive configuration for an apiary? Optimize Hive Setup for Better Colony Survival
- What is the proper way to store unused bee hives? Expert Stacking Tips for Equipment Longevity
- What are the strategic benefits of installing beekeeping hives at an elevation of 1 to 6 meters? Protect Your Assets
- What are the key advantages of modern improved beekeeping hives? Scale Your Honey Yield and Production Efficiency
- Why Increase Hive Installation Quantity in Commercial Apiaries? Offset Climate Risks with Scalable Infrastructure


