In short, wiring a bee frame is the process of threading a fine wire through the side bars of the frame, pulling it taut, and securing it to create a support structure. This wire acts as a skeleton, providing a rigid base for embedding a sheet of wax foundation, which guides the bees in building straight, strong honeycomb.
The core purpose of wiring a frame is to add structural integrity to the comb. This prevents the delicate wax from sagging in the heat or breaking apart under the immense force of a honey extractor, ensuring both the health of the hive and a successful harvest.

Why Wiring a Frame is a Critical Step
Properly wiring a frame is a foundational task in beekeeping that pays dividends throughout the season. It directly impacts the hive's structure and your ability to manage it effectively.
Supporting the Wax Foundation
The primary role of the wire is to hold the sheet of wax foundation perfectly in place. Without this support, the foundation can warp or sag, leading to irregularly built comb that is difficult to inspect and manage.
Reinforcing the Comb for Extraction
A full frame of honey is heavy, and the honeycomb itself is fragile. The wires act as rebar within the comb, providing the necessary strength to withstand the powerful centrifugal forces of a honey extractor without disintegrating.
Assembling Your Toolkit
Having the right tools on hand makes the process efficient and effective. You will need a few specific items to do the job correctly.
The Essential Tools
- Hammer: For driving in the small nails and setting the eyelets.
- Eyelet Punch: A specialized tool for creating a clean pilot hole for the eyelets.
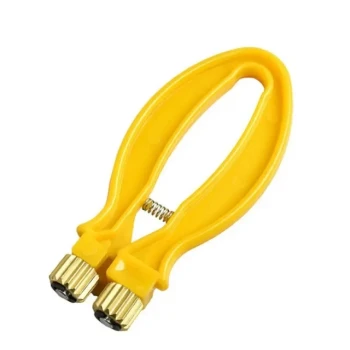
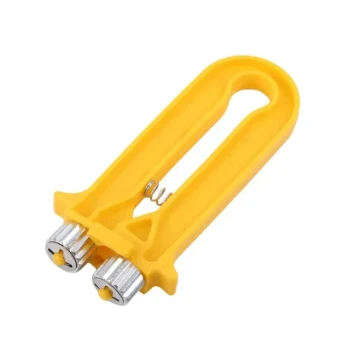
- Pliers (Needle-nose or Lineman's): Used for gripping and tightly wrapping the wire around the nails.
The Frame Components
- Assembled Wooden Frame: The structure you will be wiring.
- Frame Wire: A thin, tinned steel wire, typically sold on a spool.
- Eyelets: Small metal rings that are inserted into the holes in the frame's side bars. They prevent the tensioned wire from cutting into the wood over time.
- Small Nails (5/8 inch): Two nails are used per frame as anchor points for starting and finishing the wire.
The Wiring Process: A Step-by-Step Guide
Follow these steps to create a tight, durable, and long-lasting wired frame.
Step 1: Prepare the Frame with Eyelets
First, use your hammer and eyelet punch to set an eyelet into each pre-drilled hole on the frame's side bars. The flared side of the eyelet should be on the outside of the frame. This simple step is crucial for protecting the wood and maintaining wire tension for years.
Step 2: Anchor the Wire
Hammer two small nails part-way into the side of the frame, one near the top hole and one near the bottom hole. Do not drive them all the way in; leave enough space to wrap the wire around them securely.
Step 3: Thread the Wire
Anchor the end of your wire by wrapping it around the top nail a few times. Then, thread the wire through the top eyelet, across to the opposite side, and through its corresponding eyelet. Continue this horizontal pattern, working your way down the frame.
Step 4: Tension and Secure the Wire
Once the wire is threaded through all the eyelets, pull the loose end firmly to remove any slack. Using your pliers, grip the wire and pull it as tight as you can before wrapping it multiple times around the bottom nail. The goal is for the wire to be taut enough to make a high-pitched "ping" when plucked, like a guitar string. Once secured, hammer both nails in the rest of the way.
Common Pitfalls to Avoid
Attention to detail is key. Avoiding these common mistakes will ensure your frames are built to last.
The Risk of Loose Wires
Wires that are not pulled taut will fail at their primary job. A loose wire allows the foundation to sag, resulting in poorly drawn, wavy comb that can connect to adjacent frames, making hive inspections a disruptive mess.
The Danger of Over-Tensioning
While tightness is good, excessive force can damage the equipment. Pulling the wire too aggressively can cause the frame's side bars to bow inward, distorting the frame and disrupting the critical bee space within the hive.
Skipping the Eyelets
Failing to use eyelets is a common shortcut that creates long-term problems. Over time, the tensioned wire will slowly slice into the soft wood of the frame, causing the wire to loosen and eventually requiring a complete re-wiring.
Making the Right Choice for Your Goal
Your final check should ensure the frame is ready for the hive. Use these guidelines to confirm your work aligns with your beekeeping goals.
- If your primary focus is longevity: Always use eyelets, as they are the single best way to protect the frame and maintain wire tension over many seasons.
- If your primary focus is comb stability: Tension the wire until it produces a clear, high-pitched note when plucked, which is the best indicator of sufficient support for heavy honey loads.
- If your primary focus is efficiency: Set up an assembly line to prepare all your frames at once—punch all eyelets first, then thread all frames, and finally tension them in a batch.
A properly wired frame is the foundational investment in a healthy, productive, and easy-to-manage hive.
Summary Table:
| Step | Key Action | Purpose |
|---|---|---|
| 1. Prepare | Install metal eyelets in frame holes. | Protects wood from wire cutting in. |
| 2. Anchor | Partially hammer in two small nails. | Creates secure anchor points for the wire. |
| 3. Thread | Weave wire through eyelets in a zigzag pattern. | Creates a supportive grid for the foundation. |
| 4. Tension | Pull wire taut and secure it; it should 'ping' when plucked. | Provides structural strength to prevent comb collapse. |
Equip your apiary for success with professional-grade supplies from HONESTBEE.
A properly wired frame is the backbone of a productive hive, ensuring your honeycomb remains intact during extraction. For commercial apiaries and distributors, using durable, reliable equipment is non-negotiable for protecting your investment and maximizing yield.
HONESTBEE supplies the high-quality frame wire, eyelets, and tools you need to build frames that last season after season. Our wholesale-focused operations are designed to meet the demands of large-scale beekeeping.
Contact HONESTBEE today to discuss your wholesale supply needs and ensure your frames are built to the highest standard.
Visual Guide

Related Products
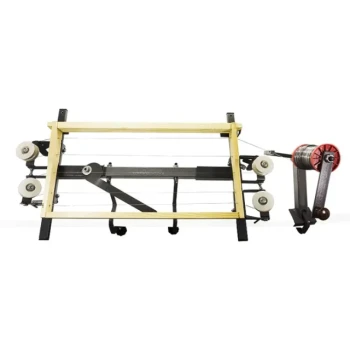
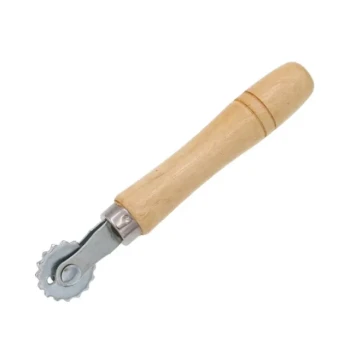
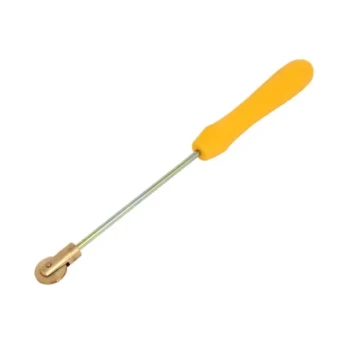
- Professional Bee Frame Wiring Tool with Integrated Tensioning System by HONESTBEE
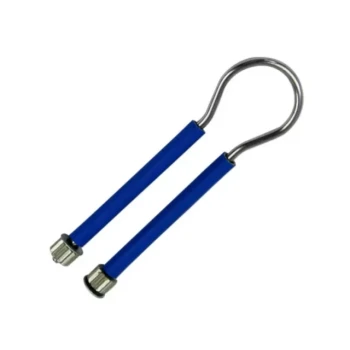
- Stainless Steel Bee Hive Frame Wire for Beekeeping
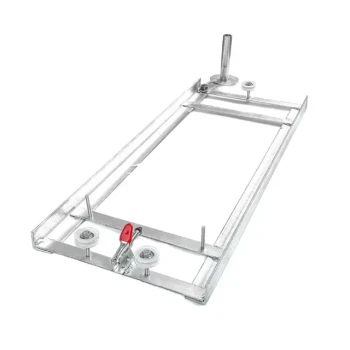
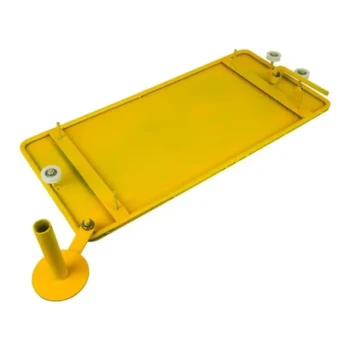
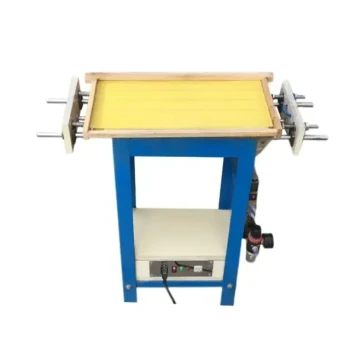
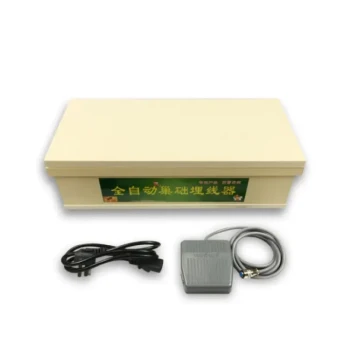
- HONESTBEE Professional Frame Wiring Board and Jig
- HONESTBEE Durable Frame Wiring Board with Integrated Tensioner
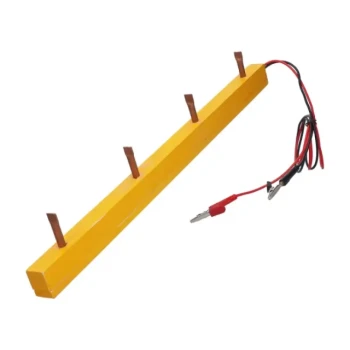
- HONESTBEE Wired and Assembled Wooden Bee Frames Foundation for a Thriving Hive
People Also Ask
- What are the differences between wedged-top and grooved-top frames? Choose the Right Foundation System
- What tools are recommended for assembling bee frames? Essential Gear for Durable and Efficient Hive Construction
- What material is bee frame wire typically made from? The Critical Choice for Hive Health
- What tools and materials are required for wiring a beehive frame? Essential Equipment for Stronger Honeycomb
- What is the specified wire gauge for the bee frame wire? Mastering 26-Gauge Wire for Durable Honeycomb Support