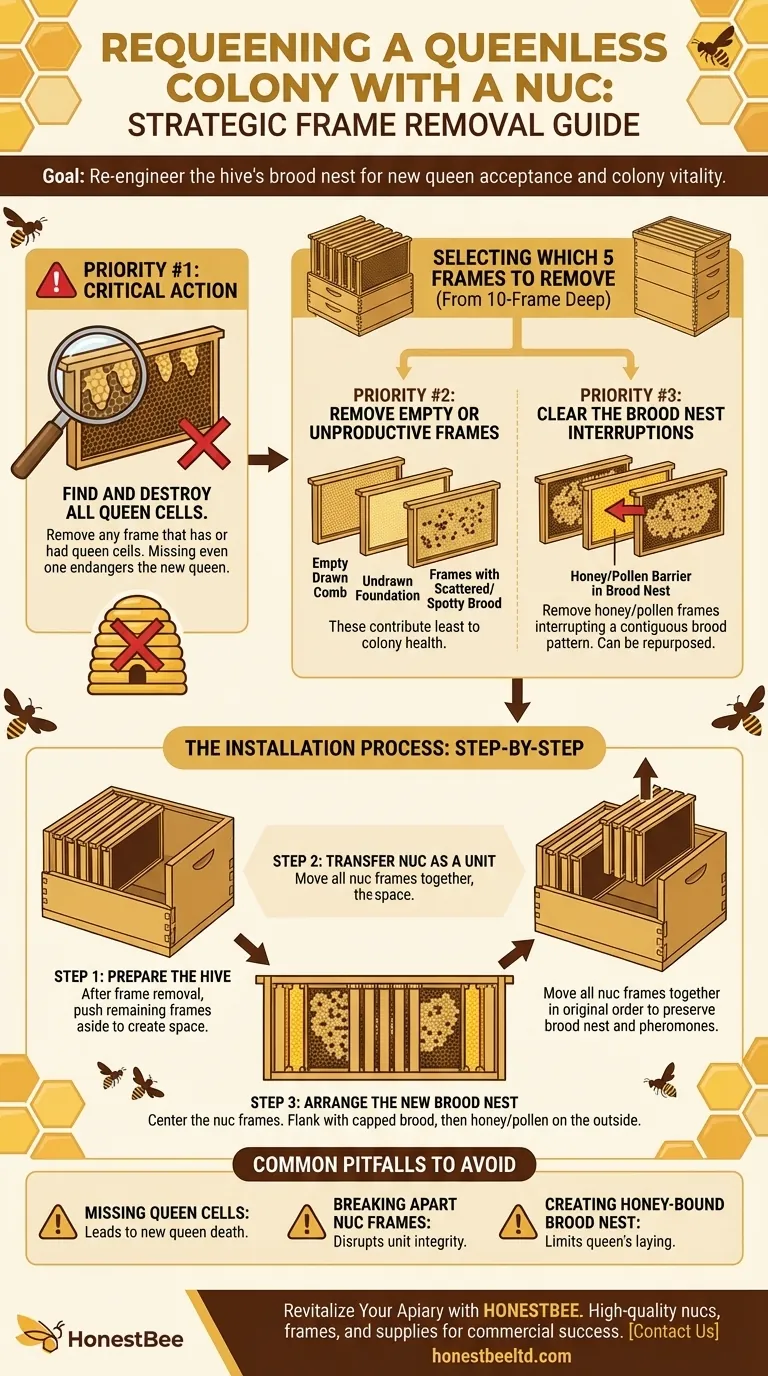
To requeen a full-size colony with a nuc, you must remove a number of frames from the main hive equal to the number of frames in your nucleus colony, which is typically five. The highest priority is to remove any and all frames containing queen cells. After that, remove empty frames, frames with scattered or unviable brood, or excess honey frames that are interrupting the brood nest's continuity.
The objective is not simply to make space, but to strategically re-engineer the hive's brood nest. You are removing obstacles to the new queen's acceptance while creating a consolidated, powerful core for the new, combined colony to thrive.
The Goal: Preparing the Hive for a New Queen
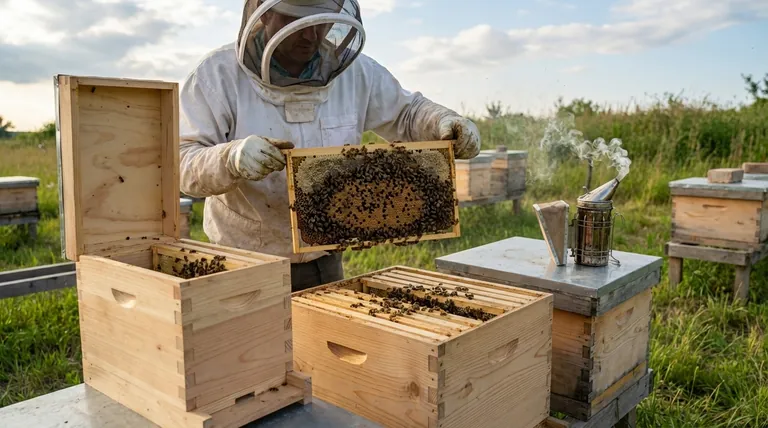
Introducing a nuc is a powerful way to requeen a hive. It provides not just a queen, but an entire functioning colony in miniature, complete with loyal worker bees and brood in all stages. This method significantly increases the odds of acceptance compared to introducing a lone queen in a cage.
The Critical First Step: Find and Destroy All Queen Cells
Before you even consider which frames to remove, you must perform a thorough inspection of the queenless colony.
You must find and destroy every single queen cell. If you miss even one, a virgin queen may emerge and kill your newly introduced laying queen, wasting the entire effort. This step is non-negotiable.
Why Remove Specific Frames?
Your choice of which frames to remove directly impacts the success of the merger. The goal is to eliminate threats to the new queen and create a clean, contiguous space for her established brood nest to be integrated.
Selecting Which 5 Frames to Remove
Assuming you are introducing a standard five-frame nuc, you will remove five frames from the ten-frame deep hive body. Select them in the following order of priority.
Priority #1: Frames with Queen Cells
Any frame that has or had queen cells on it is a prime candidate for removal. Even after destroying the cells, removing the frame entirely is the safest way to ensure no hidden cells were missed.
Priority #2: Empty or Unproductive Frames
The next best frames to remove are those contributing the least to the colony's health. This includes:
- Empty drawn comb
- Frames of undrawn foundation
- Frames with scattered, spotty brood (often a sign of a failing queen or laying workers)
These frames provide little value and their removal makes way for the productive frames from the nuc.
Priority #3: Frames of Honey or Pollen in the Brood Nest
A healthy brood nest is laid out in a contiguous pattern. Sometimes, a colony will "backfill" the brood area with nectar or pollen, creating barriers.
Removing a frame of honey from the middle of the brood area allows you to insert the nuc's brood frames as a single, unbroken unit. The removed honey frame isn't wasted; it can be placed on the outer edge of the hive body or moved up into a honey super.
The Installation Process: A Step-by-Step Guide
Proper installation is as critical as frame selection.
Step 1: Prepare the Queenless Colony
After destroying all queen cells and selecting the five frames for removal, push the remaining five frames to one side of the hive body. This creates a large, open space.
Step 2: Transfer the Nuc Frames as a Unit
Move all five frames from your nuc into the space you just created in the main hive.
It is critical to keep the nuc frames together and in their original order. This preserves the integrity of the nuc's brood nest and the pheromone scent of the queen, which is key to her acceptance.
Step 3: Arrange the New Brood Nest
Your goal is a consolidated brood nest. The ideal arrangement places the nuc's five frames in the center.
On either side of the nuc frames, place the best remaining frames from the original colony—primarily those with capped brood. Frames containing pollen and honey should be on the outermost edges of the brood box, serving as a pantry.
Common Pitfalls to Avoid
Success depends on avoiding a few common but critical mistakes.
Failing to Remove All Queen Cells
This is the most common reason for failure. A single missed queen cell can lead to the death of your new queen. Be meticulous and check every inch of every frame that remains in the hive.
Breaking Apart the Nuc's Brood Frames
Do not shuffle the nuc frames or intersperse them with frames from the old colony. The nuc is an established unit. Placing it into the hive as a cohesive block greatly improves the queen's safety and acceptance.
Creating a "Honey-Bound" Brood Nest
When arranging the final hive, ensure honey frames are on the outside, not in the middle. Placing honey frames between brood frames creates a barrier that can limit the queen's ability to lay, defeating the purpose of the requeening.
Making the Right Choice for Your Goal
Your frame selection can be tailored to solve specific colony issues.
- If your primary focus is rapid colony buildup: Prioritize keeping frames of capped brood from the original colony. This combines emerging bees from two sources for a dramatic population explosion.
- If your colony has laying workers: When you remove the five frames, shake all the bees from the remaining frames onto the ground in front of the hive. The laying workers are poor fliers and are less likely to make it back inside, cleaning up the workforce before the new queen arrives.
- If your primary focus is disease management: Use this opportunity to cull old, dark comb or frames showing signs of minor issues like chalkbrood. Replace them with the fresh, healthy frames from your nuc.
By strategically removing the correct frames, you are not just making room; you are actively setting the stage for a successful merger and a revitalized, productive colony.
Summary Table:
| Frame Removal Priority | Description | Key Action |
|---|---|---|
| Priority #1 | Frames with queen cells | Find and destroy all queen cells; remove the entire frame. |
| Priority #2 | Empty or unproductive frames (drawn comb, foundation, spotty brood) | Remove to make space for productive nuc frames. |
| Priority #3 | Honey/pollen frames interrupting the brood nest | Remove to create a contiguous brood area for the new queen. |
Ready to revitalize your apiary with a proven requeening strategy? HONESTBEE supplies commercial apiaries and beekeeping equipment distributors with the high-quality nucs, frames, and supplies you need for successful colony management. Let our wholesale-focused expertise support your operation's growth and health. Contact HONESTBEE today to discuss your needs!
Visual Guide
Related Products
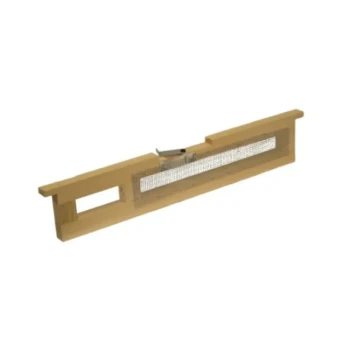
- Wooden Bee Hive Frames for Beekeeping and Wholesale
- Professional Wooden Requeening Frame for Beekeeping
- JZBZ Langstroth Queen Rearing Frame for Beekeeping
- Plastic Bee Frame Beekeeping Hive Frames for Wholesale
- Ergonomic Plastic Frame Spacer Tool for Rapid Hive Management Beekeeping
People Also Ask
- What is the primary function of frames within a beehive system? Structural Foundation and Hive Management
- What are the main considerations when choosing between wooden and plastic bee hive frames? Optimize Your Apiary's Efficiency
- How should beehive frames be maintained to prolong their lifespan? 5 Pro Tips for Durable Beekeeping Equipment
- Can I reuse old beehive frames? Save Money and Boost Hive Productivity
- Why are standardized beehives and hive frames essential for comb honey? Ensure Uniformity and Premium Quality