In short, nothing is wasted. When you pour too much beeswax into a mold, the excess is simply pushed out the sides or ends as the wax cools and solidifies. This overflow can be easily collected and remelted for your next project.
Overfilling a beeswax mold is not a critical error but a common part of the crafting process. The key is understanding that the excess wax is completely recoverable, ensuring no material goes to waste.
The Mechanics of Beeswax Overflow
When working with beeswax, seeing some excess seep from your mold can be alarming, but it's a predictable physical process. Understanding why it happens is the first step to managing it effectively.
Why Overflow Occurs
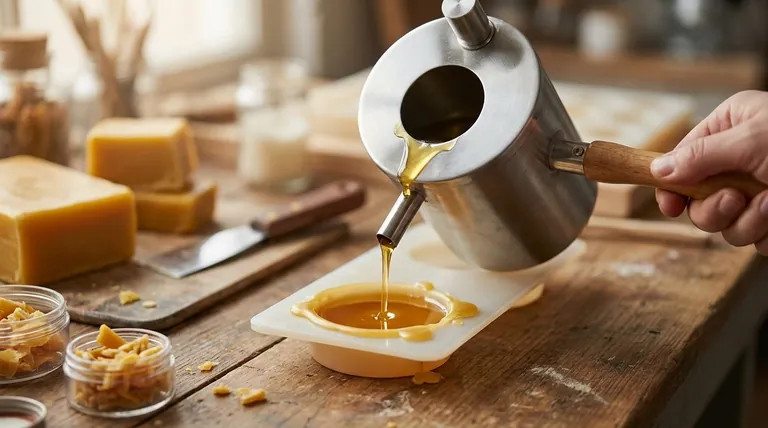
Beeswax shrinks slightly as it cools. To ensure a complete, solid final product without voids, crafters often intentionally pour a small amount of extra wax. As the wax solidifies from the outside in, this liquid excess is displaced and forced out of any available opening, like seams or vent holes.
What to Do When It Happens
The most important step is to do nothing immediately. Let the mold and the overflow wax cool completely. Trying to wipe away hot liquid wax will only create a larger mess and can potentially damage the surface of your final product.
The Appearance of Overflow
The excess will look like small beads, thin sheets, or ridges of hardened wax along the mold's seams or openings. Once fully hardened, it is typically brittle and easy to remove.
Managing and Reclaiming Excess Beeswax
Treating overflow as a resource rather than a mistake is fundamental to an efficient crafting workflow. The reclamation process is simple and straightforward.
Step 1: Scrape and Collect
Once the beeswax is fully hardened, use a craft knife or a scraping tool to carefully remove the excess from the exterior of the mold. The pieces should pop off cleanly. Collect all of these scraps.
Step 2: Store for Future Use
Keep a dedicated container for all your beeswax scraps, including overflow, trimmings, and unsuccessful projects. These pieces are just as valuable as your primary wax supply.
Step 3: Remelt and Render
When you have collected enough scraps, you can remelt them for a new project. For the best results, you may want to periodically render your scraps by melting them down and filtering them through a cheesecloth to remove any dust, debris, or old wick fragments. This produces a clean, pure block of reusable beeswax.
Understanding the Trade-offs
While overflow is manageable, it's helpful to understand it in the context of your goals. Your approach might change depending on whether your priority is tidiness or a perfect final form.
The Risk of Underfilling
The primary reason to pour a slight excess is to avoid underfilling. An underfilled mold will result in an incomplete shape, dips, or voids in the final product, which is often a more significant issue than having to clean up a bit of overflow.
The Downside of Chronic Overfilling
Consistently producing a large amount of overflow is inefficient. It creates more cleanup work and can be a sign that you are using significantly more wax than needed. Aiming for a small, manageable amount of overflow is the ideal balance.
How to Apply This to Your Project
Your strategy for dealing with excess wax should align with your primary goal as a crafter.
- If your primary focus is a perfect, dense final product: Intentionally overfill your molds slightly to prevent any risk of voids and accept the cleanup as a necessary part of the process.
- If your primary focus is minimizing waste and cleanup: Practice measuring your wax more precisely, but know that any excess is fully recoverable and can be remelted.
- If your primary focus is process efficiency: Establish a system where you collect all scraps in a dedicated bin and periodically render them down to create clean wax blocks for future use.
Embracing the properties of beeswax, including its tendency to overflow, transforms a potential frustration into a routine part of your craft.
Summary Table:
| Aspect | Key Insight |
|---|---|
| Overflow Cause | Intentional overfilling prevents voids as wax shrinks while cooling. |
| Appearance | Brittle beads or sheets of wax along mold seams. |
| Primary Action | Let wax cool completely before scraping off excess. |
| Reclamation | Collect scraps, store them, and remelt/render for future use. |
| Main Goal | No beeswax is wasted; overflow is a manageable, recoverable part of the process. |
Perfect Your Beekeeping and Crafting Workflow with HONESTBEE
Mastering your beeswax molding process is just the beginning. For commercial apiaries and beekeeping equipment distributors, efficiency and quality are paramount. HONESTBEE supplies the durable, reliable beekeeping supplies and equipment you need to maximize productivity and minimize waste.
Let us help you streamline your operations with our wholesale-focused solutions. Contact HONESTBEE today to discuss your specific needs and discover how our products can support your success.
Visual Guide

Related Products
- Beeswax Machine Press Embosser Wax Foundation Mold Printer Bee Hive Equipment Making Sheet
- Beeswax Foundation Sheets Beehive Foundation for Wholesale
- Colorful Silicone Beeswax Foundation Mold Mould for Beekeeping
- Economy Manual Beeswax Embossing Mill Wax Foundation Machine Roller
- Electric Beeswax Flat Sheet Machine with Operating Tray for Wax Processing
People Also Ask
- What is the recommended temperature for melting beeswax to make foundation sheets? Master the 70°C-80°C Ideal Range
- What specific equipment is required for making beeswax foundation? Essential Tools for High-Quality Production
- How is a beeswax foundation sheet machine constructed? Build High-Precision Honeycomb Foundations
- What are the primary technical challenges faced by beeswax foundation production machinery? Tackling Lipophilic Residues
- What are the advantages of implementing a pulley and belt drive system in beeswax foundation machinery? Master Quality.


