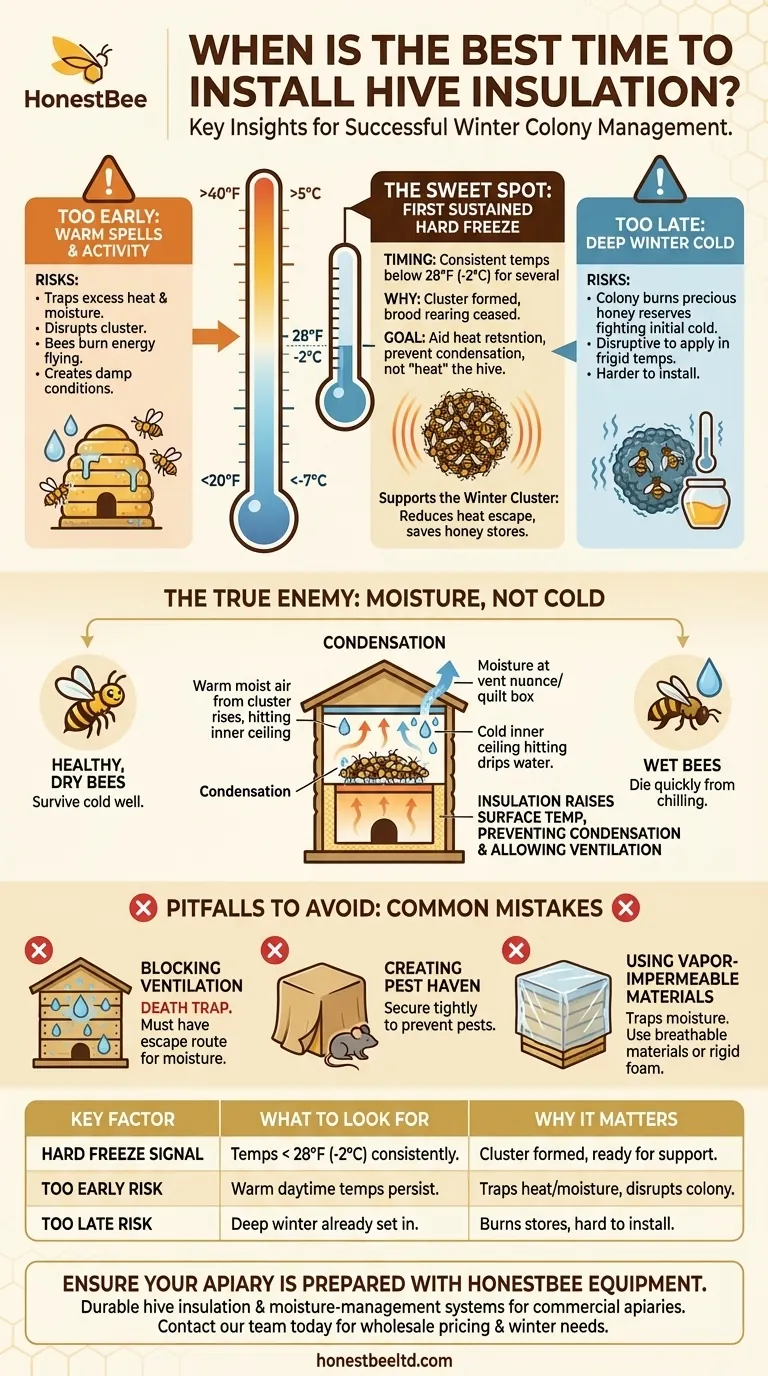
The best time to install hive insulation is just as your region experiences its first sustained hard freeze, typically when temperatures drop below 28°F (-2°C) for several consecutive hours. This timing ensures the honey bee colony has already formed its tight winter cluster. Insulating before this point can trap excess heat and moisture, while waiting too long forces the bees to expend precious energy and honey stores against the initial cold.
Your goal is not to heat the hive, but to help the bees more efficiently retain the heat they generate themselves. Proper timing is critical to support this natural process without inadvertently creating a moisture problem, which is a greater threat to a wintering colony than cold alone.
Why Insulation is a Balancing Act
Successful wintering depends on understanding how a bee colony manages its environment. Your insulation strategy must support, not hinder, their natural behavior.
The Goal: Supporting the Winter Cluster
A winter cluster is a dense ball of bees that forms inside the hive as temperatures drop. Bees on the inside of the cluster generate heat by vibrating their wing muscles, while bees on the outside act as a living layer of insulation.
The entire cluster slowly moves throughout the hive during the winter, consuming honey for energy. Well-placed insulation reduces how much heat escapes the hive box, meaning the cluster uses less energy and consumes fewer honey stores to maintain its core temperature.
The True Enemy: Moisture, Not Cold
Healthy, dry bees can survive remarkably cold temperatures. Wet bees, however, will die quickly. A wintering cluster constantly releases warm, moist air from respiration, just like we do.
When this warm, moist air hits a cold inner surface of the hive, it condenses into water droplets. This condensation can drip down onto the cluster, chilling and killing the bees.
How Insulation Manages Condensation
Proper insulation keeps the interior walls of the hive warmer. By raising the temperature of these surfaces above the dew point, you prevent condensation from forming on the walls and ceiling directly above the bees.
Instead, the moisture remains as vapor and rises, where it can be safely removed through a dedicated ventilation point, such as an upper entrance or a quilt box.
Identifying the Right Time to Insulate
Timing is everything. Watching the weather forecast and understanding the signs from your colony are key indicators for when to act.
The "Hard Freeze" as a Signal
A light frost is not the signal. You should wait for a hard freeze, which signals that consistent winter cold has arrived.
At this point, brood rearing has typically ceased, and the bees have committed to their winter cluster. Adding insulation now provides support without disrupting their pre-winter preparations.
The Dangers of Insulating Too Early
If you insulate while daytime temperatures are still warm, you risk overheating the hive. This can cause the bees to break their cluster, fly when they shouldn't, and consume stores at an accelerated rate.
More importantly, early insulation can trap moisture while the colony is still large and active, creating the exact damp conditions you want to avoid.
The Risks of Insulating Too Late
Waiting until deep winter to insulate is also problematic. The colony will have already burned through a significant portion of its honey reserves just to survive the initial cold snaps.
Furthermore, wrapping a hive in frigid temperatures can be disruptive to a well-established cluster and is simply more difficult to do correctly.
Understanding the Trade-offs and Pitfalls
Insulation is a powerful tool, but it can cause harm if implemented incorrectly. Avoiding common mistakes is as important as the insulation itself.
Pitfall 1: Blocking Ventilation
Insulation without ventilation is a death trap. Never seal up your hive completely. The moisture a colony produces must have an escape route.
Ensure the hive has a small upper entrance or a ventilated quilt box at the top. This allows the warm, moist air to exit the hive, keeping the main chamber dry.
Pitfall 2: Creating a Haven for Pests
Loose insulation wraps or improperly installed foam boards can create cozy spaces for mice and other pests to overwinter.
Ensure any hive wraps are secured tightly and there are no gaps between insulation boards and the hive body that would invite unwanted guests.
Pitfall 3: Using Vapor-Impermeable Materials
Avoid wrapping your hive directly with non-breathable materials like plastic sheeting. These materials are vapor barriers and will trap moisture against the hive wall, leading to condensation and mold.
Use materials designed for hive insulation or rigid foam board, and always ensure your ventilation strategy is in place.
Making the Right Choice for Your Goal
Your local climate and specific wintering goals should guide your final decision.
- If your primary focus is a simple, set-and-forget approach: Install your insulation wrap or panels immediately following the first hard, killing freeze in your area.
- If you live in a region with volatile winters (cold snaps and warm spells): Be prepared to add or even remove insulation as conditions demand, and prioritize a robust moisture-management system like a quilt box.
- If your primary focus is optimal moisture control: Your top priority should be a quilt box and a dedicated upper entrance for ventilation, as these directly address the threat of condensation. Insulation is a secondary, but still very helpful, addition.
Ultimately, successful wintering comes from working with your bees' natural instincts, not against them.
Summary Table:
| Key Timing Factor | What to Look For | Why It Matters |
|---|---|---|
| Hard Freeze Signal | Temperatures consistently below 28°F (-2°C) | Indicates the winter cluster has formed and brood rearing has ceased. |
| Too Early Risk | Warm daytime temperatures persist | Can trap excess heat and moisture, disrupting the colony. |
| Too Late Risk | Deep winter cold has already set in | Forces bees to burn excess honey stores to survive initial cold. |
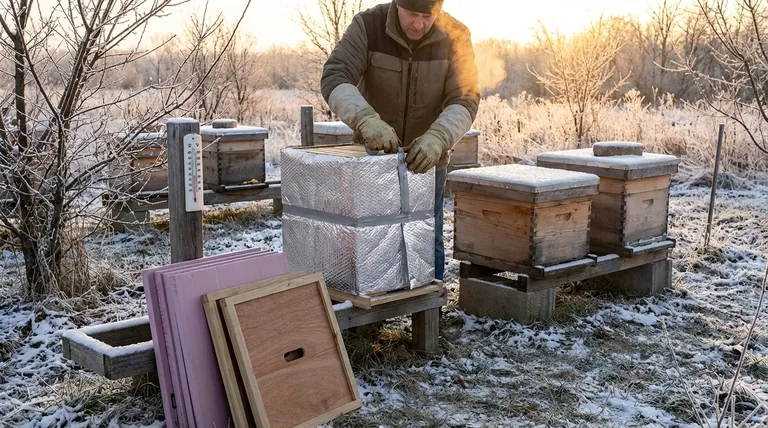
Ensure your apiary is prepared for winter with the right equipment from HONESTBEE.
We supply durable, high-performance hive insulation and moisture-management systems designed for the needs of commercial apiaries and beekeeping equipment distributors. Our wholesale-focused operations ensure you get the reliable supplies you need to support your colonies' natural wintering behavior, helping them conserve energy and emerge strong in the spring.
Contact our team today to discuss your winter preparation needs and wholesale pricing.
Visual Guide
Related Products
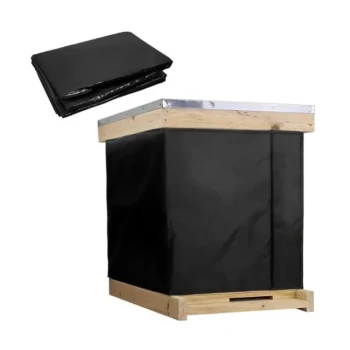
- Professional Insulated Winter Hive Wrap for Beekeeping
- Professional Insulated Plastic Bee Hives
- Inner Beehive Cover for Beekeeping Bee Hive Inner Cover
- Stainless Steel Round Beehive Air Vents for Ventilation
- Metal Hive Feet Bee Hive Stand for Ant Protection
People Also Ask
- What are the steps to properly wrap a beehive for winter? Ensure Your Colony Survives the Cold
- When is the best time to wrap a beehive for winter? A Guide to Perfect Winterization Timing
- What are the core advantages of using insulated beehives in cold environments? Boost Survival & Efficiency
- How do insulation wraps and hive wraps protect bee colonies during winter? Maximize Survival & Honey Reserves
- What are the benefits of using insulated covers for hives? Ensure Colony Survival and Health