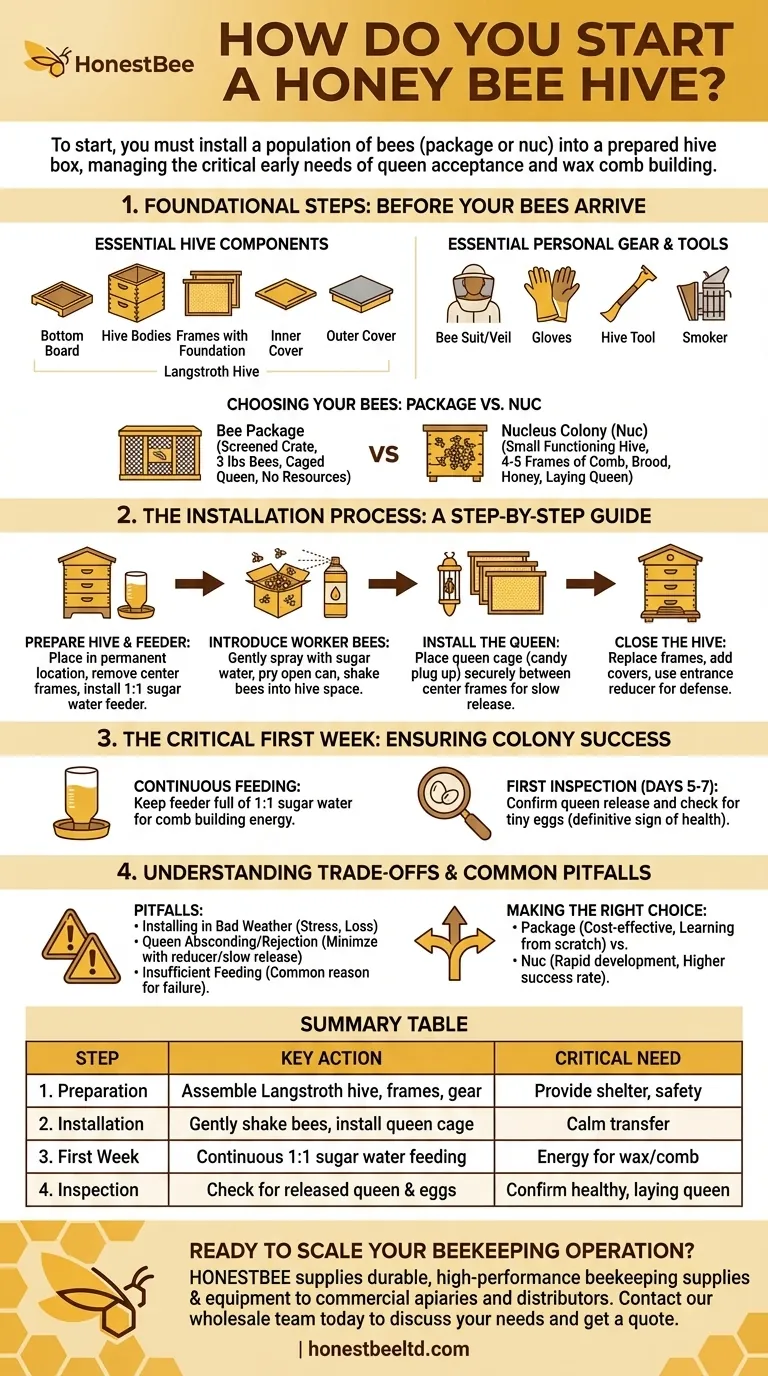
To start a honey bee hive, you must install a population of bees, either from a "package" or a "nuc," into a prepared hive box. This involves placing the worker bees into the hive body and carefully introducing the caged queen, allowing the colony several days to acclimate and accept her before she is released to begin laying eggs.
The core task is not simply placing bees in a box, but successfully managing the colony's two most critical early needs: accepting their queen and building their initial wax comb. Your success as a beekeeper begins with supporting them through this fragile period.
Foundational Steps: Before Your Bees Arrive
Before you can install bees, you must have the proper environment and equipment ready. Preparation is the most critical factor in a successful start.
Essential Hive Components
The standard beehive is a Langstroth hive, which consists of vertically stacked boxes. At a minimum, you will need:
- A bottom board (the floor of the hive).
- One or two hive bodies (the "brood boxes" where the queen lays eggs).
- Ten frames with foundation for each hive body (the structure bees build their comb on).
- An inner cover and an outer cover (the ceiling and roof).
Essential Personal Gear and Tools
Working with bees requires protective gear for your safety and confidence. Do not start a hive without:
- A bee veil or full bee suit.
- Beekeeping gloves.
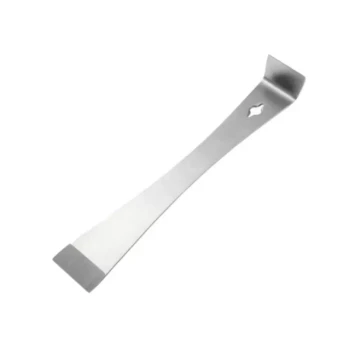
- A hive tool for prying apart frames.
- A smoker to help calm the bees during inspections.
Choosing Your Bees: Package vs. Nuc
You have two primary options for sourcing your bees:
- A bee package is a screened crate containing about three pounds of bees and a caged queen. They have no resources and must start from scratch.
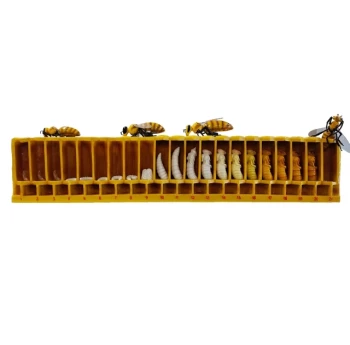
- A nucleus colony ("nuc") is a small, functioning hive with 4-5 frames of established comb, brood, honey, and a proven, laying queen.
The Installation Process: A Step-by-Step Guide
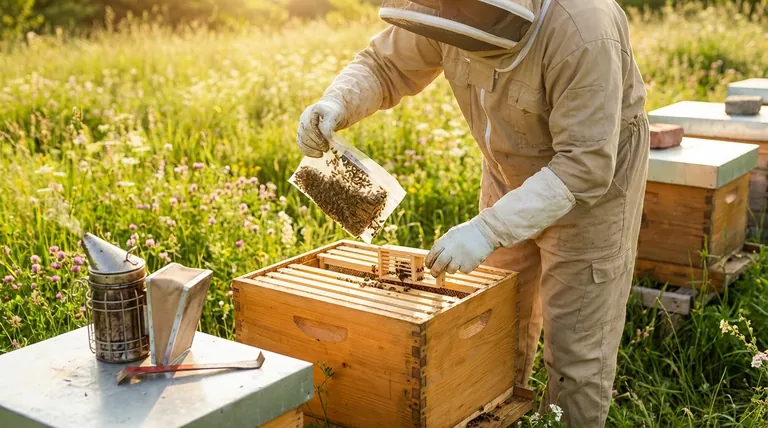
The day your bees arrive is a critical moment. The goal is a calm, orderly transfer from their transport container into their new home. This process is best done on a clear, calm afternoon.
Step 1: Prepare the Hive and Feeder
Set up your hive in its permanent location. Remove about half the frames from the center of the hive body to create an open space for the bees. You must also install a feeder with 1:1 sugar water (equal parts sugar and water by weight), as new colonies have no food stores and need this energy to build wax.
Step 2: Introduce the Worker Bees
If using a package, spray the bees lightly with sugar water to calm them and prevent flying. Pry open the can of syrup, remove it, and then gently shake the bees into the open space inside the hive.
Step 3: Install the Queen
The queen cage will be hanging inside the package. Remove it and check that the queen is alive. One end of the cage will be plugged with a white sugar substance called a candy plug. Place the queen cage, candy plug-side up, securely between two frames in the center of the hive. The worker bees will eat through this plug over several days, releasing her slowly and ensuring she is accepted.
Step 4: Close the Hive
Gently replace the frames you removed, being careful not to crush bees. Place the inner cover and outer cover on top. Use an entrance reducer to make the hive opening very small, which helps the new, small colony defend itself from predators or robbing bees.
The Critical First Week: Ensuring Colony Success
Your work is not done after installation. The first week determines whether the colony will establish itself.
The Role of Continuous Feeding
A new colony's primary job is drawing comb—building the wax structure of their home. This requires an immense amount of energy. Keep the feeder full of 1:1 sugar water for several weeks until they have built out comb on most of the frames in their first hive body.
Your First Inspection: Checking for Queen Acceptance
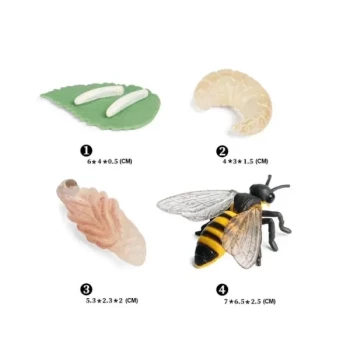
After 5-7 days, perform a quick inspection. Your goals are to confirm the queen has been released from her cage and, most importantly, to look for eggs. Seeing tiny, rice-like eggs at the bottom of the comb cells is the definitive sign that you have a healthy, accepted, and laying queen.
Understanding the Trade-offs and Common Pitfalls
Starting a hive is a natural process, but it is prone to common beginner mistakes.
Pitfall: Installing Bees in Bad Weather
Do not install bees on a cold, rainy, or extremely windy day. This stresses the colony and can lead to a significant loss of bees. Wait for calm, mild weather.
Pitfall: Queen Absconding or Rejection
Sometimes, the colony does not accept the new queen and may kill her. Other times, the entire colony, queen included, may decide the new home is unsuitable and abscond (leave). Using an entrance reducer and ensuring a slow queen release minimizes this risk.
Pitfall: Insufficient Feeding
This is the single most common reason a new colony fails. A package of bees has zero resources. Without a constant supply of sugar water, they cannot build comb, the queen will have nowhere to lay, and the colony will starve.
Making the Right Choice for Your Goal
Your choice of bee source directly impacts the speed and difficulty of establishing your hive.
- If your primary focus is cost-effectiveness and learning from the ground up: Choose a bee package, as it forces you to understand the fundamental needs of a colony starting from zero.
- If your primary focus is rapid colony development and a higher success rate: Choose a nuc, as it gives you a multi-week head start with a proven queen and established resources.
Your primary role in starting a hive is to provide the ideal conditions of food, shelter, and security, then allow the colony to thrive.
Summary Table:
| Step | Key Action | Critical Need |
|---|---|---|
| 1. Preparation | Assemble Langstroth hive, frames, and protective gear. | Provide secure shelter and ensure beekeeper safety. |
| 2. Installation | Gently shake bees into hive and install queen cage. | Calmly transfer the colony to its new home. |
| 3. First Week | Provide continuous 1:1 sugar water feeding. | Supply energy for wax production and comb building. |
| 4. Inspection | Check for released queen and look for eggs after 5-7 days. | Confirm a healthy, accepted, and laying queen. |
Ready to scale your beekeeping operation with professional-grade equipment? HONESTBEE supplies durable, high-performance beekeeping supplies and equipment to commercial apiaries and distributors through our wholesale-focused operations. From hive bodies and frames to protective gear and tools, we provide the reliable foundation your business needs to build strong, productive colonies. Contact our wholesale team today to discuss your needs and get a quote.
Visual Guide
Related Products
- Stainless Steel Honey Bee Smoker Hive and Honeycomb Smoker for Beekeeping
- Langstroth Honey Bee Box Hive Boxes for Different Depths
- Automatic Heat Preservation 6 Frame Pro Nuc Box for Honey Bee Queen Mating
- Professional Stainless Steel Pry-Bar Hive Tool
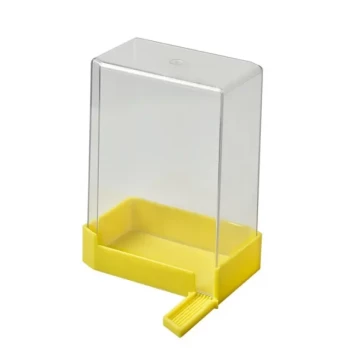
- HONESTBEE Professional Hive Top Bee Feeder Feeding Solution
People Also Ask
- Why is a specialized bee smoker considered a critical tool for apiary safety? Master Hive Control & Productivity
- Why is a bee smoker considered an essential auxiliary tool? Boost Safety and Efficiency in Honey Harvesting
- Why is a smoker important in beekeeping? Essential for Safe and Calm Hive Management
- When should you add more fuel to the bee smoker? Watch for This Critical Smoke Signal
- Why is a stainless steel bee smoker considered indispensable? Master Hive Management with Cool Smoke Technology