In beekeeping, grafting is a precise technique for raising queen bees. It involves the manual transfer of a very young female larva from its original worker cell into a specially prepared artificial queen cell cup. This method allows beekeepers to select larvae from their best-performing hives, ensuring that new queens inherit desirable traits like gentleness, productivity, or disease resistance.
Grafting bypasses the random nature of queen replacement and gives a beekeeper direct control over the genetic lineage of their colonies. It is the fundamental technique for scaling up queen production and actively managing the genetic quality of an apiary.

The Principle Behind Grafting
Grafting works by manipulating the natural instincts of a honey bee colony to raise a new queen when they perceive they are queenless.
Triggering the Queen-Rearing Instinct
A honey bee colony is driven to have one healthy, laying queen. By creating a "cell-builder" colony that is queenless (or feels queenless), beekeepers create an urgent biological need within that hive to raise a new queen from available young larvae.
The Power of Royal Jelly
Any fertilized egg can develop into either a worker bee or a queen. The key difference is diet. A larva destined to be a queen is fed exclusively on a protein-rich substance called royal jelly throughout its development.
The Role of the Queen Cup
By transferring a chosen larva into a vertically oriented, cup-shaped cell, beekeepers signal to the nurse bees that this larva is a queen-in-waiting. The bees respond by flooding the cell with royal jelly, setting the larva on the developmental path to becoming a queen.
The Grafting Process, Step-by-Step
Success in grafting is a matter of precision, timing, and a gentle touch. Each step is critical to the outcome.
Step 1: Hive Preparation
Before grafting, you must prepare a strong "cell-builder" colony. This hive must be full of young nurse bees and have an abundance of pollen and nectar. Most importantly, it must be made queenless to stimulate the queen-rearing response.
Step 2: Selecting the Ideal Larva
This is the most critical decision in the process. From a "breeder" hive with desirable genetics, you must select a larva that is less than 24 hours old. These larvae are tiny, C-shaped, and appear to be floating in a pool of royal jelly.
Step 3: The Manual Transfer
Using a specialized grafting tool, you gently slide the tip under the larva and its bed of royal jelly. You then carefully lift it out of its worker cell without rolling or damaging it. The larva is then delicately placed into the bottom of an artificial plastic or wax queen cup.
Step 4: Incubation and Cell Building
The frame holding the newly grafted queen cups (the "cell bar") is placed into the prepared cell-builder colony. The nurse bees will immediately begin to draw out the wax cells and feed the larvae royal jelly.
Step 5: Maturation and Transfer
After several days, the bees will cap the queen cells. Shortly before the new queens are due to emerge, these mature queen cells are carefully removed and transferred to small nucleus colonies where they can hatch, mature, and conduct their mating flights.
Understanding the Trade-offs and Challenges
Grafting is a powerful but demanding technique that is not suitable for every beekeeper or situation.
High Skill Requirement
Grafting requires a steady hand, excellent eyesight, and considerable practice. Damaging the larva during transfer is a common cause of failure for beginners.
Critical Timing
The window for selecting a larva of the correct age is extremely narrow. Grafting a larva that is too old will result in a poorly developed queen or outright rejection by the nurse bees.
Equipment and Resources
Unlike simpler methods, grafting requires specialized equipment, including grafting tools, cell cups, cell bars, and the resources to maintain multiple types of colonies (breeder, cell-builder, and mating nucs) simultaneously.
Not Ideal for Small Scale
For a hobbyist who only needs one or two new queens, the setup and effort involved in grafting are often unnecessary. Simpler methods, like a "walk-away split," are far more efficient for small-scale needs.
Making the Right Choice for Your Goal
Deciding whether to learn grafting depends entirely on your beekeeping objectives.
- If your primary focus is simplicity and just a few queens: A simple hive split is a more practical and reliable method.
- If your primary focus is genetic improvement: Grafting is the essential skill, as it gives you precise control to propagate the best genetics in your apiary.
- If your primary focus is raising a large number of queens for sale or expansion: Grafting is the industry-standard method for efficient, scalable queen production.
Ultimately, mastering grafting transforms a beekeeper from a passive manager into an active architect of their apiary's health and productivity.
Summary Table:
| Step | Key Action | Purpose |
|---|---|---|
| 1. Hive Prep | Create a strong, queenless 'cell-builder' colony | Stimulates the colony's instinct to raise a new queen |
| 2. Larva Selection | Choose a larva <24 hours old from a high-performance hive | Ensures the new queen inherits desirable genetic traits |
| 3. Manual Transfer | Gently move the larva to an artificial queen cup using a grafting tool | Signals to nurse bees that this larva is a queen candidate |
| 4. Incubation | Place grafted cups into the cell-builder colony | Nurse bees feed the larva royal jelly to trigger queen development |
| 5. Maturation | Transfer mature queen cells to nucleus colonies | Allows new queens to hatch, mate, and begin laying eggs |
Ready to take control of your apiary's genetics and scale your queen production?
Mastering the grafting method is essential for commercial beekeepers and equipment distributors focused on quality and efficiency. HONESTBEE supplies the professional-grade beekeeping supplies and equipment—including precision grafting tools, durable queen cups, and cell bars—you need to succeed.
Contact our expert team today to discuss how our wholesale-focused solutions can support your large-scale queen-rearing operations and help you build a more productive, resilient apiary.
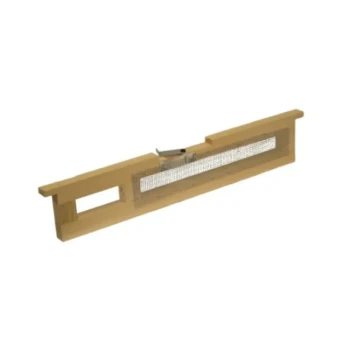
Visual Guide

Related Products
- Stainless Steel Beekeeping Queen Grafting Tool for Honey Bee Rearing
- Black 2 Pack Beekeeper Queen Grafting Tool for Bee Queen Larva Transferring Needle
- Stainless Steel Queen Grafting Tool for Beekeeping and Bee Queen Grafting
- Plastic Chinese Queen Grafting Tool for Bee Queen Rearing
- Retractable Chinese Queen Rearing Grafting Tools Equipment
People Also Ask
- Why is it necessary for migratory beekeeping enterprises to utilize professional queen bee rearing tools? Boost Resilience
- What is the purpose of a queen grafting tool in beekeeping? Master Larva Transfer for Selective Breeding
- What is the process of grafting in honey bee queen rearing? A Master Guide for Commercial Success
- What are the steps involved in using a queen grafting tool? A Guide to Successful Queen Rearing
- What are the benefits of using a queen grafting tool for queen rearing? Master Precision for Superior Bee Genetics