At its core, the process for filtering beeswax involves using hot water to melt the raw wax, allowing the mixture to separate by density, and then straining out the physical debris. Once cooled, the purified wax solidifies into a clean block on top of the water, leaving impurities behind.
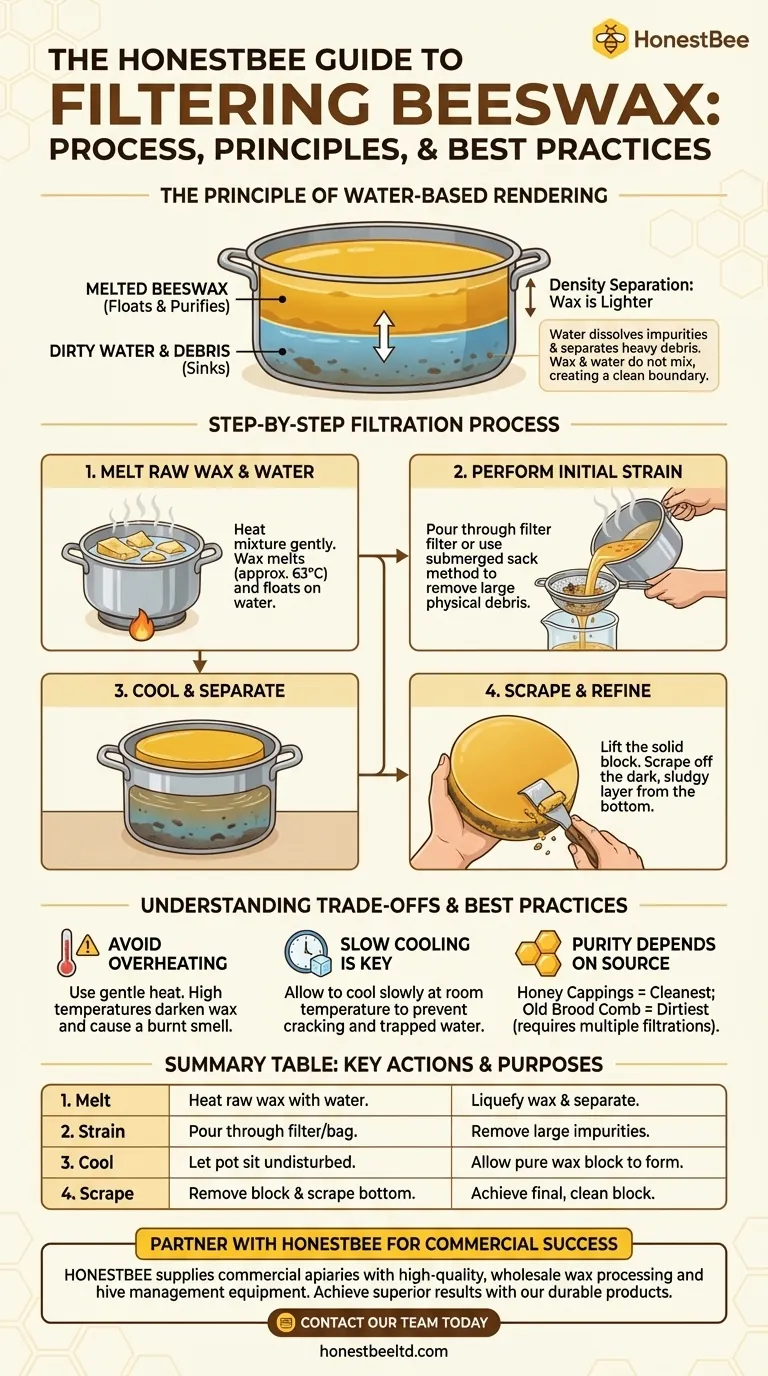
The entire cleaning process, known as rendering, hinges on a simple principle: melted beeswax is lighter than both water and the debris you want to remove. By melting the wax in water, you create a system where clean wax naturally rises to the top while impurities sink or get trapped in the water.
The Principle of Water-Based Rendering
To effectively filter beeswax, you must first understand why water is the most critical element in the process. It's not just a heating medium; it's an active separation agent.
Why Water is Essential
Water acts as a solvent and a weight. It dissolves water-soluble materials like residual honey and helps heavy physical debris—such as dirt or parts of the cocoon from old brood comb—to sink to the bottom.
Because wax is a lipid, it does not mix with the water. When melted, it floats cleanly on the surface, creating a distinct boundary between the pure wax and the dirty water below.
The Role of Gentle Heat
Beeswax melts at a relatively low temperature (around 145°F or 63°C), well below the boiling point of water. The goal is to keep the water hot enough to melt the wax but not so hot that it boils vigorously.
Overheating can darken the beeswax and potentially create a fire hazard. Using a double boiler or simply heating the water gently gives you precise control.
A Step-by-Step Guide to Filtering Beeswax
This process works for all sources of raw wax, including honey cappings, burr comb, or old comb cut from frames.
Step 1: Melt the Raw Wax and Water
Place your raw beeswax into a dedicated pot that you don't use for food. Add enough water to submerge the wax and provide a substantial base layer.
Gently heat the mixture on the stove. The wax will begin to melt and float on the surface of the water.
Step 2: Perform the Initial Strain
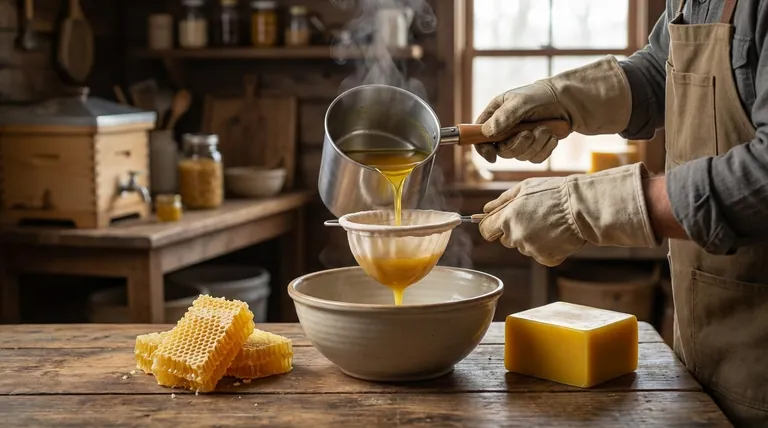
Once all the wax is melted, it's time to remove the large debris. A common method is to pour the entire mixture of hot water and wax through a strainer lined with a filter.
A very effective technique involves placing the raw comb into a cloth or polypropylene sack. Submerge the sack in hot water, using a weight to keep it down. The wax will melt and seep through the fabric, rising to the surface of the pot while the debris remains trapped in the bag.
Step 3: Cool and Separate
Turn off the heat and leave the pot undisturbed in a safe place to cool down completely. This can take several hours or even overnight.
As it cools, the purified beeswax will harden into a solid disk on the surface of the water. The dirt, honey, and other impurities will be trapped in the murky water below or stuck to the underside of the wax disk.
Step 4: Scrape and Refine
Once the wax disk is completely solid, you can easily lift it off the water. The bottom of the disk will likely have a layer of dark, sludgy material.
Simply use a hive tool or scraper to remove this dirty layer from the bottom of your wax block. What remains is a much cleaner, rendered block of beeswax. For many applications, this is pure enough.
Understanding the Trade-offs and Best Practices
Achieving perfectly clean wax requires attention to detail. Certain pitfalls can compromise the quality of your final product.
Avoid Overheating the Wax
The most common mistake is applying too much heat. This can scorch and darken the wax, giving it a less desirable color and a burnt smell. Always use gentle, indirect heat.
The Importance of Slow Cooling
Allowing the wax to cool slowly is critical. If it cools too quickly, it can crack, trapping water inside and making the block less stable. Simply leaving the pot at room temperature is the best method.
Purity Depends on the Source
The source of your wax determines how much cleaning it will need. Wax from honey cappings is the cleanest and requires the least filtering. Wax from old brood comb is the dirtiest and may require repeating the filtering process to achieve the desired purity.
Making the Right Choice for Your Goal
The level of filtration you need depends entirely on your intended use for the wax.
- If your primary focus is rustic projects like fire-starters or simple waterproofing: A single water rendering is almost always sufficient to remove the major debris.
- If your primary focus is high-purity applications like cosmetics, balms, or fine candles: You may need to perform a second filtration by re-melting the clean wax block (without water) and pouring it through a finer filter, like a paper towel or coffee filter.
- If your primary focus is processing large volumes of wax: Consider investing in a dedicated solar wax melter, which uses the sun's energy for a slow, gentle, and efficient rendering process.
By matching your filtering method to your final goal, you can efficiently produce beautiful, clean beeswax for any project.
Summary Table:
| Step | Key Action | Purpose |
|---|---|---|
| 1. Melt | Heat raw wax with water in a pot. | To liquefy the wax and separate it from debris. |
| 2. Strain | Pour mixture through a filter or cloth bag. | To remove large, solid impurities. |
| 3. Cool | Let the pot sit undisturbed until wax solidifies. | To allow pure wax to form a solid block on top. |
| 4. Scrape | Remove the wax block and scrape off the dirty bottom layer. | To achieve the final, clean block of beeswax. |
Need reliable equipment for your beekeeping and wax rendering operations?
At HONESTBEE, we supply commercial apiaries and beekeeping equipment distributors with the high-quality, wholesale-focused supplies needed for efficient large-scale wax processing and hive management. From durable melting pots to fine straining filters, our products are built to help you achieve superior results.
Contact our team today to discuss your specific needs and discover how we can support your business's growth and efficiency.
Visual Guide
Related Products
- Beeswax Machine Press Embosser Wax Foundation Mold Printer Bee Hive Equipment Making Sheet
- Beeswax Foundation Sheets Beehive Foundation for Wholesale
- Colorful Silicone Beeswax Foundation Mold Mould for Beekeeping
- Economy Manual Beeswax Embossing Mill Wax Foundation Machine Roller
- Electric Beeswax Flat Sheet Machine with Operating Tray for Wax Processing
People Also Ask
- What equipment is needed to make beeswax foundation? A Guide to DIY Wax Sheet Production
- What miscellaneous equipment is needed for making foundation? A Guide to the Essential Tools
- What are the advantages of implementing a pulley and belt drive system in beeswax foundation machinery? Master Quality.
- What miscellaneous equipment is useful when making beeswax foundation? Essential Support Tools for Beekeepers
- What is the purpose of a beeswax foundation sheet machine? Maximize Hive Health and Honey Production


