The simplest and most effective method for cleaning raw beeswax is water rendering. This process involves melting the wax in water, allowing the mixture to cool completely, and then separating the solidified, clean wax from the water and debris that have settled at the bottom.
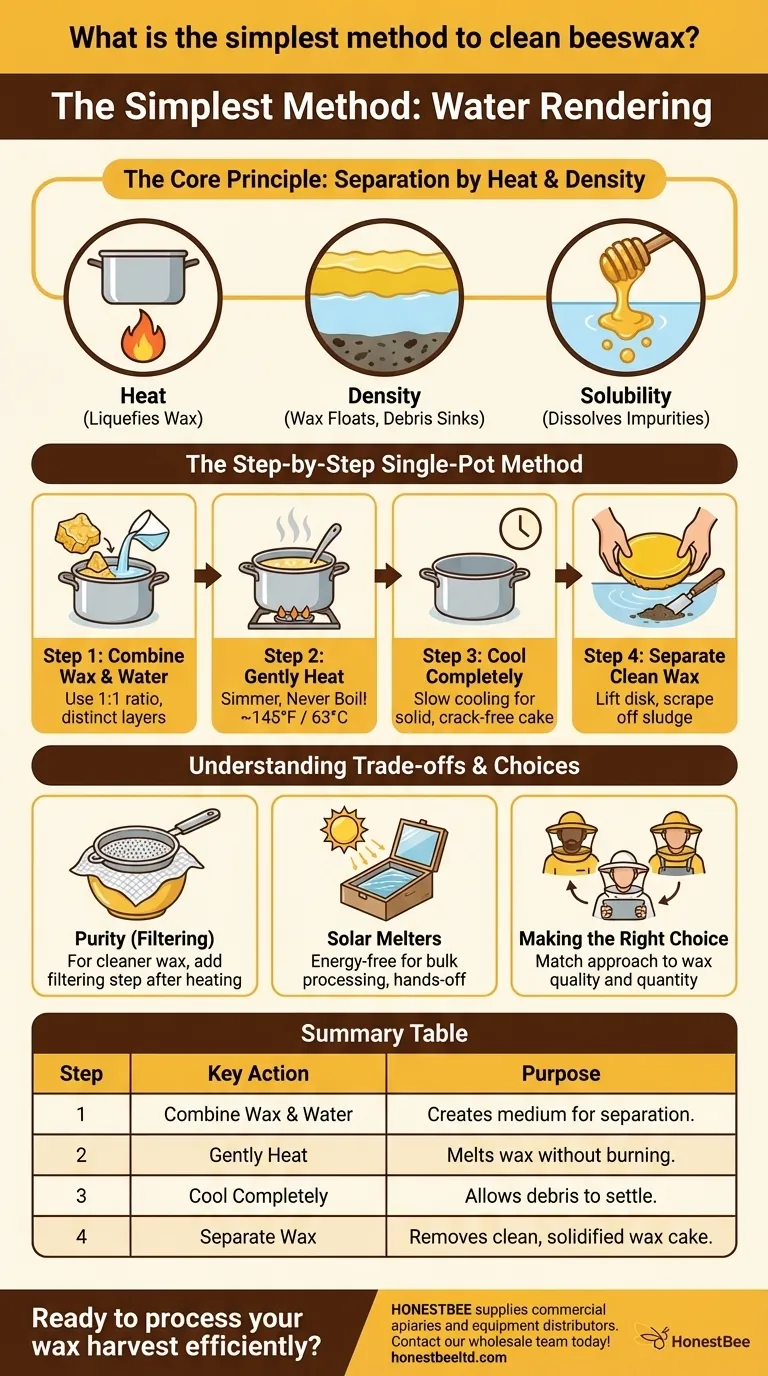
The core principle is not simply melting, but using the different densities of wax, water, and debris. Hot water provides a medium for the lighter wax to float, heavier debris to sink, and water-soluble impurities like honey to dissolve away.
The Principle: Why Water Rendering Works
To clean beeswax effectively, you are performing a simple act of physical separation. Water is the ideal medium to facilitate this process for three key reasons.
The Role of Heat
Melting the wax is the essential first step. In its solid, raw form—as cappings, burr comb, or old honeycomb—impurities are trapped within the wax structure. Applying gentle heat liquefies the wax, releasing the debris.
Separation by Density
Once melted, the components naturally stratify. Beeswax is hydrophobic (repels water) and less dense than water, so it floats to the surface. Most impurities, such as dirt, propolis, and other hive debris, are heavier and will sink through the water to the bottom of the pot.
Removing Soluble Impurities
Raw wax often contains residual honey or other water-soluble elements. The hot water bath acts as a solvent, dissolving these impurities and holding them in the water layer, separate from the pure wax.
The Step-by-Step Single-Pot Method
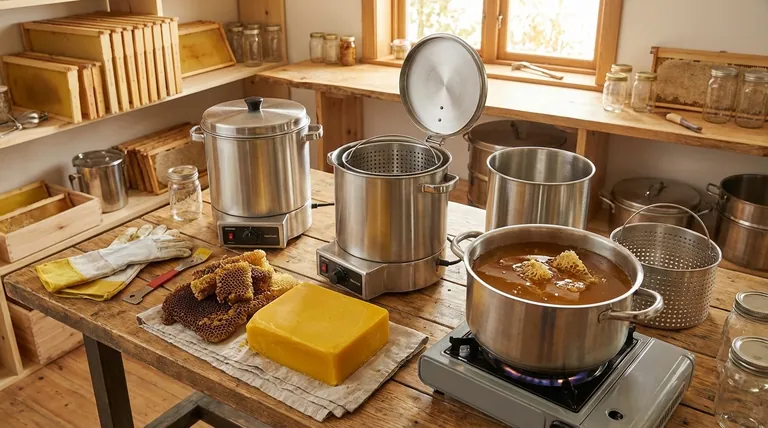
This is the foundational technique suitable for nearly any quantity of raw wax. It requires only a dedicated pot (not used for food), water, and a heat source.
Step 1: Combine Wax and Water
Place your raw beeswax into a pot. Add enough water to ensure that once the wax melts, there will be a distinct layer of water underneath it. A 1:1 ratio by volume is a good starting point.
Step 2: Gently Heat the Mixture
Heat the pot over low to medium heat. Never boil the mixture. Overheating can darken the beeswax and is a fire hazard. The goal is to bring the water to a gentle simmer, which is more than enough to melt the wax (which melts around 145°F / 63°C).
Step 3: Cool Slowly and Completely
Once the wax is fully melted, turn off the heat and let the pot cool undisturbed. Slow cooling is critical for allowing the debris to fully settle and for forming a solid, crack-free cake of wax. Letting it sit overnight is ideal.
Step 4: Separate the Clean Wax
After the pot is completely cool, the beeswax will have solidified into a hard disk on top of the water. You can easily lift or pry this disk out. The bottom of the wax disk will have a layer of sludge and debris, which can be scraped off with a hive tool or knife.
Understanding the Trade-offs
While simple water rendering is highly effective, it's important to understand its limitations and when to modify the process.
The Purity of the First Pass
For wax that starts with a large amount of debris (like old, dark brood comb), a single rendering may not be enough. Some very fine particles can remain suspended, leaving a sludgy layer on the bottom of the final wax cake.
Improving Purity with Filtering
For a cleaner final product, you can add a filtering step. After the wax has melted in the water (Step 2), pour the entire hot mixture through a strainer lined with cheesecloth or a sturdy paper towel into a second cooling container (like a plastic bucket). This physically removes debris before the cooling and separation stage.
The Alternative: Solar Melters
For beekeepers who process large quantities of wax, a solar melter is a highly efficient, energy-free alternative. This device uses the sun's heat to melt wax out of the comb, letting it drip through a filter into a collection pan. While it requires specific equipment, it is a very "hands-off" method for bulk processing.
Making the Right Choice for Your Goal
Your approach should match the quality of your raw wax and your desired outcome.
- If your primary focus is cleaning a small batch of light cappings: The simple single-pot rendering method is perfectly sufficient.
- If your goal is to process dark, dirty brood comb: Plan on performing the single-pot method twice or add a filtering step to achieve high purity.
- If you are a beekeeper with large, regular harvests of wax: Investing in or building a solar melter will save significant time and effort in the long run.
By understanding these simple principles of separation, you can confidently turn any form of raw comb into clean, valuable beeswax.
Summary Table:
| Step | Key Action | Purpose |
|---|---|---|
| 1 | Combine Wax & Water | Creates medium for separation. |
| 2 | Gently Heat | Melts wax without burning. |
| 3 | Cool Completely | Allows debris to settle. |
| 4 | Separate Wax | Removes clean, solidified wax cake. |
Ready to process your wax harvest efficiently? HONESTBEE supplies commercial apiaries and beekeeping equipment distributors with the high-quality tools needed for every step, from harvesting to rendering. Let us help you scale your operation. Contact our wholesale team today to discuss your equipment needs!
Visual Guide
Related Products
- Beeswax Machine Press Embosser Wax Foundation Mold Printer Bee Hive Equipment Making Sheet
- Beeswax Foundation Sheets Beehive Foundation for Wholesale
- Colorful Silicone Beeswax Foundation Mold Mould for Beekeeping
- Economy Manual Beeswax Embossing Mill Wax Foundation Machine Roller
- Electric Beeswax Flat Sheet Machine with Operating Tray for Wax Processing
People Also Ask
- What equipment is needed to make beeswax foundation? A Guide to DIY Wax Sheet Production
- What are the primary technical challenges faced by beeswax foundation production machinery? Tackling Lipophilic Residues
- What miscellaneous equipment is needed for making foundation? A Guide to the Essential Tools
- What is the recommended temperature for melting beeswax to make foundation sheets? Master the 70°C-80°C Ideal Range
- What miscellaneous equipment is useful when making beeswax foundation? Essential Support Tools for Beekeepers


