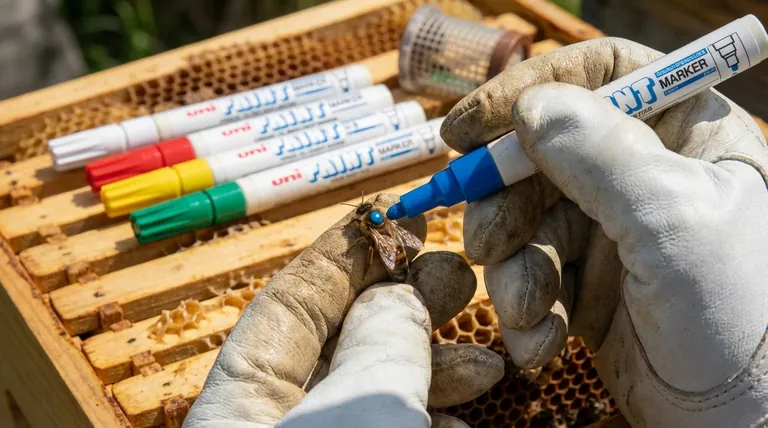
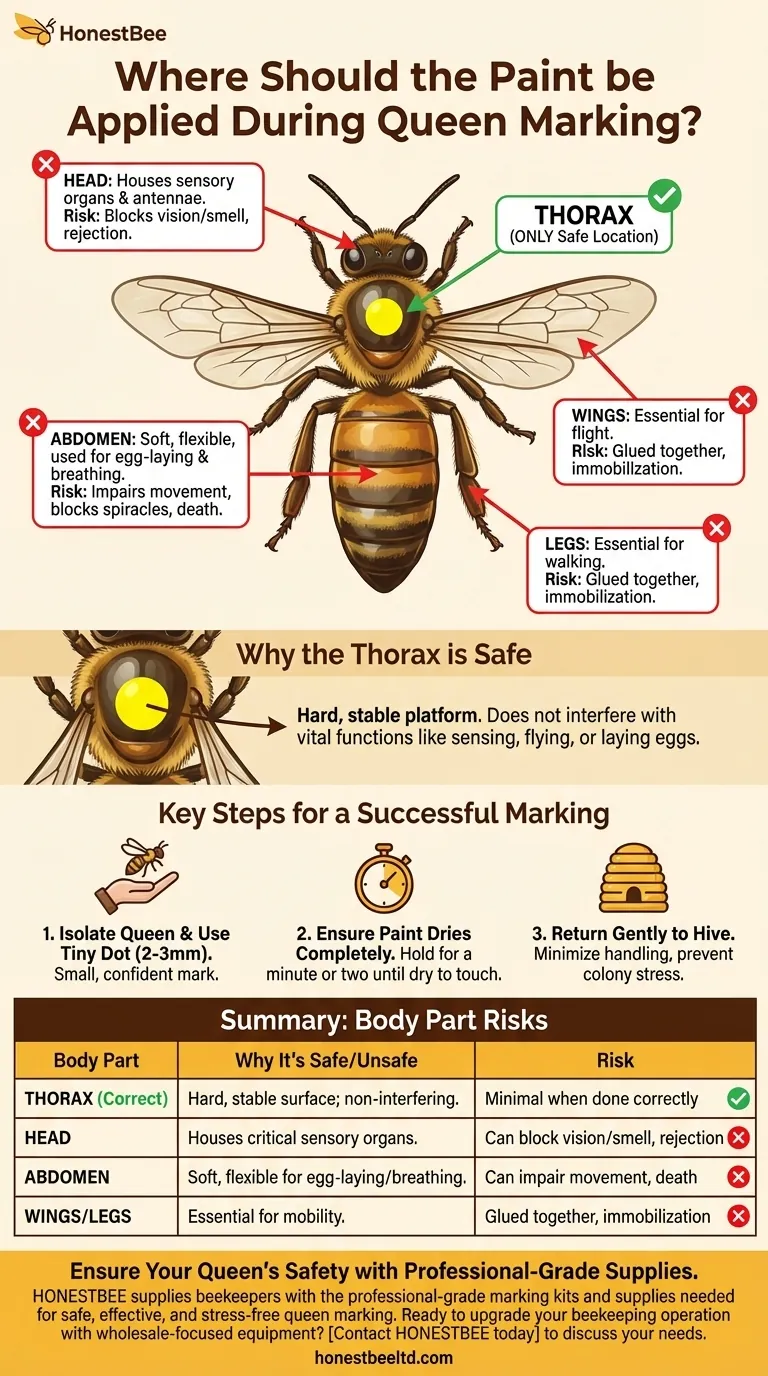
For a successful and safe queen marking, the paint must be applied as a single, small dot on the top of her thorax—the middle section of her body. Placing the mark anywhere else, such as her head, abdomen, or wings, can injure or kill her and jeopardize the entire colony.
The specific location for marking a queen bee is not a matter of preference; it is a critical safety requirement. The thorax is chosen because it is the only hard, stable part of her body where a mark will not interfere with her essential functions like sensing, flying, or laying eggs.
Why the Thorax is the Only Safe Location
Understanding the queen's anatomy is essential to performing this task correctly. Each part of her body has a function that must be protected.
The Thorax: A Hard, Stable Platform
The thorax is the queen's robust middle section where her legs and wings are attached. Its hard, chitinous surface provides a perfect, non-flexible spot for a small dot of paint.
A mark here is easily visible to the beekeeper without harming the bee.
Why Not the Head?
The queen's head contains her most critical sensory organs. Her eyes and, most importantly, her antennae are located here.
Applying paint to her head could block her vision or coat her antennae, which she uses to smell, taste, and communicate. This would render her unable to function, and the colony would likely reject and kill her.
Why Not the Abdomen?
The abdomen is the long, soft rear section of the queen responsible for egg-laying and housing her digestive and reproductive systems.
This part of her body is delicate and flexes as she moves and lays. Paint on the abdomen could interfere with these movements or cover her spiracles (breathing pores), leading to her death.
Why Not the Wings or Legs?
Applying paint to the wings or legs is a critical mistake. The paint can glue these moving parts together, preventing her from flying or walking properly.
An immobilized queen cannot perform her duties and will quickly be superseded by the colony.
Understanding the Risks and Best Practices
Marking a queen is a delicate procedure. Following best practices is non-negotiable for the health of your hive.
Use a Tiny Amount of Paint
The mark should be a small, confident dot, approximately 2-3 millimeters in diameter. A large glob of paint is unnecessary for visibility and increases the risk of it running onto other body parts.
Ensure the Paint Dries Completely
After marking the queen, you must hold her gently for a minute or two until the paint is completely dry to the touch.
Releasing her with wet paint can cause it to smudge onto her legs, wings, or other bees. This can lead to injury and cause the other bees to become aggressive toward her due to the foreign scent.
Handle the Queen Gently
The process of catching and holding the queen is often more dangerous for her than the marking itself. Be calm, deliberate, and gentle to avoid crushing her or causing undue stress.
Use the Opportunity Wisely
Having the queen temporarily separated provides a unique opportunity. Many beekeepers use this time to perform a mite count on a sample of worker bees using a sugar shake or alcohol wash, increasing the efficiency of their hive inspection.
Key Steps for a Successful Marking
Applying this knowledge correctly ensures the well-being of your most important bee.
- If your primary focus is queen safety: Isolate the queen, apply a single, tiny dot of paint only to the center of her thorax, and hold her until it is completely dry.
- If your primary focus is long-term visibility: Use the correct international color code for the year and apply a confident, small dot that is easy to spot during future inspections.
- If your primary focus is colony stability: Handle the queen minimally and return her to the hive as soon as the paint is dry to prevent the colony from noticing her absence and initiating emergency queen cells.
Properly marking your queen transforms a source of anxiety into an act of confident and effective hive management.
Summary Table:
| Body Part | Why It's Safe/Unsafe | Risk |
|---|---|---|
| Thorax (Correct) | Hard, stable surface; does not interfere with vital functions. | Minimal risk when done correctly. |
| Head | Houses critical sensory organs like eyes and antennae. | Can block vision/smell, leading to rejection. |
| Abdomen | Soft, flexible area for egg-laying and breathing. | Can impair movement or block spiracles, causing death. |
| Wings/Legs | Essential for mobility and colony function. | Paint can glue parts together, immobilizing the queen. |
Ensure Your Queen's Safety with Professional-Grade Supplies
Marking a queen is a delicate task that requires precision and the right tools. For commercial apiaries and distributors, using reliable, high-quality equipment is non-negotiable for protecting your valuable queens and ensuring colony health.
HONESTBEE supplies beekeepers with the professional-grade marking kits and supplies needed for safe, effective, and stress-free queen marking. Our products are designed for durability and ease of use, helping you manage your hives with confidence.
Ready to upgrade your beekeeping operation with wholesale-focused equipment?
Contact HONESTBEE today to discuss your needs and discover how our supplies can contribute to your success.
Visual Guide
Related Products
- Queen Bee Marking Pen POSCA Queen Marking Pens for Beekeeping Bee Markers
- Queen Bee Marking Pen UNI Medium Point for Queen and Bee Marking
- One Hand Yellow Queen Marking Catcher Tube Cage Beekeeper Tool Accessory for Queen Bee
- Queen Bee Catcher Plastic Bee Marker Bottle with Piston Marking Tube
- Queen Bee Marking Tube Cage Bottle Catcher Holder with Clear Plastic Plunger Marker
People Also Ask
- How should a queen bee marking pen tip be properly primed? Master the Art of Safe Queen Marking
- Why are Posca pens commonly used for marking queen bees? The Safest, Most Durable Method for Beekeepers
- What type of markers are commonly used for marking Queen bees? Choose the Safe, Non-Toxic Standard
- What is the purpose of a queen marking pen in beekeeping? Essential for Efficient Hive Management
- What is the purpose of using a queen marking pen? Enhance Hive Management and Age Tracking


