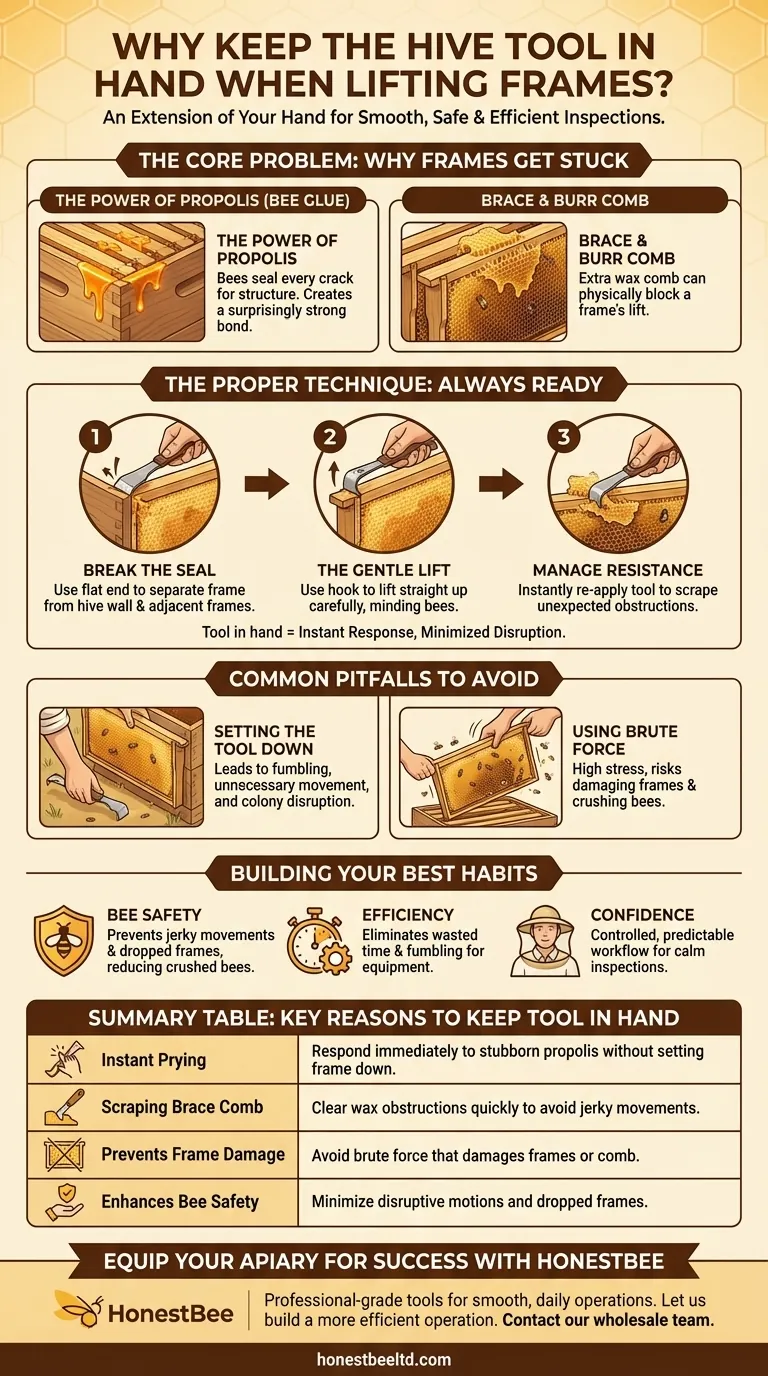
Keeping your hive tool in hand is a critical habit because frames are almost never free-moving and often require additional prying even after you've started lifting them. Being able to immediately re-apply the tool to stubborn propolis seals or scrape away brace comb without setting the frame down is essential for a smooth, safe, and efficient hive inspection.
Think of your hive tool not just as an opener, but as an extension of your hand throughout the entire inspection. Keeping it ready ensures you can respond instantly to resistance, minimizing disruption to the colony and preventing clumsy, potentially harmful mistakes.
The Core Problem: Why Frames Get Stuck
To understand the importance of the hive tool, you must first understand why frames don't lift out easily. Bees are master builders and seal every crack and seam inside the hive for structural integrity and defense.
The Power of Propolis
Bees produce a resinous substance called propolis, or "bee glue," to seal small gaps and coat interior surfaces. They use it to cement the ends of the frames to the hive body and to glue adjacent frames together, creating a surprisingly strong bond.
Brace and Burr Comb
Bees will also build small sections of extra wax comb, known as brace or burr comb, to connect frames or fill any space they deem too large. This comb can physically block a frame from being lifted cleanly.
The Proper Technique for Lifting a Frame
A successful lift is a two-part process that requires the constant readiness of your hive tool. This method prevents jerky movements that can anger the bees or damage the comb.
Step 1: Breaking the Seal
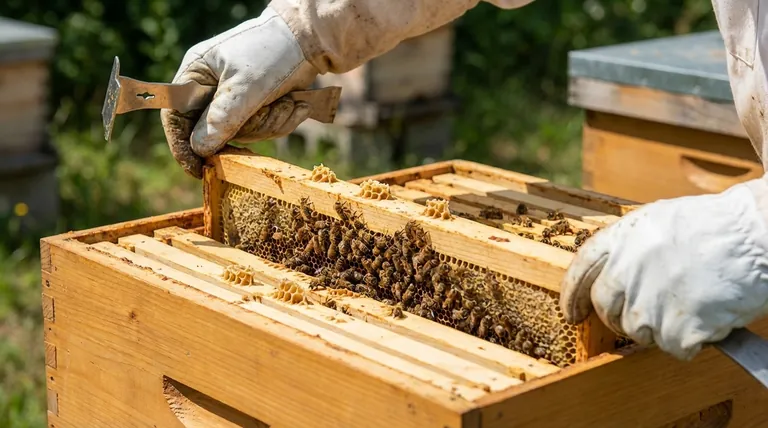
Before you even attempt to lift a frame, you must first break the propolis seal. Use the flat, prying end of your hive tool to gently separate the end bars of the frame from the hive wall and from the adjacent frames.
Step 2: The Gentle Lift
Once the frame is loosened, slide the hooked end of your hive tool under one of the frame's "ears" (the ends of the top bar). Use this hook to lift the frame straight up slowly and carefully, being mindful not to crush bees against the neighboring frame.
Managing Unexpected Resistance
This is the moment where keeping the tool in hand proves its value. If you begin to lift and feel resistance, the tool is already in position to pry a bit more or scrape away a piece of brace comb that you missed.
Common Pitfalls to Avoid
Failing to keep your tool at the ready often leads to predictable and frustrating problems during an inspection.
Setting the Tool Down
The most common mistake is setting your tool down to get a two-handed grip on a frame. If that frame is still stuck, you now have to awkwardly put it back down, find your tool, and start over, disrupting the colony with unnecessary movements.
Using Brute Force
Never try to yank a stuck frame out with your hands alone. This sudden, jarring motion is highly stressful for the bees, risks damaging the wooden frame or delicate comb, and can easily lead to you dropping the frame back into the hive, potentially crushing the queen.
Building Your Best Hive-Side Habits
Adopting this simple practice directly supports the primary goals of any beekeeper, from the novice to the expert.
- If your primary focus is bee safety: Keeping the tool in hand prevents the jerky movements and dropped frames that are a major cause of crushed bees and colony stress.
- If your primary focus is efficiency: This habit eliminates wasted time and motion, allowing you to move smoothly from one frame to the next without fumbling for your equipment.
- If your primary focus is building confidence: A controlled, predictable workflow makes inspections feel less chaotic, helping you stay calm and focused on observing the colony's health.
Ultimately, treating your hive tool as an ever-present part of your hand is the foundation of calm, competent beekeeping.
Summary Table:
| Key Reason | Why It Matters |
|---|---|
| Instant Prying | Respond immediately to stubborn propolis seals without setting the frame down. |
| Scraping Brace Comb | Clear unexpected wax obstructions quickly to avoid jerky, harmful movements. |
| Prevents Frame Damage | Avoid using brute force that can damage wooden frames or delicate comb. |
| Enhances Bee Safety | Minimize disruptive motions and prevent dropped frames that risk crushing bees. |
Equip Your Apiary for Success with HONESTBEE
Mastering hive inspection technique is just the first step. Ensuring you have reliable, professional-grade equipment is what separates successful commercial beekeepers and distributors. HONESTBEE supplies the durable hive tools and essential beekeeping supplies that commercial apiaries and equipment distributors trust for smooth, daily operations.
Let us help you build a more efficient and profitable operation. Contact our wholesale team today to discuss your supply needs and discover how our products support your bottom line.
Visual Guide
Related Products
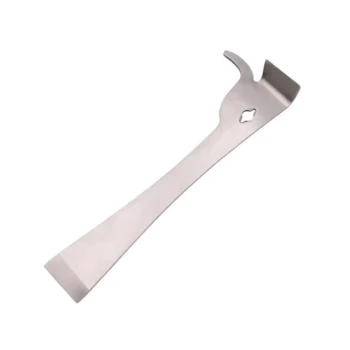
- HONESTBEE Professional Long Handled Hive Tool with Precision Cutting Blade
- Professional Multi-Function Stainless Steel Hive Tool
- HONESTBEE Premium Italian Style Hive Tool with Hardwood Handle
- Ergonomic Plastic Frame Spacer Tool for Rapid Hive Management Beekeeping
- Professional Grade Foldable Beehive Handles
People Also Ask
- What are the different types of hive tools available? Choose the Right Tool for Your Apiary
- What are hive tools and what are their primary uses in beekeeping? Essential Equipment for Apiary Success
- Which intervention materials and management tools are used in commercial apiaries? Protect Your Bees from Pesticides
- Why are professional hive tools considered indispensable? Master Beekeeping Maintenance with Precision Leverage
- Why are professional hive tools & observation equipment necessary for queen rearing evaluation? Master Your Quality