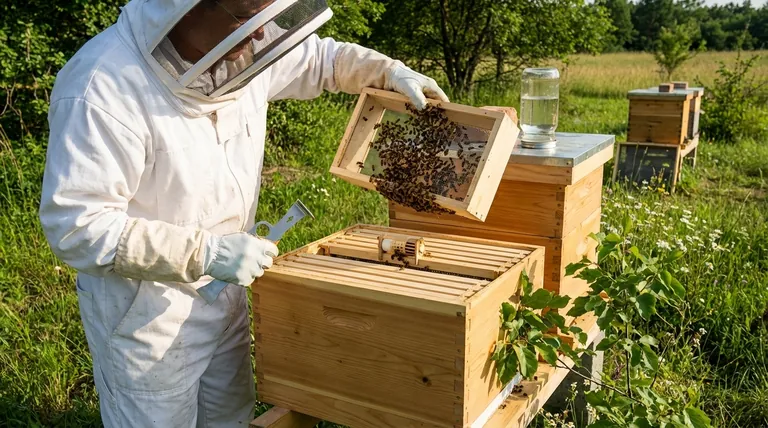
To install a package of bees into a new hive, you must first place the caged queen inside, suspended between two frames. Then, you gently shake or pour the rest of the bees from their transport container into the hive body, close the hive, and provide a food source.
The physical act of transferring bees is simple, but ensuring they stay and thrive requires thoughtful preparation of the hive's location and diligent post-installation care to help the new colony accept its home.
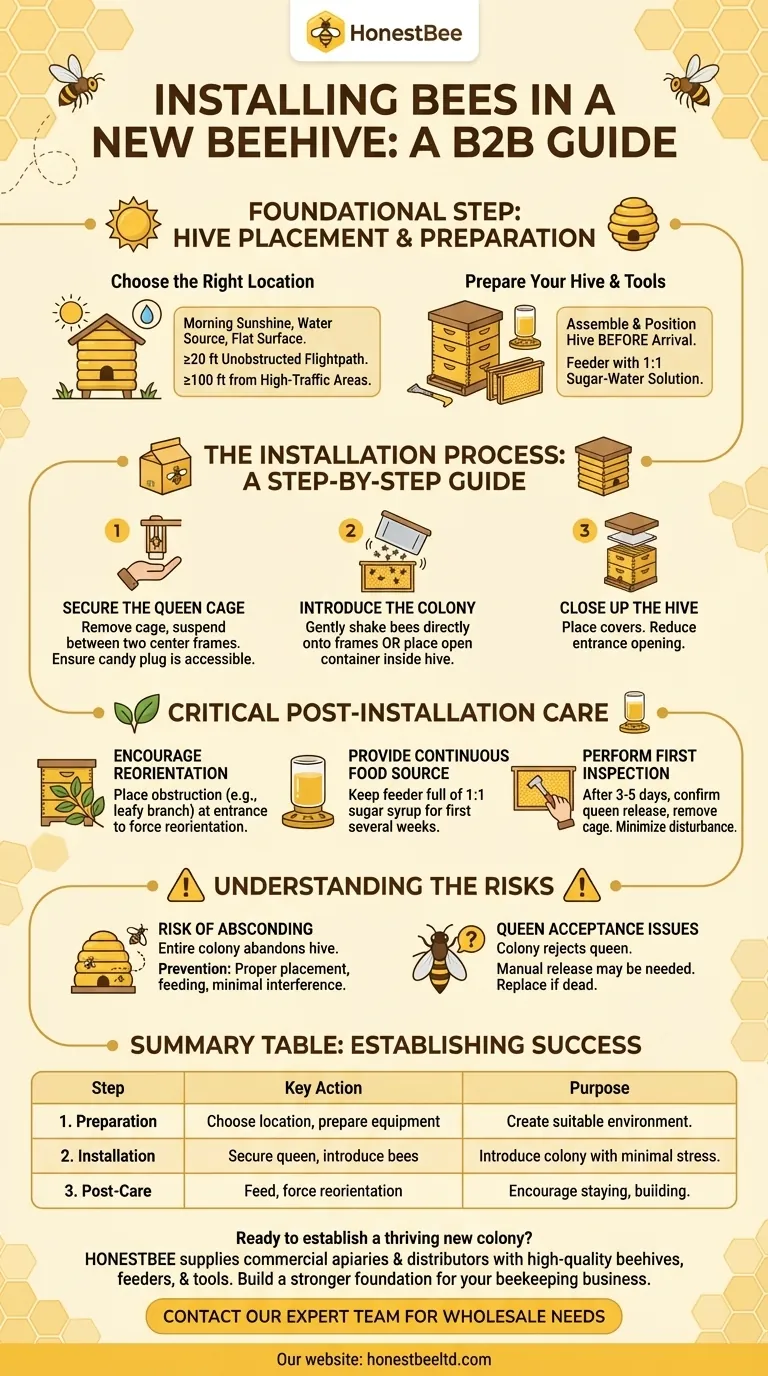
Foundational Step: Hive Placement and Preparation
Before your bees arrive, the success of your new colony depends entirely on the environment you create for them. A well-placed hive is the first and most critical step.
Choose the Right Location
The ideal location is not a matter of convenience; it is a matter of bee biology. Your hive should have morning sunshine to encourage foraging, a nearby water source, and a flat, level surface.
Ensure the hive has at least 20 feet of unobstructed flightpath in front of its entrance. For safety and to prevent nuisance issues, place it at least 100 feet from high-traffic areas like sidewalks or patios.
Prepare Your Hive and Tools
Have your hive completely assembled and positioned before you pick up your bees. This minimizes stress on the bees and on you.
You will also need a feeder filled with a 1:1 sugar-water solution. A new package of bees has no food stores and will need this energy to begin building comb immediately.
The Installation Process: A Step-by-Step Guide
The goal of installation is to move the bees into their new home with minimal stress, encouraging them to accept the queen and the location. This process is best done in the late afternoon when the bees are naturally less active.
Secure the Queen Cage
Your package of bees will arrive with the queen in a separate small cage, typically plugged with a sugar candy cork.
Gently remove the queen cage. Using a thumbtack or the cage's metal tab, suspend it between two frames in the center of your hive box. Ensure the candy-plug end is accessible so the worker bees can chew through it to release her over a few days.
Introduce the Colony
With the queen in place, it is time to add the rest of the bees. You can do this by firmly shaking the open transport container, dumping the bees directly on top of the frames.
While this method is fast, a gentler alternative is to simply place the open container inside an empty hive box set on top of your main hive body. The bees will migrate down to the queen on their own overnight.
Close Up the Hive
Once the bees are inside, place the inner and outer covers on the hive. Reduce the entrance opening to its smallest size to help the small colony defend itself.
Critical Post-Installation Care
The first few days are the most vulnerable period for a new colony. Your actions now determine whether they will stay and build a productive hive.
Encourage Reorientation
Bees have an excellent internal GPS. To prevent them from returning to their old location or drifting away, you must force them to reorient.
Place an obstruction like a leafy branch or a tuft of grass lightly in front of the hive entrance. This disrupts their normal flight path, forcing them to take note of their new surroundings and mark it as home.
Provide a Continuous Food Source
A new package of bees has an immense amount of work to do. They must produce wax, build comb, and begin raising brood.
They cannot do this without a consistent source of carbohydrates. Keep their feeder full of 1:1 sugar syrup for the first several weeks until they have drawn out several frames of comb and are actively foraging.
Perform the First Inspection
After three to five days, perform a quick inspection. Your only goals are to confirm the queen has been released from her cage and to remove the empty cage. Do not disturb the frames more than necessary.
Understanding the Risks
Even with perfect technique, challenges can arise. Understanding them helps you respond effectively.
The Risk of Absconding
Absconding is when the entire colony abandons the hive. This can happen if the queen is not accepted, if they are overly disturbed, or if they feel the location is unsuitable. Proper placement, feeding, and minimal interference are the best prevention.
Queen Acceptance Issues
Occasionally, the colony will not accept the new queen. During your first inspection, if the queen is not released, you may need to manually release her by removing the candy plug. If you find her dead, you will need to acquire a new queen immediately.
Making the Right Choice for Your Goal
Your approach should be guided by your primary objective for the new colony.
- If your primary focus is a smooth and low-stress installation: Prepare your location and all equipment days in advance and choose a calm, late afternoon for the installation.
- If your primary focus is long-term colony survival: Prioritize post-installation care, especially consistent feeding and forcing reorientation with an entrance obstruction.
- If your primary focus is rapid colony growth: Ensure the queen is released successfully and the bees have a constant, uninterrupted supply of sugar syrup to fuel comb construction.
Ultimately, establishing a new beehive is about creating an ideal environment where a colony feels secure enough to build its home.
Summary Table:
| Step | Key Action | Purpose |
|---|---|---|
| 1. Preparation | Choose a sunny, sheltered location with a clear flight path. | Create a secure and suitable environment for the colony. |
| 2. Installation | Secure the queen cage between frames, then gently shake in the worker bees. | Introduce the colony to the hive with minimal stress. |
| 3. Post-Care | Provide a sugar-water feeder and place an obstruction at the entrance. | Encourage the bees to stay, reorient, and begin building comb. |
Ready to establish a thriving new colony? The right equipment is fundamental to success. HONESTBEE supplies commercial apiaries and beekeeping equipment distributors with high-quality, durable beehives, feeders, and essential tools through our wholesale-focused operations. Let us help you build a stronger foundation for your beekeeping business.
Contact our expert team today to discuss your wholesale needs and ensure your next installation is a success.
Visual Guide
Related Products
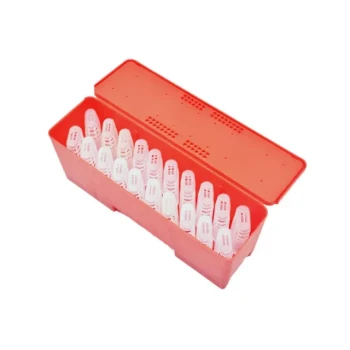
- Plastic Transporting Bee Packages and Nuc Boxes for Beekeeping
- Australian Langstroth Beehive Boxes for Beekeeping Wholesales
- JZBZ Style Professional Battery Box with 20 Shipping Cages
- High-Performance Langstroth Bee Hives for Global Professional Beekeeping
- Styrofoam Mini Mating Nuc Box with Frames Feeder Styrofoam Bee Hives 3 Frame Nuc Box
People Also Ask
- What are beekeeping boxes called? A Guide to Hive Bodies and Box Types
- What is the commercial value of using standardized bee packages? Drive Scalability in Large-Scale Apiaries
- How do standardized bee packages serve as a recovery mechanism for commercial beekeeping? Ensure Business Continuity
- What is the typical worker bee population in package bees vs nucleus colonies? Choose the Right Start for Your Hive
- Why is the timely introduction of high-quality bee packages critical? Save Your Apiary from Asian Hornet Invasions