To install a double jar or hive top feeder in a Langstroth hive, you must construct a temporary, protected "feeding attic" above the colony. Specifically, place the inner cover on the top-most occupied box, position the feeder directly over the cover's central hole, surround the feeder with an empty hive body, and cap the entire assembly with the outer cover.
Core Takeaway: The "shell method" of installation prioritizes colony security and climate control. By enclosing the feeder within an empty box, you protect the syrup from external robbers and utilize the hive’s rising heat to keep the feed viscous and accessible.
The Installation Hierarchy
Correct installation relies on a specific vertical stacking order. This ensures the bees can access the food without exposing the colony to the elements.
1. The Foundation: The Occupied Box
Begin with your standard hive configuration. Ensure the top-most box containing bees is level. This is the ceiling of the bees' living quarters and the floor of your feeding station.
2. The Interface: The Inner Cover
Place the inner cover directly on top of the occupied box. The central hole in this cover acts as the traffic chokepoint. It allows bees to move up to the feed while maintaining the colony's internal temperature.
3. Positioning the Feeder
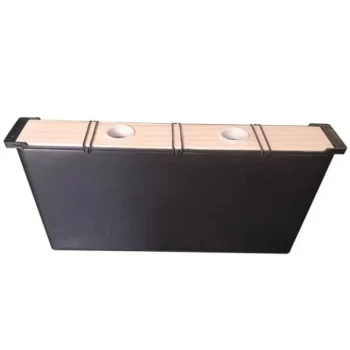
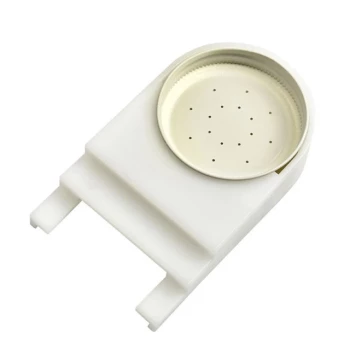
Set the double jar feeder or hive top feeder directly over the inner cover’s central hole.
- For Jar Feeders: The perforated lids must face down, sitting directly over the opening so bees can draw syrup through the holes.
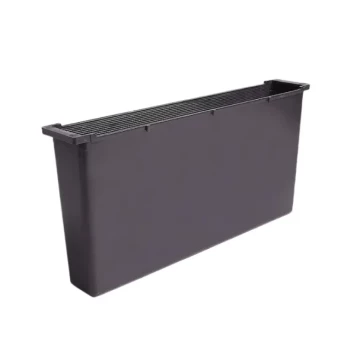
- For Tray/Top Feeders: Align the access channel with the hole in the inner cover.
4. The Protective Shell
Place an empty hive box (a deep or medium super with no frames inside) on top of the inner cover. This box surrounds the feeder completely. Its sole purpose is to create a physical barrier between the feeder and the outside world.
5. The Final Seal
Place the telescoping outer cover (the roof) on top of the empty hive box. This weather-proofs the system and prevents rain or pests from entering the feeding chamber.
Why Internal Feeding Matters
While you can slide a feeder into the hive entrance, the top-feeder configuration offers distinct advantages regarding hive physics and biology.
Heat Conservation
Heat naturally rises within a hive. By placing the feeder at the very top, the colony's generated warmth keeps the syrup at an ambient temperature. This is critical in cooler weather, as cold syrup can prevent bees from feeding.
Robbing Prevention
Entrance feeders emit the scent of sugar syrup directly at the front door, inviting wasps and robber bees from other colonies. Top feeders conceal this scent inside the hive. This significantly reduces the likelihood of inducing a robbing frenzy, which can destroy a weak colony.
Understanding the Trade-offs
While the top-feeding method is generally superior for hive health, there are logistical considerations to keep in mind.
Equipment Dependency
This method requires spare equipment. You must have an extra hive body available to act as the shell. If you are running short on woodenware, you cannot install this feeder type correctly.
Inspection Logistics
To inspect the colony, you must remove the outer cover, the empty shell, and the feeder itself. This adds weight and complexity to routine inspections compared to entrance feeders, which can simply be pulled out.
Making the Right Choice for Your Goal
- If your primary focus is Colony Security: Use the hive top/jar feeder method described above to minimize scent leakage and prevent robbing.
- If your primary focus is Minimal Equipment: Use an entrance feeder, provided the colony is strong enough to defend the front door against robbers.
By properly enclosing your feeder, you turn a simple maintenance task into a strategic advantage for your colony's growth.
Summary Table:
| Installation Step | Component | Purpose |
|---|---|---|
| 1. Foundation | Level Occupied Box | Provides a stable base for the feeding attic. |
| 2. Interface | Inner Cover | Acts as a thermal barrier and traffic chokepoint for bees. |
| 3. Feeder | Jar or Tray Feeder | Placed over the central hole for direct bee access. |
| 4. Protection | Empty Hive Body | Creates a protective shell against weather and robbers. |
| 5. Seal | Outer Cover | Weather-proofs the system and secures the feeding chamber. |
Scale Your Beekeeping Operation with HONESTBEE
Maximize your colony's growth and productivity with professional-grade equipment. HONESTBEE specializes in serving commercial apiaries and distributors by providing high-capacity machinery and durable hive components. From advanced hive-making and honey-filling machines to essential consumables and specialized hardware, we offer a comprehensive wholesale portfolio designed for efficiency.
Partner with a supplier that understands the demands of large-scale beekeeping. Contact HONESTBEE today to discuss our wholesale offerings and how our equipment can streamline your operations.
Related Products
- HONESTBEE Professional Hive Top Bee Feeder Feeding Solution
- Professional Hive Top Bee Feeder for Beekeeping
- HONESTBEE Square Top Hive Bee Feeder Top Bee Feeder
- HONESTBEE Round Hive Top Bee Feeder for Syrup
- Rapid Bee Feeder White Plastic 2L Round Top Feeder for 8 or 10-Frame Bee Hives
People Also Ask
- Do I need an inner cover with a hive top feeder? Optimize Your Hive Setup for Healthy Bees
- What is a hive top feeder? A Guide to Efficient, Low-Stress Beekeeping
- What is a top feeder and how is it designed? Maximize Hive Feeding Efficiency
- How do you use a top feeder for bees? Expert Guide to Installation and High-Volume Hive Feeding
- What are the characteristics, advantages, and disadvantages of hive top feeders? Optimize Your High-Volume Feeding