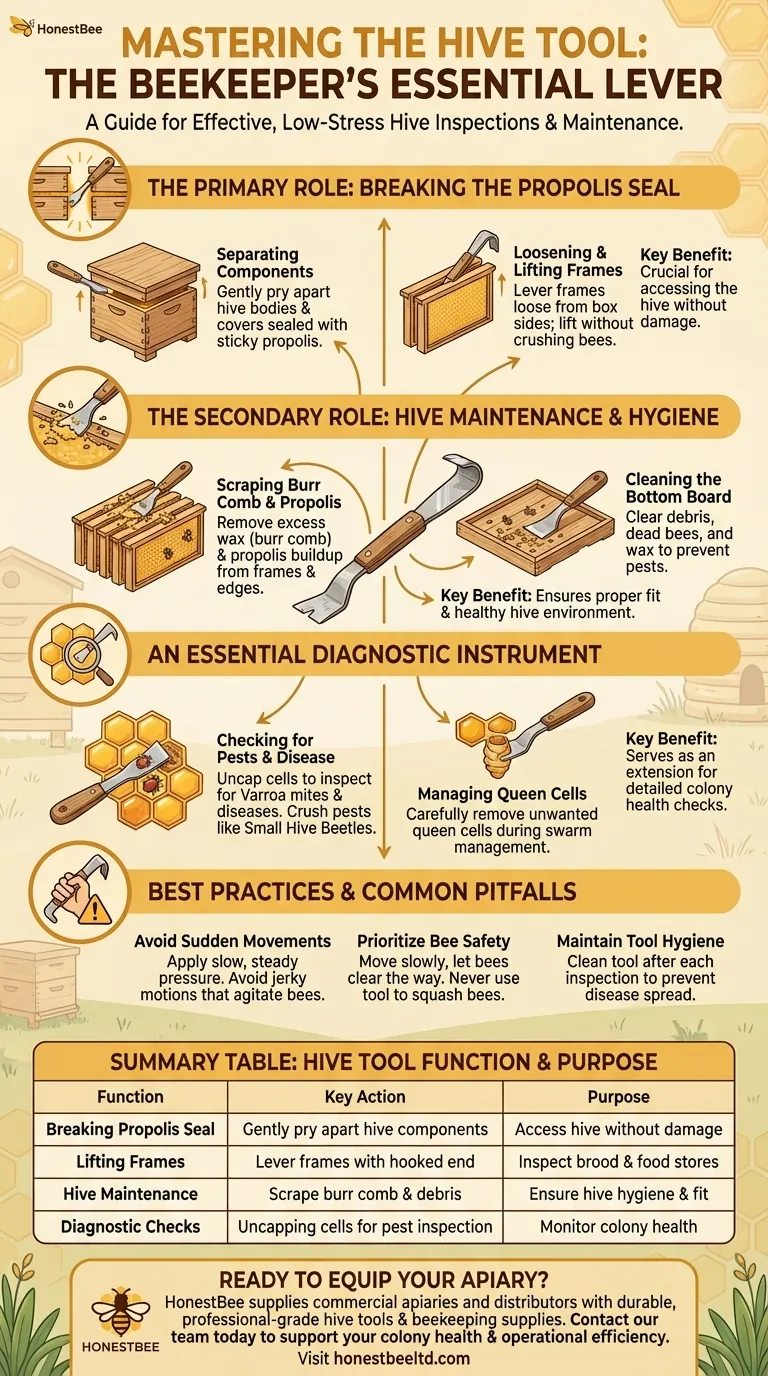
A hive tool is the beekeeper's essential lever, used to carefully separate hive components and lift frames that bees have sealed together with a sticky resin called propolis. It allows you to perform a thorough inspection of the colony's health, food stores, and population without causing unnecessary damage or stress to the bees.
The hive tool is not merely a pry bar; it is a multi-purpose instrument for manipulating, cleaning, and diagnosing the hive. Understanding its various functions is fundamental to conducting an effective and minimally disruptive bee inspection.
The Primary Role: Breaking the Propolis Seal
Bees use propolis, a mixture of tree resin and beeswax, to seal every crack and seam inside their hive. This makes the hive incredibly secure and weather-tight but also glues all the components—lids, boxes, and frames—firmly together.
Separating Hive Bodies and Covers
Your first action during an inspection is to break the seal between the top cover and the main hive body. This is done by gently inserting the flat end of the hive tool into the seam and applying steady pressure to pry them apart.
Loosening and Lifting Frames
Frames are often tightly packed and sealed with both wax and propolis. The hive tool is used to gently pry the first frame loose from the side of the box, creating enough space to lift it out for inspection without rolling or crushing bees. The hooked end of a J-hook style tool is specifically designed to lever frames up from their resting place.
The Secondary Role: Hive Maintenance and Hygiene
A clean and well-maintained hive is crucial for bee health and makes future inspections easier. The hive tool is your primary instrument for this task.
Scraping Propolis and Burr Comb
Bees will often build burr comb in any space that is larger than the ideal "bee space." This excess wax, along with built-up propolis, must be scraped away from frame tops and the edges of the hive boxes. This ensures frames fit properly and boxes stack flush.
Cleaning the Bottom Board
The flat edge of the tool is perfect for scraping debris, dead bees, and wax off the hive's bottom board. This cleaning action helps prevent the buildup of pests and diseases.
An Essential Diagnostic Instrument
Beyond prying and scraping, the hive tool serves as an extension of the beekeeper's senses, allowing for detailed diagnostic checks.
Checking for Pests and Disease
The sharp edge of the tool can be used to uncap a few cells of drone or worker brood. This allows you to inspect the developing pupae for signs of parasitic Varroa mites, one of the most significant threats to honey bees. It can also be used to crush pests like the Small Hive Beetle.
Managing Queen Cells
If necessary, the tool can be used to carefully nick or remove unwanted queen cells during swarm management, helping to direct the colony's reproductive impulses.
Best Practices and Common Pitfalls
Using the tool effectively requires a combination of force and finesse. Mishandling it can harm your bees and your equipment.
Avoid Sudden, Jerky Movements
Always apply slow, steady pressure when prying components apart. Sudden movements can jar the hive, agitate the bees, and cause the tool to slip, potentially damaging the woodenware or crushing bees.
Prioritize Bee Safety
Always be aware of where your tool is and where the bees are. When scraping frames, move slowly and give the bees a chance to get out of the way. Never use the tool to squash bees unnecessarily.
Maintain Tool Hygiene
Propolis and wax can harbor disease spores. After inspecting a hive, especially one you suspect is sick, scrape your hive tool clean. A wash with a baking soda solution can help remove residue and prevent the spread of pathogens between your colonies.
Applying the Tool to Your Inspection Goal
How you use the hive tool depends on the purpose of your inspection.
- If your primary focus is a quick population check: Use the tool to crack the seal between boxes just enough to peer down and assess the number of bees.
- If your primary focus is a full brood inspection: Use the hooked or bent end to carefully lift individual frames from the brood chamber to look for the queen, eggs, and larvae.
- If your primary focus is preparing for a honey harvest: Use the flat edge to scrape the tops of frames clean of burr comb and propolis before adding a new honey super.
Mastering the hive tool is the first step toward becoming a confident, effective, and gentle beekeeper.
Summary Table:
| Hive Tool Function | Key Action | Purpose |
|---|---|---|
| Breaking Propolis Seal | Gently pry apart hive components | Access the hive without damage |
| Lifting Frames | Lever frames with the hooked end | Inspect brood and food stores |
| Hive Maintenance | Scrape burr comb and debris | Ensure hive hygiene and proper fit |
| Diagnostic Checks | Uncapping cells for pest inspection | Monitor colony health and disease |
Ready to Master Your Hive Inspections?
A reliable hive tool is the foundation of effective beekeeping. HONESTBEE supplies commercial apiaries and beekeeping equipment distributors with durable, professional-grade hive tools and essential beekeeping supplies through our wholesale-focused operations.
Let us equip you for success. Contact our team today to discuss your needs and discover how our products can support the health of your colonies and the efficiency of your operations.
Visual Guide
Related Products
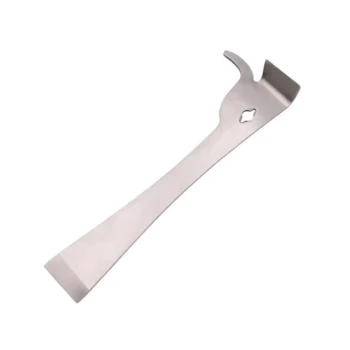
- HONESTBEE Professional Long Handled Hive Tool with Precision Cutting Blade
- Professional Multi-Function Stainless Steel Hive Tool
- HONESTBEE Premium Italian Style Hive Tool with Hardwood Handle
- Ergonomic Plastic Frame Spacer Tool for Rapid Hive Management Beekeeping
- Professional Grade Foldable Beehive Handles
People Also Ask
- Why are professional hive tools considered indispensable? Master Beekeeping Maintenance with Precision Leverage
- What are the different types of hive tools available? Choose the Right Tool for Your Apiary
- What are the common construction features of hive tools? Key Insights for Superior Beekeeping Efficiency
- Why are professional hive tools & observation equipment necessary for queen rearing evaluation? Master Your Quality
- Which intervention materials and management tools are used in commercial apiaries? Protect Your Bees from Pesticides