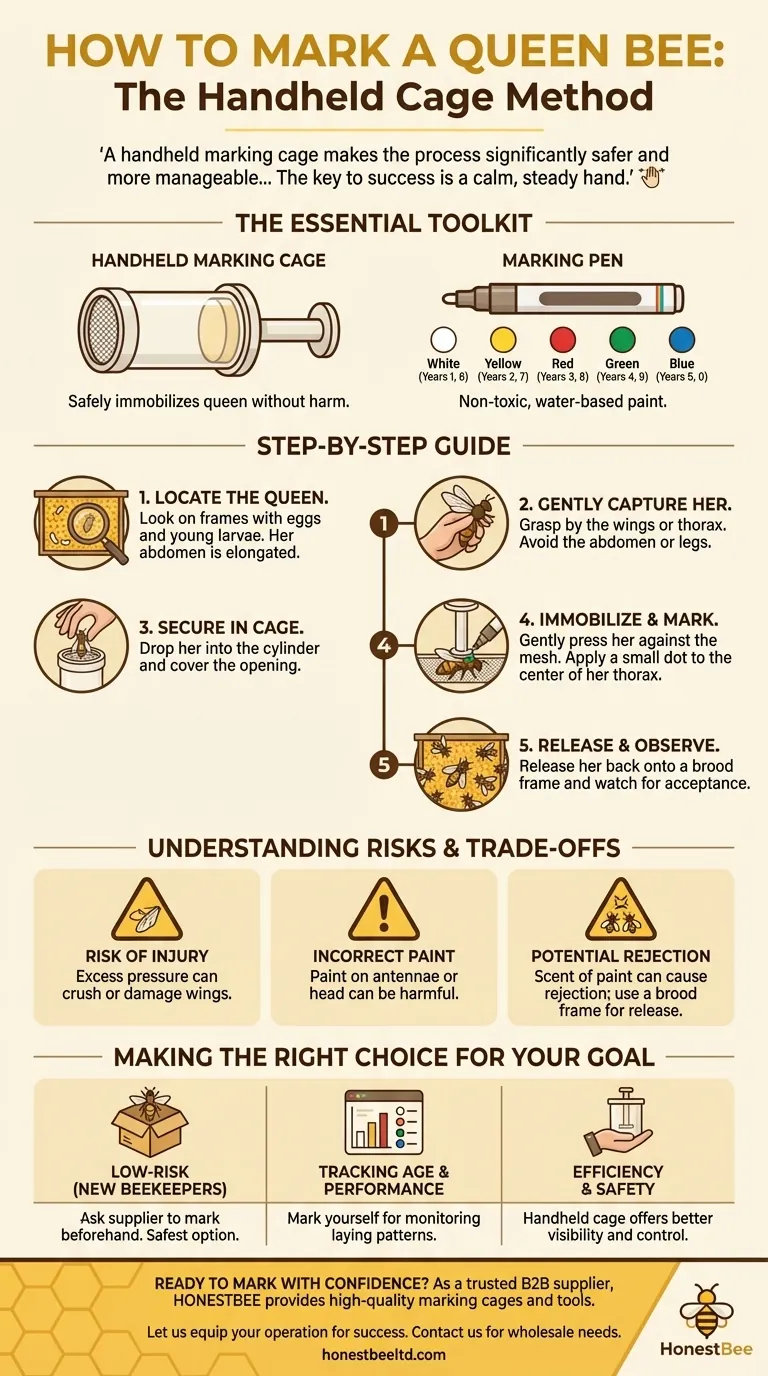
To mark a queen bee using a handheld cage, you must first locate and gently capture her, ideally by the wings. Place her into the cage’s cylinder, use the foam-tipped plunger to gently press her against the top mesh, and apply a small dot of non-toxic paint to her thorax. After the paint is applied, you can release her back onto the frame within the hive.
A handheld marking cage makes the process significantly safer and more manageable than marking by hand. The key to success is not speed, but a calm, steady hand that prioritizes the queen's safety at every step.
The Essential Toolkit for Queen Marking
Before you open the hive, ensure you have the correct tools prepared and within reach. Fumbling for equipment mid-process increases stress for both you and the bees.
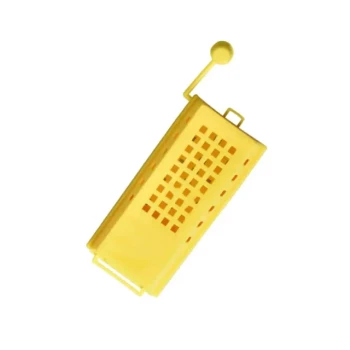
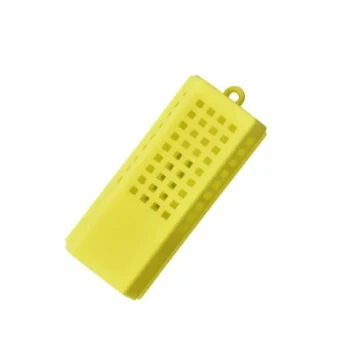
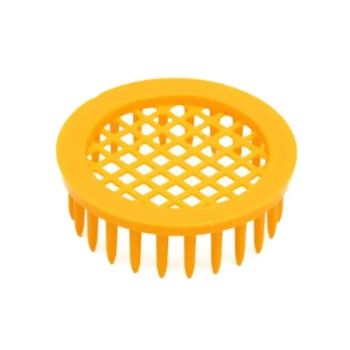
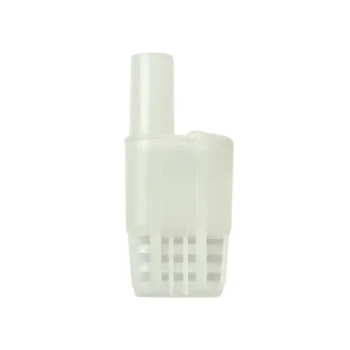
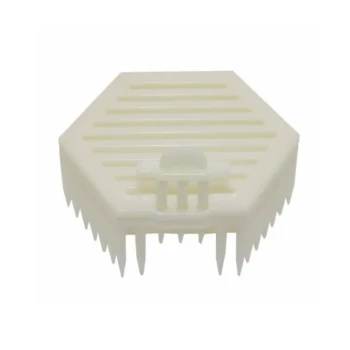
The Handheld Marking Cage
This device is your most important tool. It typically consists of a plastic cylinder with a mesh grid or parallel bars at one end and a soft, foam-tipped plunger that slides inside.
The design allows you to safely immobilize the queen against the grid without harming her. The openings are large enough to apply the marking pen but too small for her to escape.
The Marking Pen
Always use a non-toxic, water-based paint pen designed specifically for marking queen bees. These pens come in an international color code system to help you track the queen's age at a glance.
The color corresponds to the last digit of the year she was hatched or introduced:
- White: Years ending in 1 or 6
- Yellow: Years ending in 2 or 7
- Red: Years ending in 3 or 8
- Green: Years ending in 4 or 9
- Blue: Years ending in 5 or 0
A Step-by-Step Guide to Marking Your Queen
Patience is paramount. Work on a calm, sunny day when the bees are actively foraging, as the hive will be less defensive.
Step 1: Locate the Queen
Begin your inspection, calmly moving from one frame to the next. Look for the queen on frames containing eggs and young larvae. Her elongated abdomen and distinct movement pattern make her stand out.
Step 2: Gently Capture the Queen
Once you find her, hold the frame with one hand. With your other hand, gently pick up the queen. The safest method is to grasp her by both wings or by the sides of her thorax. Avoid picking her up by the legs or abdomen, which are fragile.
Step 3: Secure Her in the Marking Cage
Carefully place the frame back in the hive or set it down securely. Drop the queen into the open cylinder of the marking cage and immediately cover the opening with your thumb.
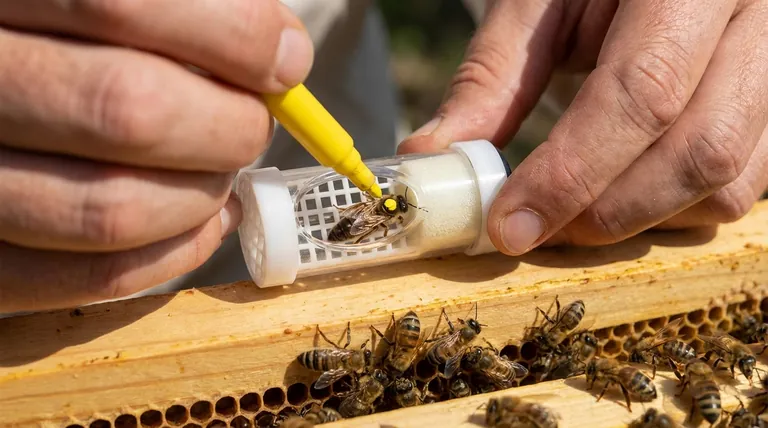
Step 4: Immobilize and Mark the Thorax
Insert the plunger into the cylinder and slowly push it forward until the foam tip gently presses the queen against the top mesh. Her thorax—the middle section of her body between the head and abdomen—should be visible and still.
Apply a single, small dot of paint to the center of her thorax. Do not use too much paint, as it can block her breathing spiracles or run onto her wings.
Step 5: Release Her Back onto the Frame
Withdraw the plunger slightly to give her space. After a moment, remove the plunger and gently tip the cage to release her back onto the same frame she came from, preferably over an area of open brood. Observe for a minute to ensure the other bees accept her and begin cleaning her.
Understanding the Trade-offs and Risks
While a marking cage minimizes risk, the procedure is not without potential pitfalls. Awareness is the best way to prevent mistakes.
Risk of Injury to the Queen
The primary risk is physical harm. Pressing the plunger too hard can crush her or damage her wings. Always use minimal pressure—just enough to hold her still.
Applying Paint Incorrectly
Marking any part of her body other than the thorax is dangerous. Paint on her antennae can disrupt her senses, paint on her head can blind her, and paint on her abdomen or wing joints can impede function.
Potential for Queen Rejection
Occasionally, the scent of the paint can cause the worker bees to view the queen as a foreign intruder. Releasing her back onto a frame with brood and allowing the hive to re-acclimate to her typically prevents this rare but serious issue.
Making the Right Choice for Your Goal
Deciding whether and how to mark your queen depends on your experience level and management goals.
- If your primary focus is low-risk management (especially for new beekeepers): Ask your bee supplier to mark the queen before you receive her. This is the safest option and removes the pressure of doing it yourself.
- If your primary focus is tracking age and performance: Marking the queen yourself with the correct annual color is essential for monitoring her laying pattern and knowing when she may need to be replaced.
- If your primary focus is efficiency and safety: The handheld marking cage is superior to attempting to mark the queen by holding her in your fingers, as it provides better visibility and control.
Ultimately, mastering this skill will boost your confidence and deepen your understanding of the colony's health.
Summary Table:
| Step | Key Action | Important Detail |
|---|---|---|
| 1 | Locate the Queen | Look on frames with eggs and young larvae. |
| 2 | Capture the Queen | Gently grasp by the wings or thorax. |
| 3 | Secure in Cage | Place her in the cylinder and cover the opening. |
| 4 | Apply the Mark | Gently press her against the mesh; apply a small dot of non-toxic paint to the thorax. |
| 5 | Release & Observe | Release her back onto a brood frame and watch for acceptance. |
Ready to mark your queens with confidence and precision?
As a trusted supplier for commercial apiaries and beekeeping equipment distributors, HONESTBEE provides the high-quality, durable tools you need for successful hive management. Our handheld marking cages are designed for safety and ease of use, helping you protect your most valuable asset—your queen.
Let us equip your operation for success. Contact HONESTBEE today to discuss your wholesale needs for marking cages, paint pens, and other essential beekeeping supplies.
Visual Guide
Related Products
- One Hand Yellow Queen Marking Catcher Tube Cage Beekeeper Tool Accessory for Queen Bee
- Queen Bee Marking Tube Cage Bottle Catcher Holder with Clear Plastic Plunger Marker
- Plastic Queen Marking Tube Cage with Plunger for Beekeeping
- Plastic Long Marker Device for Catching and Marking Bees Queen Bee Marking Tube and Cage
- Plastic Queen Bee Catcher Marker Tube Holder for Queen Marking Bottle
People Also Ask
- Why are high-quality queen bee marking tools essential for pedigree tracking? Master Honey Bee Genetic Integrity
- What equipment is needed to mark a queen bee? A Simple 3-Tool Guide for Every Beekeeper
- What tools are recommended for marking queen bees? Safely Identify Your Queen with the Right Kit
- What are the steps to mark a queen bee? A Safe, 3-Step Guide for Beekeepers
- What tools are recommended for marking a Queen bee? Ensure a Safe and Successful Mark