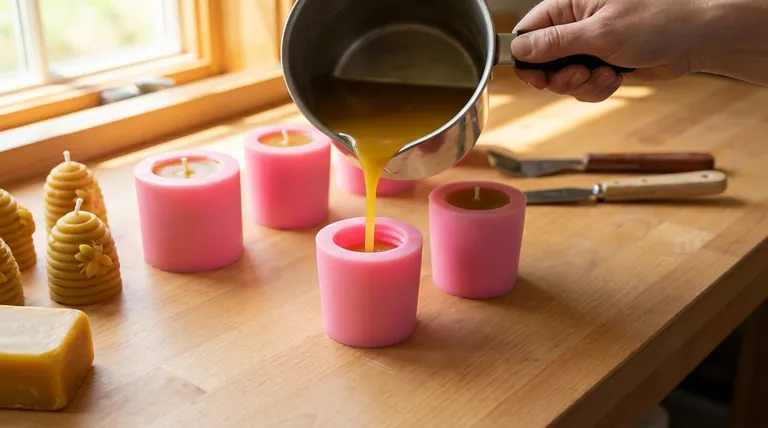
The key to a perfectly formed candle is a slow, steady pour into a properly prepared mold. This process involves pouring the melted wax in a single, continuous motion to the top of the mold. After a few minutes of cooling, you will likely need to perform a second, smaller pour to "top off" the candle and fill any sinkholes that form as the wax shrinks.
The act of pouring wax is not just about filling a container; it's a deliberate technique to manage heat, control airflow, and compensate for wax shrinkage. Mastering this process is the difference between a flawed candle and a professional-quality one.
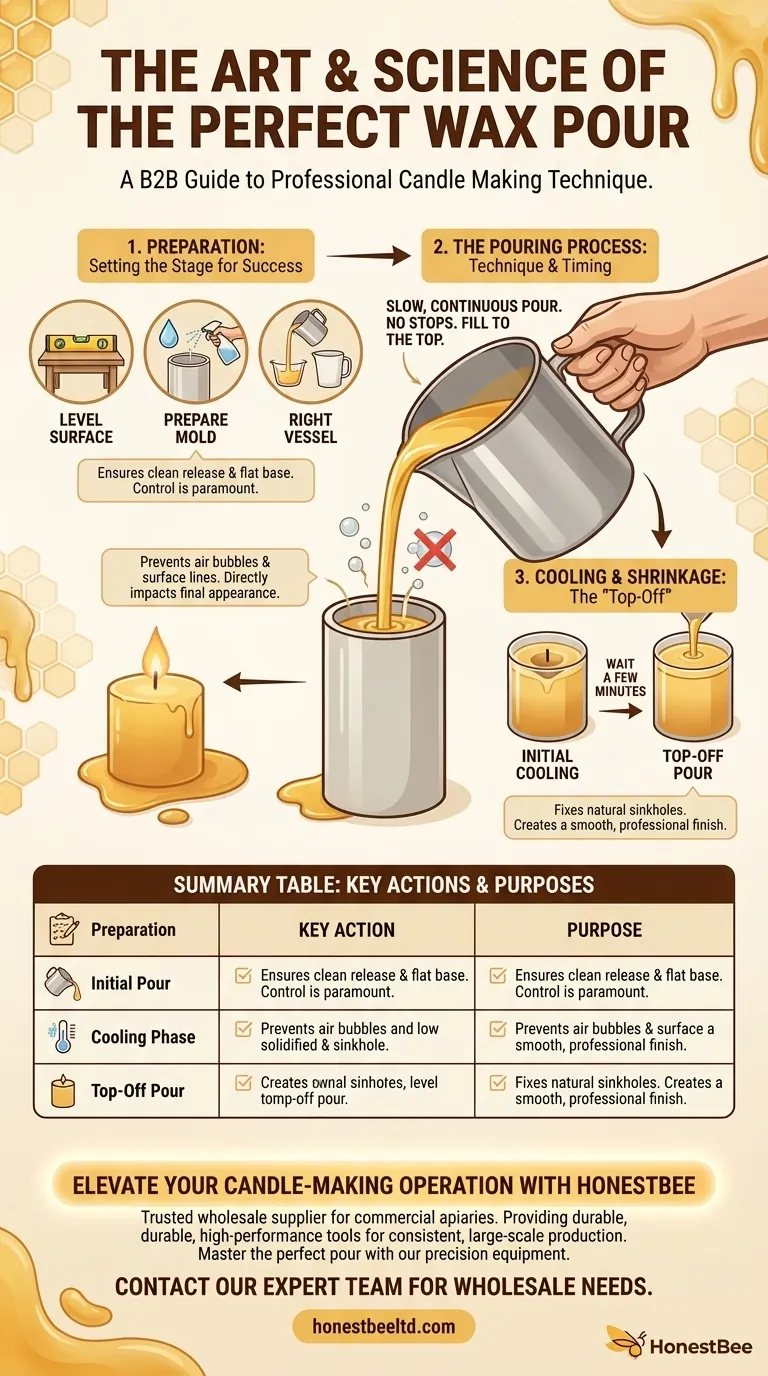
Preparation: Setting the Stage for Success
Before you even begin to pour, a few preparatory steps are essential for achieving a clean, well-formed result. These actions prevent common issues before they start.
Ensure a Level Surface
Your candle mold must be placed on a completely level surface. This ensures the candle solidifies with a flat base and stands straight.
Prepare Your Mold
To prevent the finished candle from sticking, some techniques can be used. For materials like beeswax, lightly spraying the inside of the mold with water can act as a simple release agent.
Use the Right Pouring Vessel
Control is paramount. Using a dedicated pouring pot with a spout, or even a large Styrofoam cup for smaller projects, gives you the precision needed for a smooth, splash-free pour.
The Pouring Process: Technique and Timing
The pour itself is the most critical phase. Your technique directly impacts the final appearance of the candle's surface.
The Importance of a Slow, Continuous Pour
Pour the melted wax into the mold slowly and steadily. A rush of wax can trap air, creating bubbles and pockets within your candle.
Pouring without stops and starts is equally important. Pausing mid-pour can create visible lines or layers on the surface of the finished candle.
Fill to the Top
Pour the wax until it reaches the very top of the mold. This ensures the candle is the intended size and provides enough wax to account for shrinkage during cooling.
Understanding the Trade-offs: Cooling and Shrinkage
Wax shrinks as it cools, which is a natural property you must manage. This shrinkage is most visible at the top of the candle.
The Initial Cooling Phase
Allow the candle to cool for a few minutes after the initial pour. You will notice the wax begin to solidify, often forming a dip or hole around the wick area.
Identifying and Fixing Sinkholes
This dip is called a sinkhole. It is a normal result of the wax pulling away from the center as it hardens. It is not a mistake, but rather a predictable event to be corrected.
The "Top-Off" Pour
To fix the sinkhole, gently pour a small amount of your remaining melted wax into the depression. This second pour fills the hole and creates a smooth, level top for your finished candle.
How to Apply This to Your Project
Your specific goal will determine which part of the process requires the most attention.
- If your primary focus is a flawless surface: Concentrate on a slow, continuous pour from a proper vessel to prevent air bubbles and seam lines.
- If your primary focus is a perfectly level top: Master the "top-off" pour to expertly correct the natural sinkhole that forms during cooling.
- If your primary focus is easy mold release: Do not skip the mold preparation step, such as using a light water spray for beeswax.
By treating the pour as a deliberate, multi-step process, you gain complete control over the final form and quality of your candle.
Summary Table:
| Step | Key Action | Purpose |
|---|---|---|
| Preparation | Level surface, prepare mold, use pouring pot | Ensures clean release and flat base |
| Initial Pour | Slow, continuous pour to the top of the mold | Prevents air bubbles and surface lines |
| Cooling Phase | Allow wax to cool for a few minutes | Lets natural shrinkage (sinkhole) form |
| Top-Off Pour | Pour a small amount of wax to fill the sinkhole | Creates a smooth, level top |
Ready to elevate your candle-making operation with professional-grade supplies?
As a trusted wholesale supplier for commercial apiaries and beekeeping equipment distributors, HONESTBEE provides the durable, high-performance tools you need for consistent, large-scale production. From precision pouring pots to reliable molds, our equipment is designed to help you master techniques like the perfect wax pour and achieve flawless results every time.
Contact our expert team today to discuss your wholesale needs and discover how our supplies can improve your efficiency and product quality.
Visual Guide
Related Products
- Steam Beeswax Melter Wax Warmer for Wax Processing
- Professional Stainless Steel Wax Melter for Beekeeping and Crafts
- Professional Frame Preparation: The HONESTBEE Electric Wire Embedder
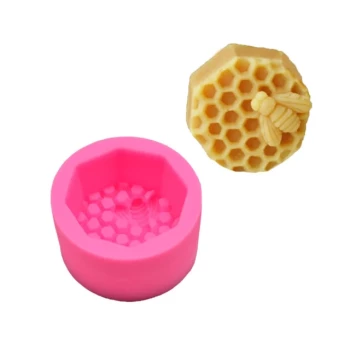
- Bee Floral Relief Silicone Mold for Artisan Soap Candle Making
- Beeswax Melter for Candle Making Honey Bee Wax Melter
People Also Ask
- How does a steam wax melter work? A Fast, Efficient Method for High-Quality Wax
- How do you melt beeswax without making a mess? Master Safe & Clean Techniques
- What are the three popular methods for melting beeswax? Safely Process Your Wax with Ease
- What safety precautions should be taken when melting beeswax? A Guide to Flammable Wax Handling
- How do steam wax melters function in the disinfection of apiary equipment? Achieve Chemical-Free Organic Sterilization