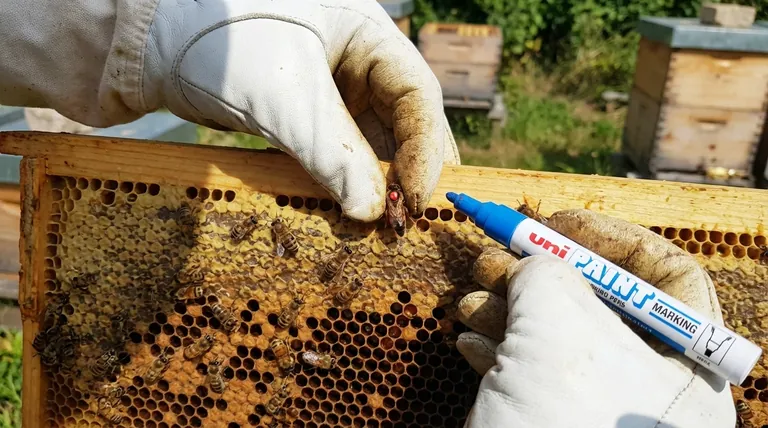
Handling a queen bee for marking demands precision and care. The primary precautions are to use a gentle but firm grip, apply paint only to the hard middle section of her back (the thorax), and avoid contact with her eyes, wings, or antennae. You must use minimal pressure and ensure the non-toxic paint is completely dry before carefully releasing her back into the hive to prevent injury or rejection by the colony.
The ultimate goal of marking is to improve hive management, not to endanger the queen. Success hinges on minimizing stress and physical risk by using the proper tools, a calm and deliberate technique, and a clear understanding of the potential dangers at each step.
Preparing for a Successful Marking
Before you even open the hive, proper preparation is essential. The right timing and the right tools set the stage for a low-stress procedure for both you and the queen.
Choosing the Right Moment
The most important timing consideration is the queen's maturity. You must avoid marking a newly hatched or virgin queen. Wait until after she has taken her mating flights and has begun to lay a consistent pattern of eggs.
Additionally, use minimal smoke when inspecting the hive. Excessive smoke can agitate the colony and cause the queen to run and hide, making her difficult to locate and capture safely.
Gathering Your Equipment
Having the correct tools ready is non-negotiable. You will need:
- A queen marking pen: Ensure it is non-toxic, water-based, and the correct color for the year.
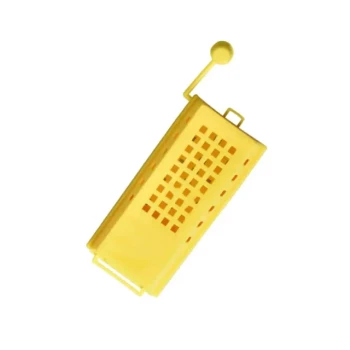
- A capture device: The two most common are a queen marking tube or a queen marker cage. These tools help immobilize her safely without direct handling.
The Handling and Marking Process
This is the most delicate phase of the operation. Each movement should be slow, deliberate, and gentle.
Safely Capturing the Queen
Your chosen tool will guide your technique. A queen marker cage is often safest for beginners, as you can gently press it into the comb over the queen, trapping her against the surface for marking.
A queen marking tube involves carefully guiding the queen into the tube and using a soft foam plunger to gently press her against a screen for marking.
Applying the Mark Correctly
Once the queen is immobilized, apply a small dot of paint to her thorax. The thorax is the hard, middle section of her body between her head and abdomen.
It is absolutely critical that no paint gets on her antennae, eyes, wings, or joints. A misplaced mark can blind her, impede her movement, or cause the other bees to identify her as foreign and kill her.
The Importance of a Calm Grip
If you must handle the queen directly, avoid thick leather gloves that reduce dexterity. Use thin gloves or your bare hands. A calm, steady grip is vital. Gently pick her up by her wings or thorax.
If she moves or grabs onto your finger, do not panic. A sudden, jerky reaction is more likely to cause injury than the queen's own movements.
Common Pitfalls and How to Avoid Them
Knowing what can go wrong is the best way to prevent it. Marking a queen carries inherent risks, but awareness can mitigate them almost entirely.
Preventing Queen Rejection
The most common cause of rejection is an improperly applied mark. If the paint's scent is too strong (because it isn't dry) or if it's on the wrong body part, worker bees may no longer recognize her scent and may "ball" and kill her.
Risk of Physical Injury
Applying too much pressure is the easiest way to harm a queen. Whether using a plunger or your fingers, the pressure should be just enough to hold her still. Never squeeze her abdomen, as this can permanently damage her reproductive organs.
Overheating and Stress
After marking, keep the queen confined for a few minutes to allow the paint to dry completely. During this time, keep her in the shade to prevent overheating, which can happen quickly.
Releasing the Queen Back to Her Colony
The final step is as critical as the marking itself. A successful release ensures she is accepted back into the nest without issue.
Allowing the Paint to Dry
Patience here is crucial. Wet paint can smear onto other bees, spreading a foreign scent and causing confusion or aggression within the colony. Give the paint several minutes to dry to the touch.
Ensuring a Safe Re-entry
Gently release the queen directly onto a frame of open brood. Do not simply drop her onto the top bars.
Once she is on the frame, carefully and slowly lower it back into the broodnest. Be mindful to avoid rolling or crushing her between frames as you close up the hive.
Making the Right Choice for Your Apiary
Your approach should match your experience level and comfort with handling bees.
- If you are a new beekeeper: Consider having your bee supplier mark the queen before delivery to eliminate all risk on your end.
- If you are ready to mark your own queen: Use a push-in queen marker cage, as this immobilizes her on the comb and is the safest method that avoids direct handling.
- If you are an experienced and confident handler: Gently picking the queen up provides maximum control but requires a practiced and steady hand.
A calm demeanor and the right technique will make marking your queen a safe and valuable part of your beekeeping practice.
Summary Table:
| Precaution | Key Action | Why It's Important |
|---|---|---|
| Timing & Preparation | Mark only mated, laying queens; use minimal smoke. | Reduces stress and makes the queen easier to handle safely. |
| Safe Capture | Use a marking tube or cage to immobilize the queen. | Prevents injury from direct handling and keeps her secure. |
| Correct Paint Application | Apply a small dot of non-toxic paint only to the thorax. | Avoids blinding, immobilizing, or causing rejection by the colony. |
| Gentle Handling | Use a calm, firm grip; avoid squeezing the abdomen. | Prevents fatal damage to her internal organs. |
| Safe Release | Ensure paint is dry; release her onto a frame of open brood. | Prevents paint smearing and ensures she is accepted back into the hive. |
Ensure Your Queen Marking Success with Professional Equipment
Marking your queen is a critical task for effective hive management. Using the right tools is the best way to minimize risk and ensure a successful outcome. HONESTBEE supplies commercial apiaries and beekeeping equipment distributors with the high-quality, wholesale-focused supplies needed for precise and safe beekeeping operations.
Let our expertise support your success. We provide the reliable marking tubes, cages, and non-toxic paints that professional beekeepers trust.
Contact HONESTBEE today to discuss your commercial or wholesale equipment needs and elevate your apiary management.
Visual Guide

Related Products
- Durable Galvanized Steel Spring Queen Bee Cage
- Portable Queen Bee Incubator with 12V Car Adapter for Safe Transport
- Professional Queen Bee Introduction and Transport Cage
- Heavy Duty Stainless Steel Queen Bee Catcher Clip
- Queen Bee Catcher Plastic Bee Marker Bottle with Piston Marking Tube
People Also Ask
- What is the mechanism of action for using temporary queen bee cages? Master Successful Queen Introduction
- What should be done if the queen is still inside her cage when the hive is inspected? Master Queen Introduction Safety
- Why are specialized queen bee cages used for the banking of mated queen bees? Maximize Commercial Apiary Storage Efficiency
- What is the optimal placement for a queen bee cage? Essential Strategies for Successful Re-queening
- What is the step-by-step process for installing a queen bee's cage onto a frame? Ensure Hive Acceptance Safely