Immediately after moving bees to a new hive, your primary actions are to provide food, secure the hive, and then leave the colony undisturbed. Ensure their feeder is full and correctly installed, reduce the hive entrance to a small opening of about two to three inches, and then step back. For the next several days, your role is one of quiet observation, not active intervention.
A newly hived bee colony is at its most vulnerable. Your immediate goals are not to manage them, but to support them by minimizing stress and creating a secure, defensible home so they can focus on their own critical tasks: establishing the queen and building out the comb.
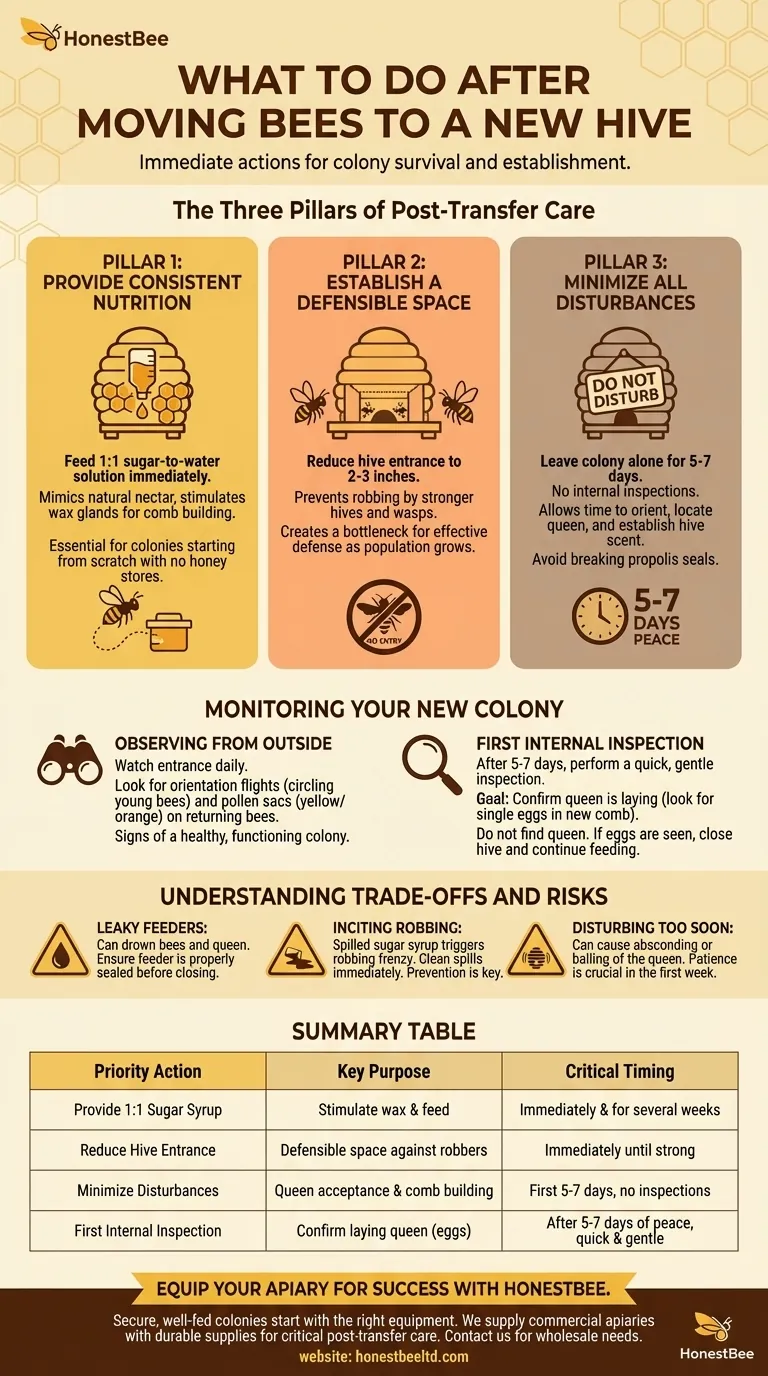
The Three Pillars of Post-Transfer Care
A successful transfer hinges on three simple but non-negotiable principles: providing food, ensuring security, and granting the bees peace to establish themselves.
Pillar 1: Provide Consistent Nutrition
A new colony has no honey stores. Whether you've installed a package or a nucleus hive (nuc), they are starting from scratch and need an immediate and reliable source of energy.
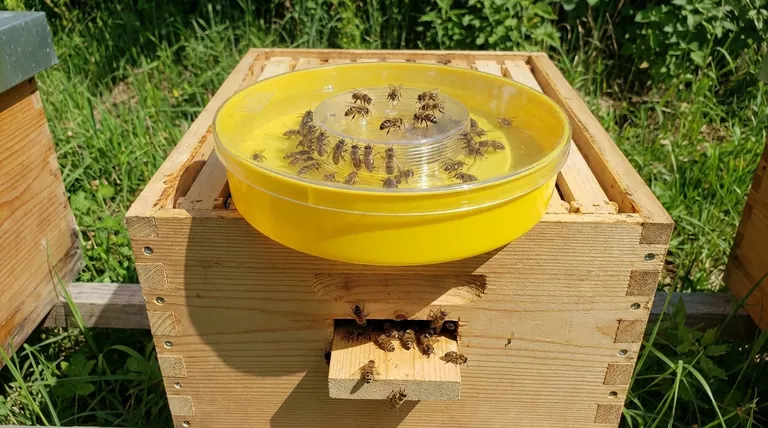
Your primary tool here is a feeder filled with a 1:1 sugar-to-water solution. This mimics natural nectar and stimulates the bees' wax glands, which is critical for building the comb that the queen needs to lay eggs.
Pillar 2: Establish a Defensible Space
A small, new colony cannot defend a large, open hive entrance. Leaving it wide open is an invitation for robber bees from stronger hives or other insects like wasps to invade and steal their precious resources.
To prevent this, you must reduce the hive entrance to a small opening, typically two to three inches wide. This creates a bottleneck that the new colony's guard bees can effectively defend as their population grows.
Pillar 3: Minimize All Disturbances
After being shaken, moved, and installed, the colony is in a state of high stress. They need time to orient themselves, locate and care for their queen, and establish the hive's unique scent.
Resist the urge to open the hive. Each inspection breaks the hive's propolis seals, releases heat and humidity, and disrupts the delicate process of the queen beginning to lay. For the first week, your work is done from the outside.
Monitoring Your New Colony
While you should not open the hive, you must still observe it. Your role shifts from an active manager to a vigilant guardian.
Observing from the Outside
Watch the hive entrance for a few minutes each day. You are looking for signs of a healthy, functioning colony.
Positive signs include orientation flights, where young bees circle in front of the hive to map its location. An even better sign, usually after a few days, is seeing bees returning with sacs of yellow, orange, or white pollen on their legs. This confirms they are feeding brood.
The First Internal Inspection
After five to seven days of being left alone, you can perform your first quick inspection. The weather should be warm and calm.
Your single goal is to confirm the queen is accepted and laying. You do not need to find the queen herself. Look for frames with newly drawn comb containing tiny, rice-like eggs, one per cell. If you see eggs, your job is done. Close the hive gently and continue feeding them.
Understanding the Trade-offs and Risks
Beginner enthusiasm can sometimes lead to actions that harm a new colony. Understanding the risks associated with common mistakes is crucial.
The Dangers of Leaky Feeders
While feeding is essential, a poorly installed or leaky feeder can be catastrophic. Syrup dripping down inside the hive can drown bees and, most critically, the queen.
Ensure your feeder is properly sealed and does not leak before you close up the hive. This is one of the most important checks to perform upon installation.
The Risk of Inciting Robbing
A reduced entrance is your primary defense against robbing, but spilling sugar syrup on or around the hive can trigger a "robbing frenzy" that a new colony cannot survive.
Be meticulous when filling feeders. If you spill any syrup, clean it up immediately. Robbing is extremely difficult to stop once it starts, so prevention is key.
Disturbing the Colony Too Soon or Too Often
Opening the hive too early can cause several negative outcomes. The bees may become stressed and "abscond," abandoning the hive entirely.
Frequent disturbances can also cause the workers to see the queen as a source of trouble, leading them to "ball" and kill her. Patience is a beekeeper's most valuable tool in the first week.
Making the Right Choice for Your Colony
Your immediate actions should be tailored to the fundamental need of every new colony: support and security.
- If your primary focus is the survival of a new package or nuc: Prioritize uninterrupted feeding with a 1:1 sugar syrup and maintain a reduced entrance for at least the first few weeks to maximize security and comb production.
- If your primary focus is verifying queen health: Wait 5-7 days before performing a quick, minimal inspection solely to confirm the presence of eggs, which indicates a laying queen.
- If your primary focus is preventing pests and robbing: Keep the area around the hive meticulously clean, with no spilled syrup, and ensure the hive entrance remains small enough for the colony to defend.
By providing these foundational supports, you empower your bees to do what they do best: build a thriving, self-sufficient colony.
Summary Table:
| Priority Action | Key Purpose | Critical Timing |
|---|---|---|
| Provide 1:1 Sugar Syrup | Stimulate wax production & feed a colony with no honey stores | Immediately after moving, continue for several weeks |
| Reduce Hive Entrance | Create a defensible space against robbers and pests | Immediately after moving, maintain until colony is strong |
| Minimize Disturbances | Allow queen acceptance, comb building, and colony scent establishment | First 5-7 days with no internal inspections |
| First Internal Inspection | Confirm queen is laying by looking for eggs in new comb | After 5-7 days of peace, be quick and gentle |
Equip your apiary for success with HONESTBEE. A secure, well-fed colony starts with the right equipment. We supply commercial apiaries and beekeeping equipment distributors with the durable, reliable supplies needed for critical post-transfer care—from secure feeders to hive parts. Let's discuss your wholesale needs and ensure your bees have the best foundation. Contact our team today to get started.
Visual Guide
Related Products
- Wholesales Dadant Size Wooden Bee Hives for Beekeeping
- Stainless Steel Round Beehive Air Vents for Ventilation
- Metal Bee Hive Stand Bee Box Stand for Beekeeping
- Durable Plastic Hive Number Set for Beekeeping
- Wooden Bee Hive Frames for Beekeeping and Wholesale
People Also Ask
- What are the 2 types of bee hives? Langstroth vs. Top-Bar for Your Apiary
- How does the design of improved beekeeping hives contribute to maintaining honey quality and purity? Enhancing Purity
- Why Increase Hive Installation Quantity in Commercial Apiaries? Offset Climate Risks with Scalable Infrastructure
- What are the key advantages of modern improved beekeeping hives? Scale Your Honey Yield and Production Efficiency
- What are the advantages of wooden bee hives? Superior Bee Health & Beekeeper Flexibility


