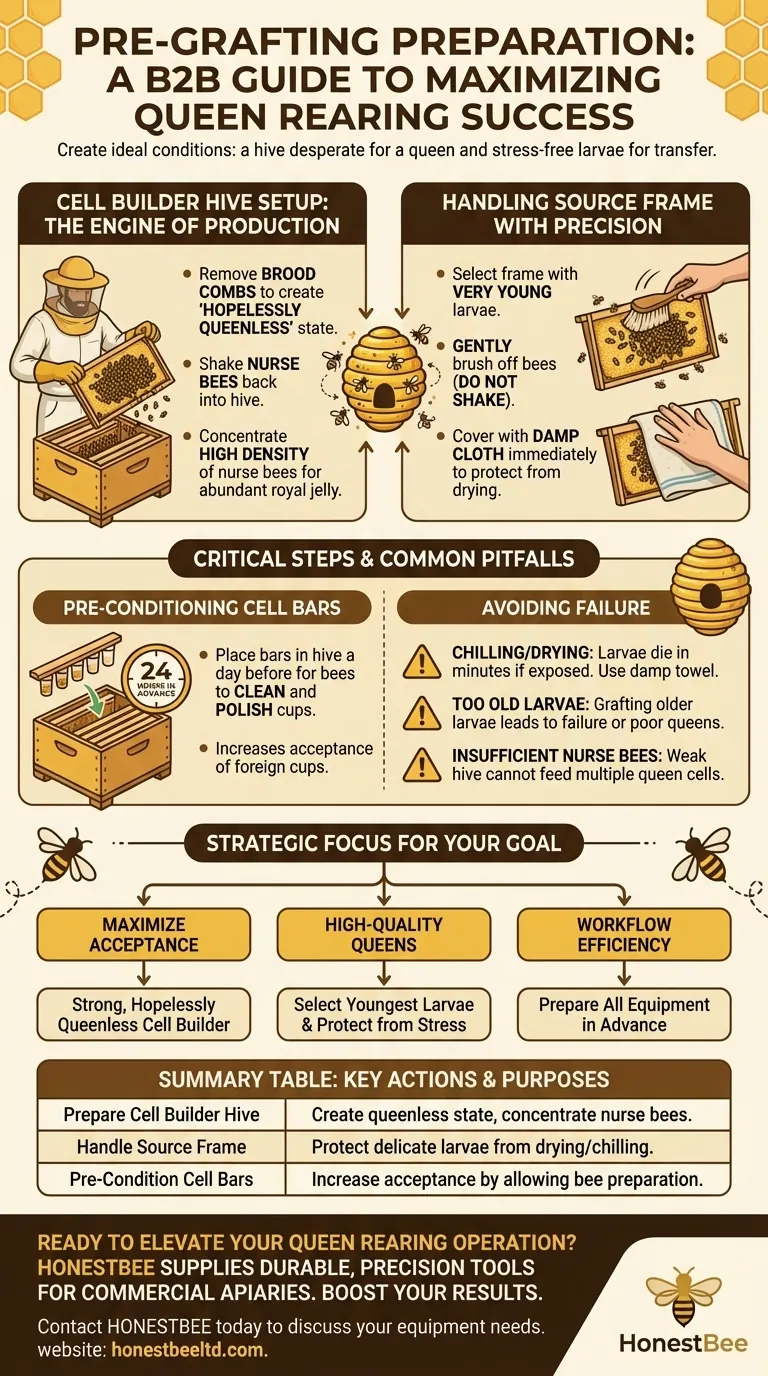
In the moments just before grafting, your focus shifts from long-term hive management to immediate, precise actions. You must prepare your "cell builder" hive by removing its brood combs and shaking all the nurse bees back inside, creating a powerful queen-rearing engine. Simultaneously, you must carefully handle the source frame of larvae, gently brushing away bees and covering it with a damp cloth to protect the delicate larvae from drying out.
The success of your graft is largely determined before you ever pick up a larva. The goal of pre-grafting preperation is to create two ideal conditions: a hive that is biologically desperate to raise a new queen and larvae that are kept in a perfect, stress-free state until the moment of transfer.
Understanding the Cell Builder Hive Setup
The "cell builder" or "starter" hive is the engine of queen production. Its condition right before you introduce the grafted cells is the single most important factor for success.
Creating a "Hopelessly Queenless" State
Just before grafting, you must remove any combs containing brood (eggs, larvae, pupae) from your starter hive.
This action makes the colony "hopelessly queenless." Without any of their own young eggs or larvae to raise a new queen from, their only option is to accept the cells you provide them.
Concentrating the Nurse Bees
When you remove the brood frames, gently shake or brush the attached bees back into the starter hive box.
This step is critical because it packs the hive with a high concentration of young nurse bees. These are the bees that produce the royal jelly needed to feed and develop your new queens. A high density of nurse bees ensures the grafted larvae receive immediate and abundant care.
Handling the Source Frame with Precision
The frame containing the larvae you will graft from is just as important as the hive they will go into. These larvae are extremely fragile.
Protecting Larvae from Exposure
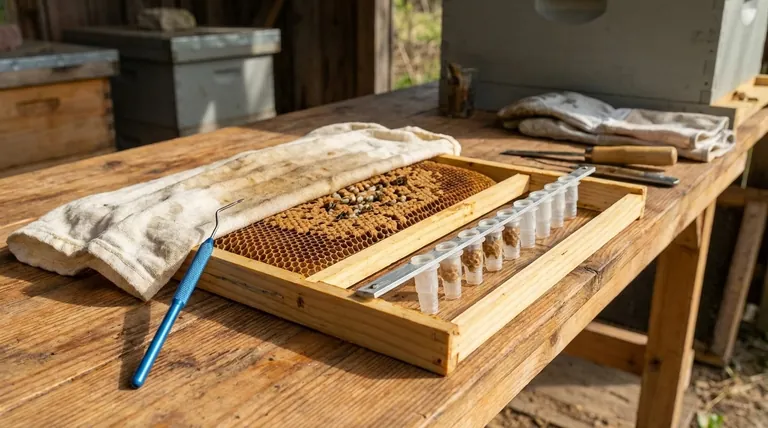
Once you select your source frame (containing larvae of the correct, very young age), you must protect it from the elements.
Gently brush the adult bees off the comb; shaking can dislodge or damage the larvae. Immediately drape a damp, clean towel over the frame to maintain high humidity and prevent the tiny larvae from drying out. This is a common point of failure.
Preparing the Cell Bars in Advance
While this is not an action for just before grafting, it is a critical preparatory step. The cell bars, which hold the plastic or wax cups for your grafts, must be placed into the cell builder hive at least 24 hours in advance.
This allows the bees to clean, polish, and coat the cups with their scent, a process often called "conditioning." This dramatically increases the chances that the bees will accept the foreign cups once a larva is placed inside.
Understanding the Trade-offs and Common Pitfalls
Meticulous preparation prevents common mistakes that lead to low acceptance rates or poor-quality queens. Avoiding these pitfalls is essential.
The Risk of Chilling or Drying Larvae
Larvae can die in minutes if they dry out or get too cold. Failing to use a damp towel or grafting in direct sun or wind will kill your larvae before they even make it into the cell builder hive.
Grafting Larvae That Are Too Old
The ideal larva for grafting is barely visible to the naked eye, floating in a pool of royal jelly, and is typically less than 24 hours old. Grafting older larvae will result in a high failure rate or, worse, poorly developed queens that are superseded quickly.
An Insufficient Nurse Bee Population
If your starter hive is weak or does not have a dense population of nurse bees, it will not have the resources to build and provision multiple queen cells. No amount of perfect technique can overcome a weak or poorly prepared cell builder.
Making the Right Choice for Your Goal
Your preparation can be tuned to your specific objective. A few key principles will guide your focus.
- If your primary focus is maximizing the cell acceptance rate: Concentrate on creating a strong, populous, and truly "hopelessly queenless" cell builder hive.
- If your primary focus is producing high-quality queens: Emphasize selecting the absolute youngest possible larvae and protecting them from any environmental stress during the transfer.
- If your primary focus is workflow efficiency: Ensure all your equipment, from pre-polished cell bars to your grafting station, is prepared days and hours in advance.
Ultimately, careful and deliberate preparation is what separates successful queen rearing from a frustrating exercise.
Summary Table:
| Pre-Grafting Action | Key Purpose | Critical Detail |
|---|---|---|
| Prepare Cell Builder Hive | Create a hopelessly queenless state | Remove all brood combs to force acceptance of grafted cells. |
| Concentrate Nurse Bees | Ensure abundant royal jelly | Shake bees from removed frames back into the hive. |
| Handle Source Frame | Protect larvae from stress | Gently brush off bees and cover frame with a damp cloth. |
| Pre-Condition Cell Bars | Increase cup acceptance | Place bars into the hive 24 hours in advance for bees to clean. |
Ready to Elevate Your Queen Rearing Operation?
Successful grafting starts with reliable, high-quality equipment. HONESTBEE supplies commercial apiaries and beekeeping equipment distributors with the durable, precision tools needed for every step of the queen-rearing process—from sturdy cell bars to protective grafting stations.
Let our wholesale-focused expertise support your success. Contact HONESTBEE today to discuss your equipment needs and boost your grafting results.
Visual Guide
Related Products
- Metal Hive Feet Bee Hive Stand for Ant Protection
- Heavy Duty Red Rubber Beekeeping Gloves with Vented Mesh Cotton Sleeves
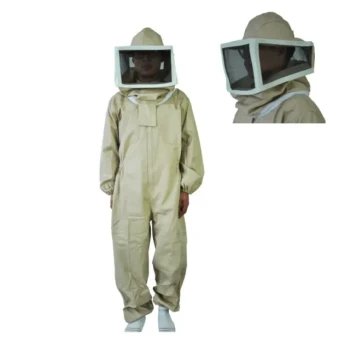
- Premium Cotton Beekeeper Suit with Reinforced Fencing Veil
- White Cotton Beekeeping Jacket and Veil for Bee Keepers
- Premium Cowboy Beekeeper Hat with Visibility Veil Outdoor Professional Beekeeping Protective Gear
People Also Ask
- Why install beehives on high-position stands > 1.3m? Effective Non-Lethal Defense Against Large Predators
- What to stand a beehive on? The Best Foundation for a Healthy, Manageable Apiary
- How do beehive stands and ground installation methods affect beekeeping productivity in extreme climates? Maximize Yields
- Besides using a guard, what is another method to prevent skunks from disturbing a beehive? Elevate for Better Protection
- How does a beehive stand protect against predators and pests? Essential Strategies for Colony Security