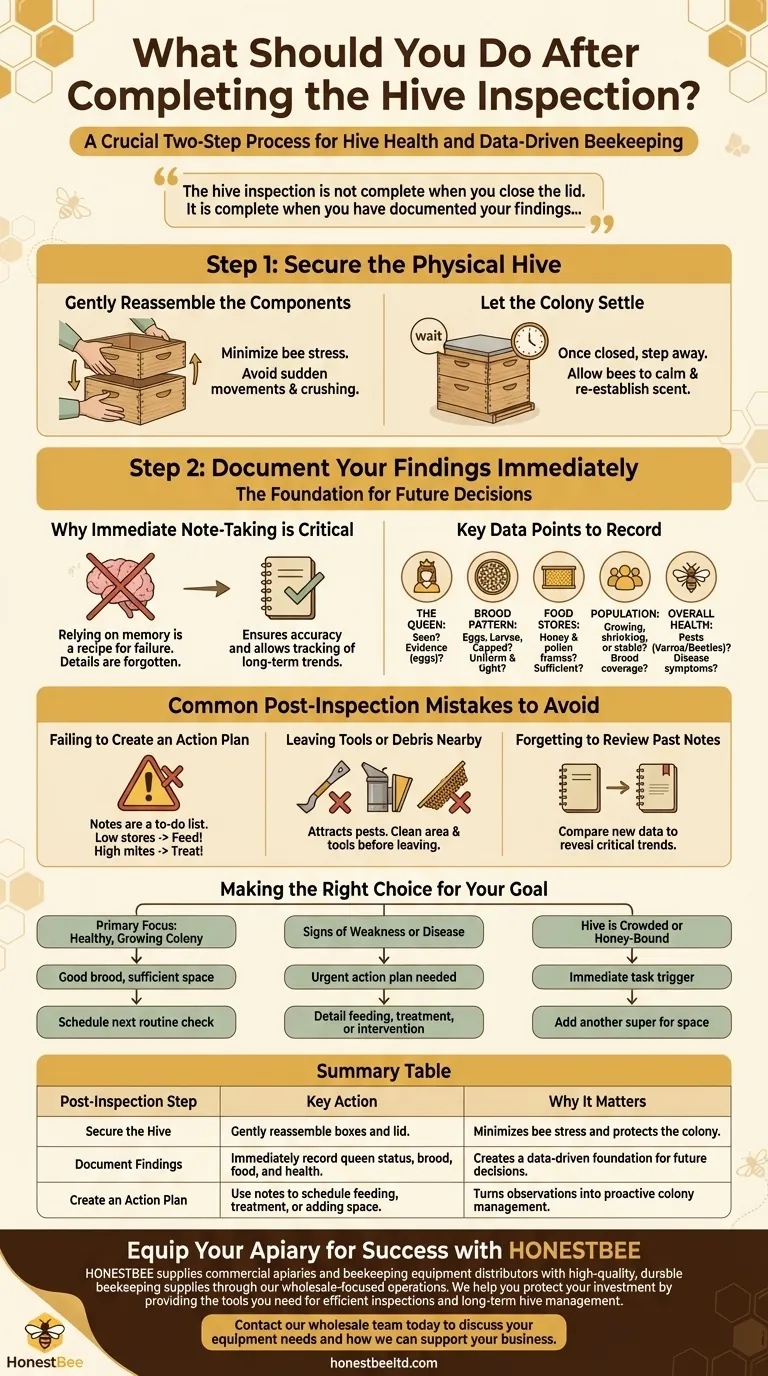
Once you’ve finished your inspection, your work is only halfway done. The most critical actions are to first properly reassemble the hive to minimize bee stress and then to immediately record your detailed observations, as this data is the foundation of all future beekeeping decisions.
The hive inspection is not complete when you close the lid. It is complete when you have documented your findings, turning a temporary disturbance into a valuable data point for managing the long-term health of your colony.
Step 1: Secure the Physical Hive
The first priority after your last frame is checked is to return the colony to its normal, protected state as calmly and efficiently as possible.
Gently Reassemble the Components
Carefully restack your hive boxes in their original order. Avoid banging them or making sudden movements, which can agitate the bees and risk crushing them.
Place the inner cover or hive mat back on top, followed by the main lid. Ensure everything sits flush to seal the hive properly.
Let the Colony Settle
Once the hive is closed, step away and let the bees be. They need time to calm down, re-establish their scent throughout the hive, and get back to their work.
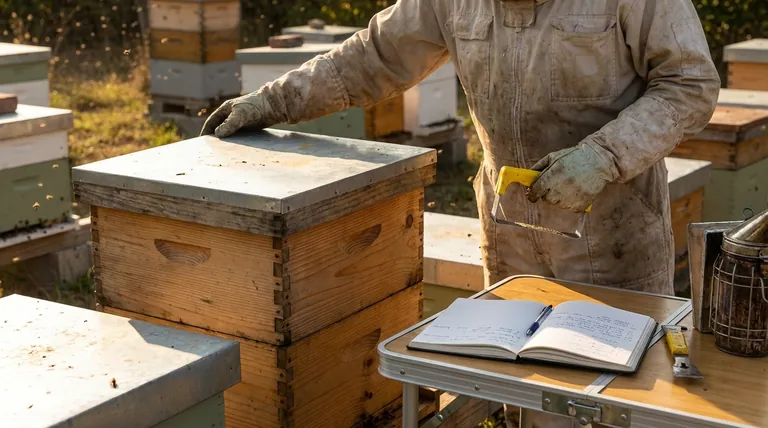
Step 2: Document Your Findings Immediately
This is the most crucial step for effective beekeeping. Your notes transform the inspection from a simple check-up into a powerful management tool.
Why Immediate Note-Taking is Critical
Relying on memory is a recipe for failure. Details about brood patterns, the temperament of the hive, or the number of honey frames are easily forgotten.
Recording your observations while they are fresh ensures accuracy and allows you to track trends over time, which is essential for spotting subtle problems before they become critical.
Key Data Points to Record
Your inspection notes should be a consistent snapshot of the colony's health. Always include:
- The Queen: Did you see her? If not, did you see evidence of her, such as fresh eggs?
- Brood Pattern: Note the presence of eggs, larvae, and capped brood. A tight, uniform brood pattern is a sign of a healthy, well-mated queen.
- Food Stores: How many frames are dedicated to honey and pollen? Is it enough for the colony's current needs?
- Population: Is the colony growing, shrinking, or stable? Are there enough bees to cover the brood frames?
- Overall Health: Document any signs of pests like varroa mites or hive beetles, or any symptoms of disease like discolored larvae or spotty brood.
Common Post-Inspection Mistakes to Avoid
Even experienced beekeepers can fall into bad habits. Avoiding these common pitfalls ensures your inspection efforts yield the best results for your bees.
Failing to Create an Action Plan
Your notes are not just a diary; they are a to-do list. An observation of low honey stores should trigger a plan to feed the bees. Seeing high mite counts should trigger a plan for treatment.
Leaving Tools or Debris Nearby
Leaving your hive tool, smoker, or bits of burr comb near the hive can attract pests like ants and wasps. Clean your tools and the area around the hive before you leave.
Forgetting to Review Past Notes
Before you close your notebook, compare your new observations to your previous entry. This comparison is what reveals critical trends, such as a sudden drop in population or a slowing queen.
Making the Right Choice for Your Goal
Your notes should directly inform your next steps. Use them to decide on the appropriate management action based on the state of the hive.
- If your primary focus is a healthy, growing colony: Your notes should confirm this with observations of a good brood pattern and sufficient space, scheduling the next routine check.
- If you saw signs of weakness or disease: Your notes are now an urgent action plan that details the need for feeding, treatment, or other intervention.
- If the hive is crowded or honey-bound: Your notes should trigger the immediate task of adding another super to provide more space for brood or honey storage.
This disciplined, two-step process of securing the hive and documenting your findings is what separates passive bee-havers from proactive, successful beekeepers.
Summary Table:
| Post-Inspection Step | Key Action | Why It Matters |
|---|---|---|
| Secure the Hive | Gently reassemble boxes and lid. | Minimizes bee stress and protects the colony. |
| Document Findings | Immediately record queen status, brood, food, and health. | Creates a data-driven foundation for future beekeeping decisions. |
| Create an Action Plan | Use notes to schedule feeding, treatment, or adding space. | Turns observations into proactive colony management. |
Equip Your Apiary for Success with HONESTBEE
Your detailed post-inspection routine is vital for colony health, and having the right, reliable equipment makes all the difference. HONESTBEE supplies commercial apiaries and beekeeping equipment distributors with high-quality, durable beekeeping supplies through our wholesale-focused operations.
We help you protect your investment by providing the tools you need for efficient inspections and long-term hive management.
Ready to enhance your operation's efficiency and success?
Contact our wholesale team today to discuss your equipment needs and how we can support your business.
Visual Guide
Related Products
- Durable Plastic Hive Number Set for Beekeeping
- Stainless Steel Round Beehive Air Vents for Ventilation
- HONESTBEE Professional Hive Top Bee Feeder Feeding Solution
- Professional Large-Format Hive Number Set for Beekeeping
- HONESTBEE Professional Long Handled Hive Tool with Precision Cutting Blade
People Also Ask
- What is the role of record-keeping tools like manuals and hive markers in professional queen bee breeding? Master Data.
- Why might bees reject a plastic hive? Key Factors in Colony Acceptance and Material Management
- What standards must be followed for organic bee hive manufacturing? Build a Certified Ecological Apiary Today
- Why might beekeepers prefer plastic hives for extraction? Boost Efficiency & Sanitation
- What are the advantages of numbered plastic tags? Achieve Precise Individual Honeybee Identification