To raise queen cells, the plugs containing the young larvae are removed from the rearing kit, attached to a special frame, and placed into a strong, "queenless" colony. This absence of a queen triggers the colony's natural survival instinct, compelling the worker bees to feed the selected larvae a diet of royal jelly and raise them into new queens.
The core principle is not mechanical; it is biological. Successful queen rearing depends on skillfully creating a specific social condition—queenlessness—to harness a honey bee colony's powerful, instinctual drive to create a new monarch.
The Core Principle: The Emergency Response
To understand how queen cells are raised, you must first understand the social structure of a honey bee colony and its reaction to losing a queen.
Understanding Queenlessness
A healthy colony is regulated by pheromones produced by its queen. These chemical signals inform the entire colony that a viable, egg-laying queen is present, which suppresses the workers' instinct to raise a new one.
When the queen is removed, her pheromones dissipate within hours. The colony quickly recognizes this absence, entering a state of emergency.
Triggering the "Emergency Impulse"
This state of queenlessness triggers a powerful, colony-wide survival mechanism known as the emergency impulse. The bees' primary objective becomes creating a replacement queen immediately to ensure the colony's continuation.
They are now highly motivated to find suitable, very young female larvae and begin the process of raising them into queens.
The Critical Role of Larval Age
Worker bees can only transform a larva into a queen if it is less than three days old. During this window, they can switch its diet from a basic brood food to a continuous, rich supply of royal jelly, which triggers the development of queen anatomy and physiology.
By providing plugs with larvae of the perfect age, you are giving the bees ideal candidates to work with during their emergency response.
The Mechanical Process: From Plug to Cell
The physical steps are straightforward, designed to present your chosen larvae to the bees in a way they will readily accept.
Step 1: Transferring the Plugs
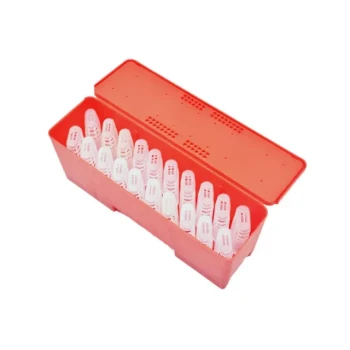
Once the larvae in your rearing kit are the correct age (typically 12-36 hours old), you carefully remove the small plastic cell plugs they reside in.
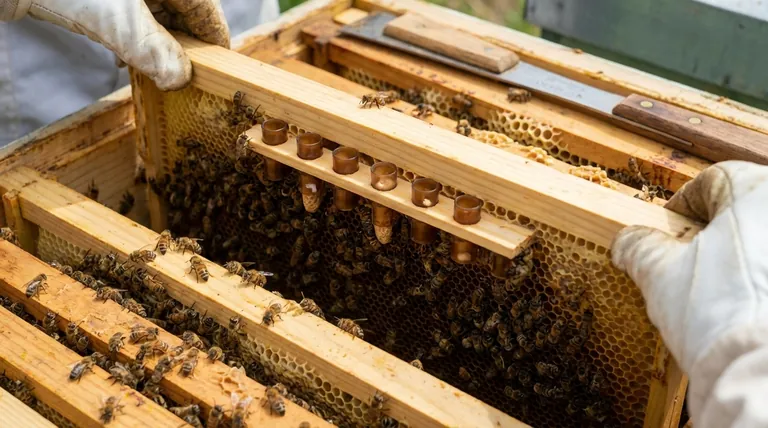
Step 2: Assembling the Cell Bar
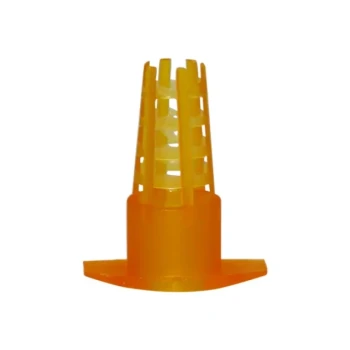
Each plug is then fitted into a corresponding cell cap. This cap is then pressed onto a cell holder, which is attached to a bar on a frame.
This assembly creates a structure that mimics the way bees naturally build queen cells, hanging vertically.
Step 3: Placing the Frame in the Colony
The frame, now populated with your assembled cell bars, is gently inserted into the heart of the prepared cell-raising colony.
The best placement is in the center of the brood nest, surrounded by frames of pollen and honey, ensuring the nurse bees have immediate access to all the resources they need.
The Cell-Raising Colony: The Engine Room
The success of the entire operation hinges on the quality and preparation of the colony tasked with raising the cells. This is not just any hive.
What Makes a Good Cell Raiser?
A strong cell-raising colony is populous and overflowing with young nurse bees. These are the bees responsible for producing royal jelly and caring for the brood.
The colony must also have abundant stores of pollen and nectar (or be well-fed) to support the resource-intensive task of raising multiple queens.
Ensuring True Queenlessness
Before you introduce your frame of queen cells, you must ensure the cell-raising colony is hopelessly queenless.
This means there is no queen, no queen cells, and—critically—no other eggs or young larvae from which the bees could raise their own "wild" queen cells. The bees must see your provided larvae as their only option for survival.
Common Pitfalls to Avoid
Even with a perfect process, beekeepers can encounter issues. Understanding them is key to troubleshooting and improving your results.
Poor Cell Acceptance
If the bees do not accept and begin drawing out the cells, the cause is almost always a flaw in the cell-raising colony. It may be too weak, lack sufficient nurse bees, or it may not be truly queenless.
Competing "Wild" Cells
If you fail to remove all other open brood (eggs and young larvae) from the cell-raiser, the bees may ignore your grafts and start their own queen cells elsewhere. These must be found and removed.
Incorrect Larval Age
Grafting larvae that are too old is a common mistake for beginners. Bees will often ignore them, knowing they cannot be developed into viable queens, resulting in a low or zero acceptance rate.
Making the Right Choice for Your Goal
Your approach should be tailored to your objective, whether it's maximizing output or simply learning the craft.
- If your primary focus is maximum acceptance and high-quality queens: Invest your energy in creating a powerful, populous, and verifiably queenless cell-raiser colony packed with resources.
- If your primary focus is learning the technique: Start with a smaller setup, like a two-frame nucleus colony, to master the mechanics of timing and transferring cells before scaling up.
Ultimately, successful queen rearing is a partnership where you guide the bees' powerful natural instincts to achieve a specific outcome.
Summary Table:
| Step | Key Action | Purpose |
|---|---|---|
| 1 | Remove Plugs from Rearing Kit | Access young larvae (12-36 hours old) for grafting. |
| 2 | Attach Plugs to Cell Bar Frame | Mimic natural queen cell structure for bee acceptance. |
| 3 | Place Frame in Queenless Colony | Trigger bees' emergency impulse to raise new queens. |
| 4 | Monitor Cell Acceptance | Ensure bees feed larvae royal jelly and build queen cells. |
Ready to Elevate Your Queen Rearing Success? As a commercial apiary or distributor, consistent, high-quality queen production is key to your operation's growth. HONESTBEE supplies durable, precision beekeeping equipment—including rearing kits and cell bars—designed to streamline your workflow and maximize acceptance rates. Our wholesale-focused solutions help you harness colony instincts reliably.
Contact us today (#ContactForm) to discuss how our products can support your queen rearing goals and boost your profitability!
Visual Guide

Related Products
- Brown Nicot Queen Cell Cups for Breeding Queen Bees Beekeeping
- JZBZ Type Wide Base Plastic Queen Cell Cups for Base Mounting and Queen Rearing
- Clear Black Plain Polystyrene Queen Bee Grafting Cell Cups No Lug for Bee Queen Cup
- JZBZ Style Shipping Cell Protector for Queen Rearing Kit
- Premium Nicot Style Cell Bar Holder and Queen Cell Cup Holder System
People Also Ask
- How does the standardized depth of queen cell cups affect larval acceptance? Boost Success with 6mm Precision
- What happens to the brown cell cups after the eggs hatch into larvae? The Critical Grafting Step for Queen Rearing
- Why are cell cups primed before grafting, and what is used for this process? Boost Your Queen Rearing Success
- Why is a diluted royal jelly solution applied to queen cell cups? Boost Acceptance in Artificial Grafting
- What role do specialized queen rearing tools play in developing mite-resistant honeybee stock? Master Genetic Selection