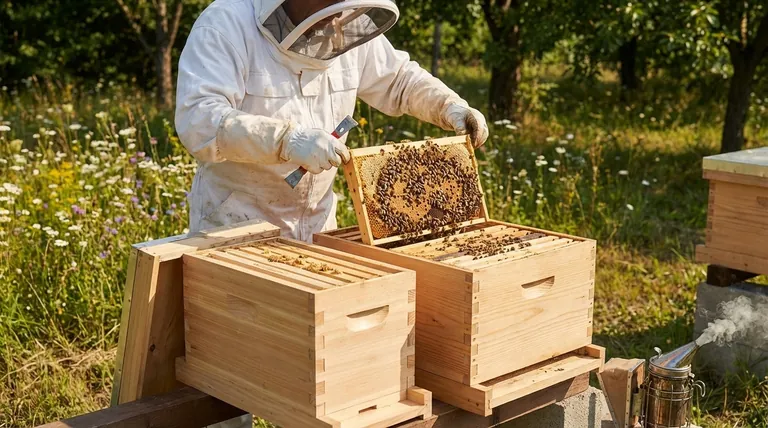
At its core, transferring bees from a nucleus box (nuc) to a full-sized hive is a methodical relocation of the colony's core components. The process involves moving the frames from the small nuc into the center of the larger hive body, preserving their original order, and then surrounding them with new, empty frames for the colony to expand into. This careful arrangement minimizes stress on the bees and provides them with the ideal structure for growth.
The goal of a nuc transfer is not just to move bees; it is to seamlessly transition the colony from a temporary starter home to a permanent residence with minimal disruption, setting the stage for successful and rapid expansion.
Preparing for a Successful Transfer
Before you open the nuc, proper preparation is essential. The timing, conditions, and equipment you have on hand will directly impact how smoothly the transfer goes and how quickly the colony adapts to its new environment.
When to Transfer Your Nuc
A nuc is a starter colony and is meant to be temporary. You should transfer the bees as soon as they show signs of outgrowing their small box, which is typically within a week or two of receiving them. Look for signs that the nuc is becoming "honey-bound" or "brood-bound," meaning the bees have run out of space to store resources or for the queen to lay eggs.
If you see that 70-80% of the frame surfaces are covered in bees when you peek under the lid, it's time to move them. Delaying the transfer can lead to the colony swarming.
Ideal Conditions for the Transfer
Choose a warm, calm, and preferably sunny day for the transfer, ideally between late morning and early afternoon. During this time, many of the older forager bees will be out of the hive, reducing traffic and congestion inside the box.
Avoid performing a transfer in cold, windy, or rainy weather. Exposing the delicate brood (bee eggs, larvae, and pupae) to cold temperatures can kill it, setting the colony back significantly.
Essential Equipment
Gather all your equipment before you begin to ensure the process is efficient and calm. You will need:
- A complete, assembled hive (bottom board, hive body, empty frames, inner cover, outer cover)
- Your full set of protective gear (suit, veil, gloves)
- A smoker and fuel
- A hive tool
- An entrance reducer
The Step-by-Step Transfer Process
With your equipment ready and conditions right, you can begin the transfer. Work deliberately and calmly to keep the bees from becoming agitated.
Step 1: Prepare Your Equipment and Calm the Colony
Place your new hive body on its permanent stand. Light your smoker and get it producing cool, white smoke.
Gently puff a small amount of smoke into the entrance of the nuc box. Wait 30-60 seconds, then lift the lid slightly and puff a little smoke across the tops of the frames. This masks the alarm pheromone and encourages bees to move down and consume honey, making them calmer.
Step 2: Open the Nuc and Inspect the Frames
Use your hive tool to gently pry the frames apart, as they will be stuck together with beeswax and propolis. Lift each frame out slowly and vertically.
As you lift each frame, do a quick visual check. Identify frames that contain brood, frames with pollen and honey, and the location of the queen if you can spot her (don't worry if you can't).
Step 3: Arrange Frames in the New Hive
This is the most critical step. You must recreate the structure of the brood nest in the new hive. Place the frames from the nuc directly in the center of the new, larger hive box.
Maintain their original order. Typically, this means the frames with the most brood are in the very center, flanked by frames of pollen and honey. This arrangement, known as "brood nest integrity," is vital for thermal regulation and allows the queen to continue her laying pattern uninterrupted.
Once the nuc frames are in place, fill the remaining empty space on both sides with your new, empty frames.
Step 4: Move the Remaining Bees
After all the frames are moved, a cluster of bees will remain in the bottom of the nuc box. To move them, hold the nuc box directly over the new hive and give it a firm shake or a sharp tap. Most of the bees will fall down onto the top of the frames.
You can leave the open nuc box leaning against the entrance of the new hive for a few hours to allow any stragglers to march into their new home.
Step 5: Close Up the Hive
Place the inner cover and outer cover on the new hive. Finally, place an entrance reducer on the smallest opening. A new, small colony cannot defend a large entrance from robbing bees or pests like wasps.
Common Pitfalls to Avoid
A successful transfer depends on avoiding a few common mistakes that can stress the colony and hinder its development.
Mistake: Scrambling the Frame Order
Do not rearrange the frames from the nuc. Placing honey or pollen frames in the middle of the brood nest can create a "barrier" that the queen is reluctant to cross, effectively splitting the nest and slowing colony growth.
Mistake: Leaving the Entrance Wide Open
Failing to use an entrance reducer is one of the most common and damaging mistakes. A small colony is vulnerable, and a wide-open entrance is an invitation for stronger hives in the area to rob their resources, which can destroy the colony.
Mistake: Transferring in Poor Weather
Patience is a beekeeper's greatest virtue. Waiting a day or two for better weather is far preferable to chilling the brood and stressing the colony, which can set their progress back by weeks.
Mistake: Not Feeding the New Colony
A new colony's most urgent task is to build out wax comb on the new, empty frames. This is an energy-intensive process. Providing a 1:1 sugar water solution in a feeder will give them the resources they need to draw comb quickly and expand the brood nest.
Making the Right Choice for Your Goal
After the transfer, your actions should support the colony's immediate needs.
- If your primary focus is rapid growth: Immediately begin feeding the colony a 1:1 sugar syrup solution to fuel wax production and help them draw out the new frames.
- If your primary focus is colony health and safety: Leave the entrance reducer on its smallest setting for several weeks and avoid opening the hive for at least one week to allow the bees to settle and reorient.
- If your primary focus is confirming a healthy queen: While you shouldn't disturb the hive for a week, your next inspection should focus on finding a pattern of fresh eggs, which is the definitive sign she is present and working.
This transfer is the foundational step in building a strong, productive, and healthy honey bee colony.
Summary Table:
| Step | Key Action | Purpose |
|---|---|---|
| 1. Preparation | Choose warm, calm weather; gather equipment. | Minimizes stress and protects brood. |
| 2. Calm the Bees | Use a smoker at the nuc entrance and under the lid. | Masks alarm pheromones, keeps bees calm. |
| 3. Frame Transfer | Move frames from nuc to center of new hive, maintaining order. | Preserves brood nest integrity for uninterrupted growth. |
| 4. Final Steps | Shake remaining bees into hive; install entrance reducer. | Ensures all bees are moved and the colony is protected. |
| Post-Transfer | Feed sugar syrup; avoid disturbance for one week. | Supports rapid comb building and allows colony to settle. |
Build a Thriving Apiary with the Right Equipment
A successful nuc transfer is the first step toward a productive season. Equip your commercial operation with durable, efficient supplies from HONESTBEE. We provide wholesale-focused beekeeping equipment and supplies designed for the demands of commercial apiaries and distributors, helping you manage colonies with confidence and maximize honey production.
Contact our expert team today to discuss your wholesale needs and how we can support the growth of your business.
Visual Guide

Related Products
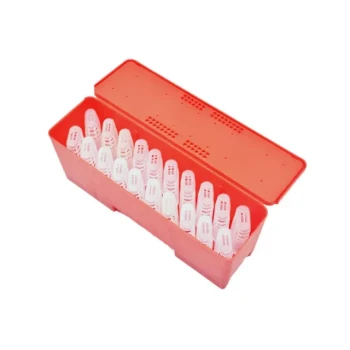
- Plastic Transporting Bee Packages and Nuc Boxes for Beekeeping
- Portable Bee Mating Hive Boxes Mini Mating Nucs 8 Frames for Queen Rearing
- Steel Round Disc Entrance Reducer for Flexzion Bee Hive Nuc Box Gate
- Styrofoam Mini Mating Nuc Box with Frames Feeder Styrofoam Bee Hives 3 Frame Nuc Box
- Automatic Heat Preservation 6 Frame Pro Nuc Box for Honey Bee Queen Mating
People Also Ask
- How should a beekeeper introduce a package of bees into a hive box? Master the Queen Release Process
- What are the disadvantages of a package of bees when compared to a nuc? Key Risks & Growth Delays Explained
- What is the typical worker bee population in package bees vs nucleus colonies? Choose the Right Start for Your Hive
- What role do bee package boxes play in the commercial transport and expansion of honeybee colonies? - Logistic Essentials
- What is the commercial value of using standardized bee packages? Drive Scalability in Large-Scale Apiaries