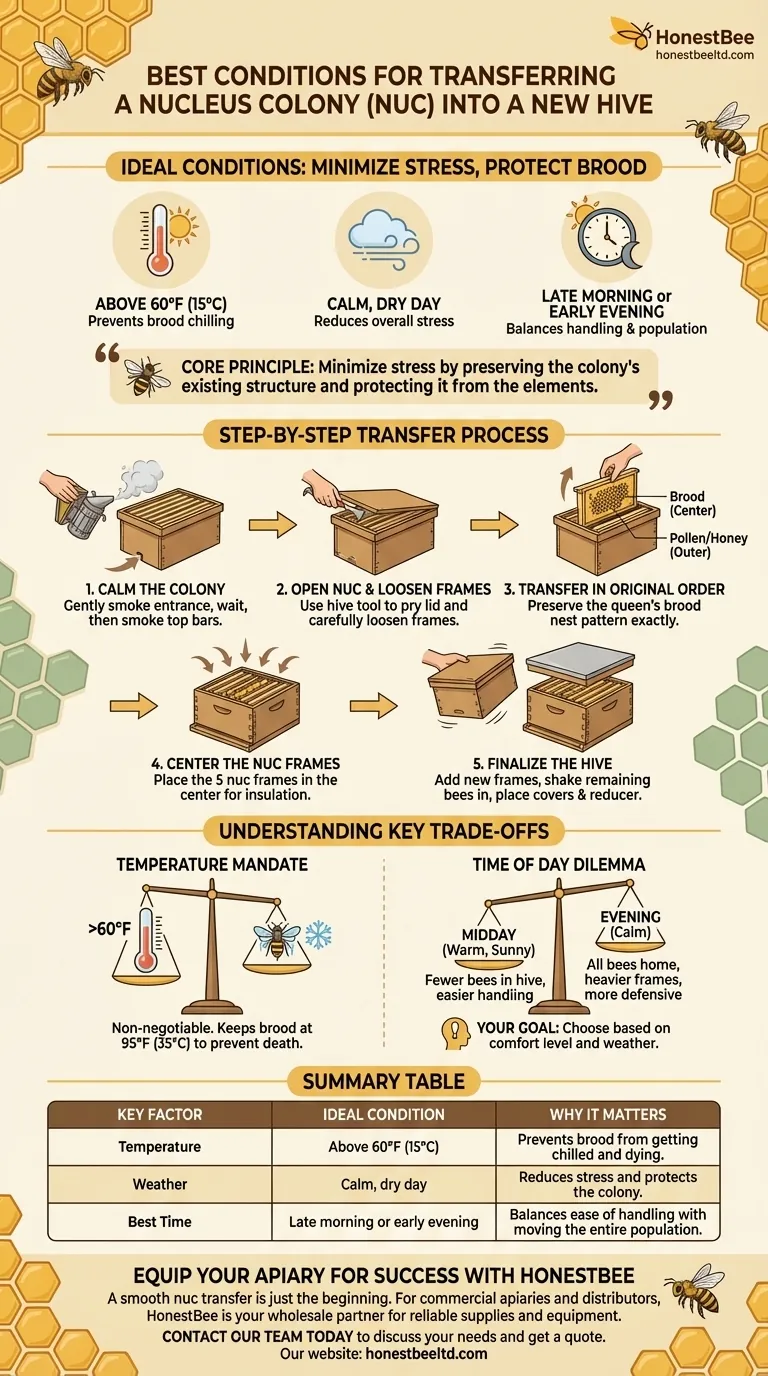
The ideal conditions for transferring a nucleus colony are when the ambient temperature is above 60°F (15°C) on a calm, dry day. This procedure is best performed either in the late morning to early afternoon when many foragers are out, or in the early evening when the colony is calmer and settling in for the night. The key is to protect the vulnerable brood from getting chilled and to minimize overall stress on the colony.
Transferring a nuc is not just about moving bees; it's about carefully transplanting a living, organized superorganism. Success depends less on a rigid set of rules and more on understanding one core principle: minimize stress by preserving the colony's existing structure and protecting it from the elements.
Preparing for a Seamless Transfer
Proper preparation is the difference between a chaotic move and a calm, successful installation. Your goal is to have everything you need within arm's reach before you ever open the nucleus box.
Assembling Your Equipment
Before you begin, gather your tools. You will need your fully assembled new hive body, complete with a bottom board, inner cover, and top cover. Have enough new frames to fill the box (e.g., five new frames for a ten-frame box).
You will also need your protective gear, a lit smoker, and a hive tool. Staging these items next to the final hive location makes the process smooth and efficient.
Why a Nucleus Colony Gives You a Head Start
A nucleus colony is a small, functioning hive, not just a collection of bees. It contains a proven, laying queen, worker bees of all ages, and frames of brood in various stages of development.
This gives your new hive a significant advantage over starting with a package of bees. Workers can begin emerging and foraging almost immediately, accelerating the colony's growth and establishment.
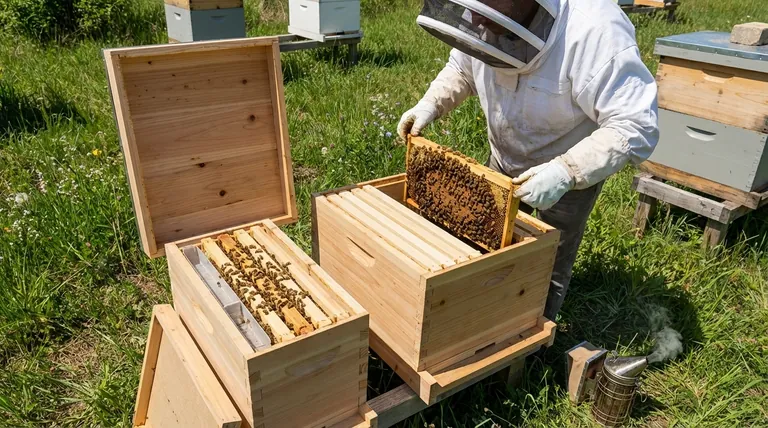
The Step-by-Step Transfer Process
Follow these steps methodically to ensure the bees and their brood are moved safely. The central principle is to maintain the original orientation and order of the frames.
Step 1: Calm the Colony
Gently apply a few puffs of smoke into the entrance of the nuc box. Wait about 30 seconds, then lift the lid and apply a few more light puffs across the top of the frames. This encourages the bees to fill up on honey and masks alarm pheromones, making them more docile.
Step 2: Open the Nuc and Loosen Frames
Use your hive tool to gently pry the lid off the nuc box. Then, use the tool to carefully loosen the frames, which are often stuck together with propolis and wax. Work from an outer frame inward.
Step 3: Transfer Frames in Their Original Order
This is the most critical step. The queen organizes her brood nest with a specific pattern—eggs and young larvae in the center, capped brood surrounding them, and pollen and honey on the outermost frames. You must preserve this order.
Lift the first frame out of the nuc, inspect it briefly, and place it in the new hive body. Continue this process, moving each frame into the new box in the exact sequence you removed it.
Step 4: Center the Nuc Frames
Place the five frames from your nuc directly in the center of your new, larger hive body. This ensures the brood nest is insulated and remains the warm, central core of the new hive.
Step 5: Finalize the Hive
Add your new, empty frames to either side of the nuc frames until the box is full. There should be no extra space.
Next, take the now-empty nuc box, turn it upside down over the new hive, and give it a firm shake or tap to dislodge any remaining bees into their new home.
Finally, place the inner cover and top cover on the hive. It is highly recommended to use an entrance reducer set to its smallest opening to help the small colony defend itself.
Understanding the Key Trade-offs
Your choice of timing involves balancing competing factors. Understanding the "why" behind the advice allows you to make the best decision for your specific situation.
The Temperature Mandate: Above 60°F (15°C)
This rule is non-negotiable. Bee brood must be kept at a consistent temperature (around 95°F or 35°C). If exposed to temperatures below 60°F (15°C) for even a short time during the transfer, the brood can become chilled and die. This sets the colony back significantly.
The Time of Day Dilemma: Midday vs. Evening
Choosing when to transfer involves a trade-off between the number of bees you have to manage inside the hive and the number flying outside of it.
Transferring on a warm, sunny day means the foraging force is out of the hive. This results in fewer bees on the frames, making the transfer physically easier to handle.
Transferring in the early evening means nearly all the bees are back home. This ensures the maximum population is moved, but it also means the frames will be heavy with bees, and the colony may be slightly more defensive. For a beginner, the sunny day option is often less intimidating.
Making the Right Choice for Your Goal
Your decision should be based on your comfort level and the immediate weather forecast.
- If your primary focus is the easiest handling: Transfer on a warm, sunny afternoon when the field force is out foraging, leaving fewer bees in the box to manage.
- If your primary focus is capturing every bee: Transfer in the early evening as foragers return, ensuring the entire population is moved in one go.
- If your primary focus is colony safety (recommended for all beekeepers): Prioritize a calm, dry day with temperatures well above 60°F (15°C) over any specific time of day.
By respecting the colony's natural structure and choosing your moment carefully, you are setting your new hive up for a season of healthy growth and success.
Summary Table:
| Key Factor | Ideal Condition | Why It Matters |
|---|---|---|
| Temperature | Above 60°F (15°C) | Prevents brood from getting chilled and dying. |
| Weather | Calm, dry day | Reduces stress and protects the colony from the elements. |
| Best Time | Late morning (fewer bees) or early evening (all bees) | Balances ease of handling with moving the entire population. |
Equip your apiary for success with HONESTBEE. A smooth nuc transfer is just the beginning. For commercial apiaries and distributors, having the right, durable equipment is key to scaling your operations efficiently. Let HONESTBEE be your wholesale partner for reliable beekeeping supplies and equipment. Contact our team today to discuss your needs and get a quote.
Visual Guide
Related Products
- 5 Frame Wooden Nuc Box for Beekeeping
- Plastic Transporting Bee Packages and Nuc Boxes for Beekeeping
- Automatic Heat Preservation 6 Frame Pro Nuc Box for Honey Bee Queen Mating
- 5 Frame Langstroth Poly Nuc Corrugated Plastic Nuc Boxes
- 4 Frame Plastic Nuc Boxes for Beekeeping Bee Nuc Box
People Also Ask
- What are the options for adding frames to a nuc after taking two frames from the parent colony?
- What built-in detail do many 5-frame nuc boxes have on the lid? A Guide to Efficient Hive Top Feeding
- What is the primary function of five-frame nuclei boxes? Master Early Colony Establishment for Stronger Hives
- What is the most common type of standard nuc? The 5-Frame Nuc Explained
- What is the typical composition of frames in a nuc? A 5-Frame Blueprint for a Thriving Hive


