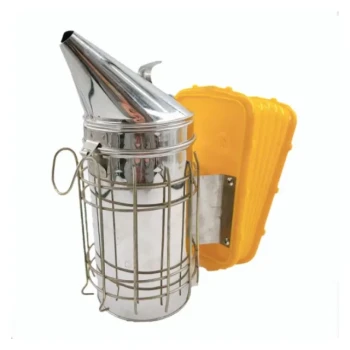
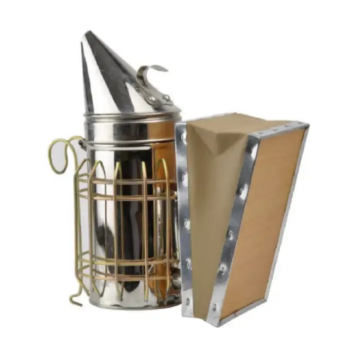
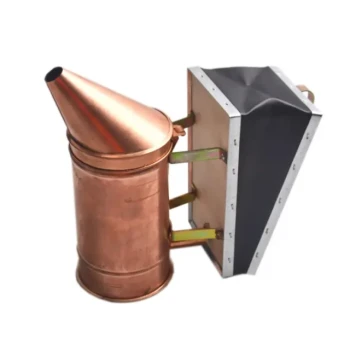
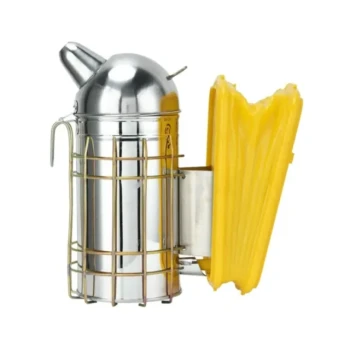
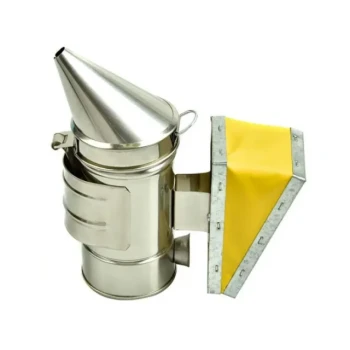
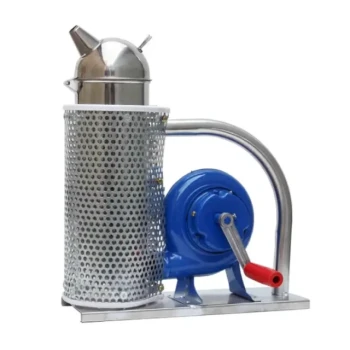
For safe apiary inspections, use only clean, natural, slow-burning fuel that produces cool, dense smoke. Light a small starter fire, pack the smoker with suitable fuel, establish a smoulder with the bellows, and use a few gentle puffs before opening the hive. Keep the smoke cool and white, prevent sparks, and extinguish the smoker completely after the inspection.
The smoker is a control tool, not a fire source. Its purpose is to produce gentle, cool smoke that interrupts alarm communication and gives bees time to settle. Safe operation depends on appropriate fuel, controlled airflow, restrained use, and complete extinguishing.
Choosing Safe Smoker Fuel
Use Clean, Natural Materials
Suitable fuels include:
- Pine needles and cones
- Untreated wood chips or shavings
- Dry natural foliage
- Clean burlap or untreated hessian sacking
- Cotton rags
- Dry grass
- Rolled corrugated cardboard
- Cardboard egg cartons
- Rotted wood
- Hemp or dried sage bundles
- Commercial plant-based smoker fuel
The fuel should ignite reasonably easily, then smoulder slowly and produce dense, cool, non-irritating smoke.
Avoid Toxic or Unpredictable Materials
Never use:
- Synthetic fabrics or plastics
- Chemically treated, painted, or varnished wood
- Cedarwood
- Oily, contaminated, or chemically treated sacking
- Materials that produce strong, irritating fumes
These materials may release harmful gases, contaminate the hive environment, or create excessive heat and sparks.
Prepare Enough Fuel for the Inspection
Pack sufficient main fuel before lighting. A smoker that goes out during frame handling can force rushed relighting or repeated disturbance of the colony.
Pack the main fuel firmly to approximately three-quarters of the chamber’s capacity, leaving enough space for airflow and the starter material.
Add a Protective Top Layer
Place a layer of fresh green grass or clean cloth over the main fuel. This helps suppress open flames and reduce the risk of hot embers or sparks escaping through the nozzle.
The top layer is a control layer, not a substitute for clean primary fuel.
Step-by-Step Smoker Operating Procedure
1. Approach the Hive Calmly
Approach deliberately and avoid unnecessary movement, vibration, or loud disturbance. Have the smoker, hive tool, protective clothing, and other equipment ready before lighting.
Keep the active smoker away from loose clothing, veils, dry vegetation, and other flammable materials.
2. Ignite the Starter Fuel
Place a small piece of starter material, such as newspaper, at the bottom of the fuel chamber. Ignite it carefully before adding the main fuel.
Protective veils and synthetic clothing should remain away from the flame during lighting because heat can damage or melt synthetic mesh.
3. Add the Main Fuel
Once the starter is burning, add small amounts of natural kindling and then the selected main fuel. Avoid overloading the chamber before airflow is established.
Pack the fuel firmly enough to support a slow burn, but do not block the air path through the smoker.
4. Establish a Smoulder with the Bellows
Pump the bellows with firm, controlled strokes until the fuel is burning consistently. The objective is dense, cool, white smoke, not a large flame.
Longer, slower strokes are generally preferable once the fuel is established because they maintain smoke without unnecessarily intensifying the fire.
5. Check the Smoke Before Using It
A properly operating smoker produces gentle, visible smoke with no sparks.
If the smoker produces flames, sparks, or hot grey smoke, it is too hot. Add more suitable fuel and reduce the intensity of the bellows until the fire becomes a cool smoulder.
6. Smoke the Hive Entrance
Give the entrance a few gentle puffs before opening the hive. The smoke should drift into the entrance rather than being forced aggressively into the colony.
Wait approximately one to two minutes so the bees have time to respond. This delay can reduce defensive behavior during the initial opening.
7. Open the Hive Carefully
Apply smoke sparingly as you remove the cover or crown board. When opening the hive, direct smoke across the top bars and under the cover, rather than blasting it directly down into the hive.
A calm colony usually needs only a few puffs. Excessive smoke can disturb the bees, obscure the inspection, and make it harder to assess colony behavior.
8. Maintain the Smoker During Inspection
Monitor the smoker throughout the inspection. Add fuel when necessary and use the bellows only enough to maintain cool, steady smoke.
Do not leave an active smoker unattended near the hive, protective clothing, dry grass, vehicles, or other combustible materials.
9. Respond to Increased Defensive Behavior
If bees become more defensive, use a few controlled puffs and allow time for the smoke to take effect. Avoid repeatedly smoking the colony without pausing.
If the colony continues to escalate and frequent smoking is required, consider ending the inspection rather than forcing the procedure.
10. Treat a Sting Without Spreading Alarm
If a sting occurs, a small amount of smoke directed at the affected area can help mask the released alarm pheromone and reduce attention to that location.
Remove the stinger using an appropriate method and continue only if it is safe to do so.
Understanding the Trade-offs
Smoke Must Be Effective but Not Excessive
Too little smoke may fail to interrupt defensive behavior. Too much smoke can unnecessarily disturb the colony and make normal inspection observations less reliable.
Use the minimum amount that produces a calm, manageable response.
Cooler Smoke Requires More Fuel Management
Cool smoke depends on a smouldering fuel bed rather than open combustion. This requires proper packing, a suitable top layer, and measured bellows use.
A smoker that burns too hot is less safe and less effective, even if it produces a large volume of smoke.
Fuel Availability Should Not Override Fuel Quality
Distributors and beekeepers may encounter different local fuel options, but convenience is not a sufficient reason to use questionable material.
A reliable supply of clean, untreated, consistent fuel is more valuable than an inexpensive material that produces toxic fumes, sparks, or excessive heat.
Extinguishing Methods Must Match Fire Risk
Plugging the smoker nozzle with a cork can cut off oxygen and extinguish the embers. A dense plug of non-flammable material or foliage may also be used to choke airflow.
For transport or storage, a warm smoker should be placed only in a dedicated, tightly sealed, heavy-duty metal or fireproof container designed to contain residual heat and embers.
Common Operating Mistakes to Avoid
Creating a “Blow Torch”
Aggressive pumping, insufficient fuel, or poor packing can turn the smoker into a hot, flaming torch.
Flames, sparks, and grey smoke indicate that the smoker needs more suitable fuel and less aggressive airflow.
Using Smoke as a Substitute for Calm Handling
Smoke does not eliminate the need for careful beekeeping. Rough frame handling, crushing bees, sudden movements, and prolonged inspections can still provoke defensive behavior.
Work gently and deliberately, using smoke as a signal rather than as a continuous blast.
Letting the Smoker Run Empty
An underfilled smoker may go out at the moment it is needed. Pack enough fuel for the planned inspection and check its output before opening the hive.
Failing to Plan for Transport
A smoker that appears extinguished may still contain hot embers. Never assume it is safe simply because visible smoke has stopped.
Starve it of oxygen, verify that it is fully out, and use a suitable metal containment box when transporting it.
How to Apply This to Your Apiary or Product Program
The safest operating standard is to combine consistent fuel quality with a repeatable inspection procedure.
- If your primary focus is beekeeper safety: Use clean, untreated fuel, keep the smoke cool, maintain distance from flammable materials, and extinguish the smoker inside a suitable metal container.
- If your primary focus is colony welfare: Use only a few gentle puffs, wait one to two minutes, and direct smoke across the entrance and top bars rather than deep into the hive.
- If your primary focus is reliable inspection performance: Pack the chamber to approximately three-quarters capacity and maintain a steady smoulder throughout the inspection.
- If your primary focus is sourcing or distribution: Offer a full range of clean, natural smoker fuels and clear usage guidance so customers can select dependable products without resorting to hazardous substitutes.
A controlled smoker, appropriate fuel, and calm handling make routine hive inspections safer for both the beekeeper and the colony.
Summary Table:
| Guideline / Step | Key Points |
|---|---|
| Fuel Selection | Use clean, natural slow-burning materials (pine needles, untreated wood, burlap, cotton rags). Avoid synthetics, treated wood, cedar, or oily rags. Pack to 3/4 full. |
| Top Layer | Add fresh green grass or clean cloth to suppress flames and prevent sparks. |
| Step 1: Approach | Move calmly, have all equipment ready. |
| Step 2: Ignite | Start with small starter at base. |
| Step 3: Add Fuel | Add kindling, then main fuel, pack firmly. |
| Step 4: Bellows | Pump to establish cool, dense white smoke. |
| Step 5: Check | Ensure no sparks or flames. |
| Step 6: Entrance | Give a few gentle puffs, wait 1-2 minutes. |
| Step 7: Open Hive | Smoke across top bars and under cover. |
| Step 8: Maintain | Monitor and add fuel as needed. |
| Step 9: Defensiveness | Use controlled puffs, pause, consider stopping. |
| Step 10: Sting | Smoke area, remove stinger safely. |
| Extinguish | Fully extinguish and store in metal container. |
| Mistakes to Avoid | No blow torch, don't rely solely on smoke, keep filled, plan transport. |
Ensure safe and efficient apiary inspections with HONESTBEE's premium beekeeping equipment and supplies. As a one-stop sourcing partner for commercial apiaries and distributors, we provide top-quality smokers, natural fuels, and full-spectrum tools with rapid delivery and dedicated support. Our OEM/ODM capabilities and certifications ensure your supply chain is reliable and profitable. Contact us today to discuss your wholesale needs and experience the HONESTBEE difference!
Related Products
- Professional Bee Smoker with Elongated Spout and Durable Bellows for Beekeeping
- Stainless Steel Honey Bee Smoker Hive and Honeycomb Smoker for Beekeeping
- European Stainless Steel Bee Smoker for Honey Bee Hive
- Premium Traditional Copper Bee Smoker with Bellows
- Heavy-Duty Bee Smoker with Durable Plastic Bellows for Beekeeping
People Also Ask
- What roles do bee smokers and precision tools play in honey harvesting? Master Safety and Quality Control
- Why is the use of professional bee smokers and specialized fuel essential? Protect Honey Purity & Colony Safety
- Why is a professional bee smoker considered an essential tool for hive management and safety? Master Colony Control.
- Why is a professional Smoker essential during routine apiary inspections? Enhance Safety and Operational Efficiency
- What is the mechanism by which a professional bee smoker assists in colony management? Boost Hive Safety and Efficiency