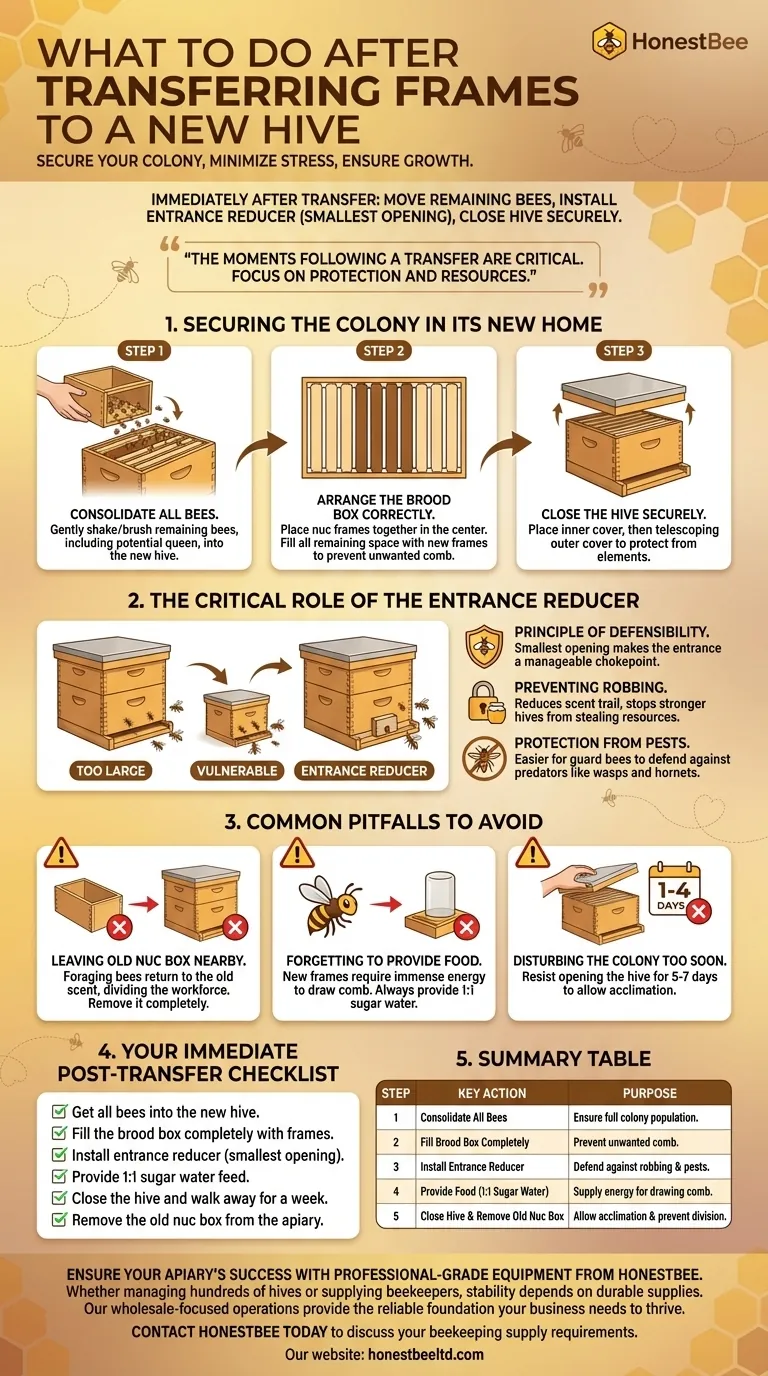
Immediately after transferring the frames, your primary tasks are to move the remaining bees into the new hive, install an entrance reducer set to its smallest opening, and securely close the hive. This process minimizes the colony's stress and secures their new, larger home from immediate threats.
The moments following a hive transfer are critical. Your goal shifts from moving the colony to protecting it, ensuring the bees can defend their new space and have the resources they need to expand successfully.

Securing the Colony in Its New Home
Transferring frames is only part of the installation. The final steps are about consolidating the colony and making their new environment safe and stable.
Step 1: Consolidate All Bees
After the last frame is moved, many bees will still be inside the empty nucleus box. It's crucial to get them into the new hive.
Gently shake or brush these remaining bees onto the top of the frames in the new hive body. This ensures the colony retains its full population, including the queen if she happened to fall off a frame during the transfer.
Step 2: Arrange the Brood Box Correctly
The transferred frames from the nucleus hive should be placed together in the center of the new brood box. This is the heart of the colony.
Add new, empty frames to fill the remaining space on both sides. The box must be completely full of frames to prevent the bees from building unwanted comb in the gaps, which makes future inspections difficult.
Step 3: Close the Hive Securely
Once all bees and frames are in place, put the inner cover on top of the brood box. Then, place the telescoping outer cover over the inner cover.
This protects the colony from the elements and establishes the hive's proper internal environment.
The Critical Role of the Entrance Reducer
A new colony in a full-sized hive is small and vulnerable. Installing an entrance reducer is arguably the most important step you will take after the transfer.
The Principle of Defensibility
A standard hive entrance is far too large for a small nucleus colony to defend effectively. They simply don't have enough guard bees to patrol that much space.
An entrance reducer is a small wooden block that physically shrinks the entrance. Using the smallest opening makes the entrance a manageable chokepoint that a few guards can easily protect.
Preventing Robbing
A weak, newly installed colony smells of honey and sugar syrup, making it a prime target for stronger, established hives in the area.
Without a reduced entrance, robbing bees can easily overwhelm the new colony, steal all of its food stores, and potentially kill the queen, dooming the hive.
Protection from Pests
A smaller entrance is also easier for the bees to guard against common pests like wasps and hornets, which prey on bees and try to enter the hive to steal resources.
Common Pitfalls to Avoid
Your actions immediately after the transfer can set the colony up for success or failure. Avoid these common mistakes.
Leaving the Old Nuc Box Nearby
Do not leave the empty nucleus box anywhere near the new hive. Foraging bees returning from the field will go back to the familiar scent and location of the old box.
This divides the colony's workforce and weakens the new hive. Remove the nuc box from the apiary completely.
Forgetting to Provide Food
The new frames you added are just foundation. Bees must expend enormous energy to draw out the wax comb on these frames before the queen can lay eggs or they can store food.
Always provide a 1:1 sugar water feed to a new colony. This simulates a nectar flow and gives them the carbohydrate energy needed for this critical construction phase.
Disturbing the Colony Too Soon
After the transfer, the bees need time to acclimate, reorient, and organize their new space. Resist the temptation to open the hive for at least five to seven days.
Your first inspection should be brief, focused only on confirming they are taking the feed and checking for new eggs to ensure the queen is healthy and laying.
Your Immediate Post-Transfer Checklist
Follow these steps precisely to give your new colony the best possible start.
- Step 1: Get all bees into the new hive. Gently shake any remaining bees from the old nuc box onto the top of the frames in their new home.
- Step 2: Fill the brood box completely. Place the nuc frames in the center and add new frames to fill all remaining slots.
- Step 3: Install the entrance reducer. Set it to the smallest possible opening to maximize the colony's ability to defend itself.
- Step 4: Provide a food source. A feeder with 1:1 sugar water is essential for helping the bees build new comb.
- Step 5: Close the hive and walk away. Place the covers on securely and leave the bees undisturbed for about a week to acclimate.
- Step 6: Remove the old nuc box. Take it far away from the apiary to prevent the colony's workforce from becoming divided.
By taking these deliberate steps, you are establishing a secure and stable foundation for your colony to thrive.
Summary Table:
| Step | Key Action | Purpose |
|---|---|---|
| 1 | Consolidate All Bees | Ensure full colony population is in the new hive. |
| 2 | Fill Brood Box Completely | Prevent unwanted comb and provide space for expansion. |
| 3 | Install Entrance Reducer | Defend against robbing and pests from the start. |
| 4 | Provide Food (1:1 Sugar Water) | Supply energy for drawing new comb. |
| 5 | Close Hive & Remove Old Nuc Box | Allow acclimation and prevent workforce division. |
Ensure your apiary's success with professional-grade equipment from HONESTBEE.
Whether you are a commercial apiary managing hundreds of hives or a distributor supplying beekeepers, the stability of a new colony depends on durable, well-designed supplies. Our wholesale-focused operations provide the reliable foundation your business needs to thrive.
Contact HONESTBEE today to discuss your beekeeping supply requirements and discover how we can support your growth.
Visual Guide
Related Products
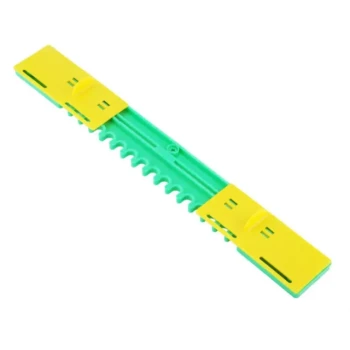
- Steel Round Disc Entrance Reducer for Flexzion Bee Hive Nuc Box Gate
- Beehive Entrance Reducer Guardian Metal Hive Entrance for Bees
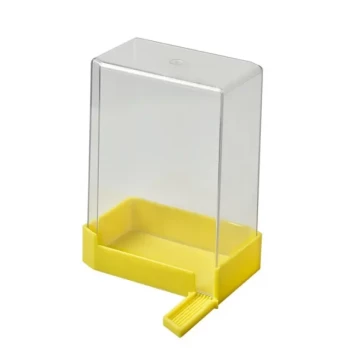
- HONESTBEE Entrance Bee Feeder Professional Hive Nutrition Solution for Beekeeping
- Professional Hive Front Entrance Bee Feeder
- Multi-Functional Sliding Hive Entrance for Beekeeping
People Also Ask
- What are the different types of entrance reducers available for beehives? Choosing the Right Tool for Hive Defense
- What is the purpose of an entrance reducer for a beehive? Strengthen Colony Defense and Prevent Robbery
- Why are entrance reducers used to counter hornet infestations? Protect Your Hive with Strategic Choke Points
- Under what conditions should a beekeeper adjust the size of a beehive entrance? Seasonal & Defense Management Tips
- What is the function of an entrance reducer for a beehive? Essential Guide for Profitable Beekeeping Distribution