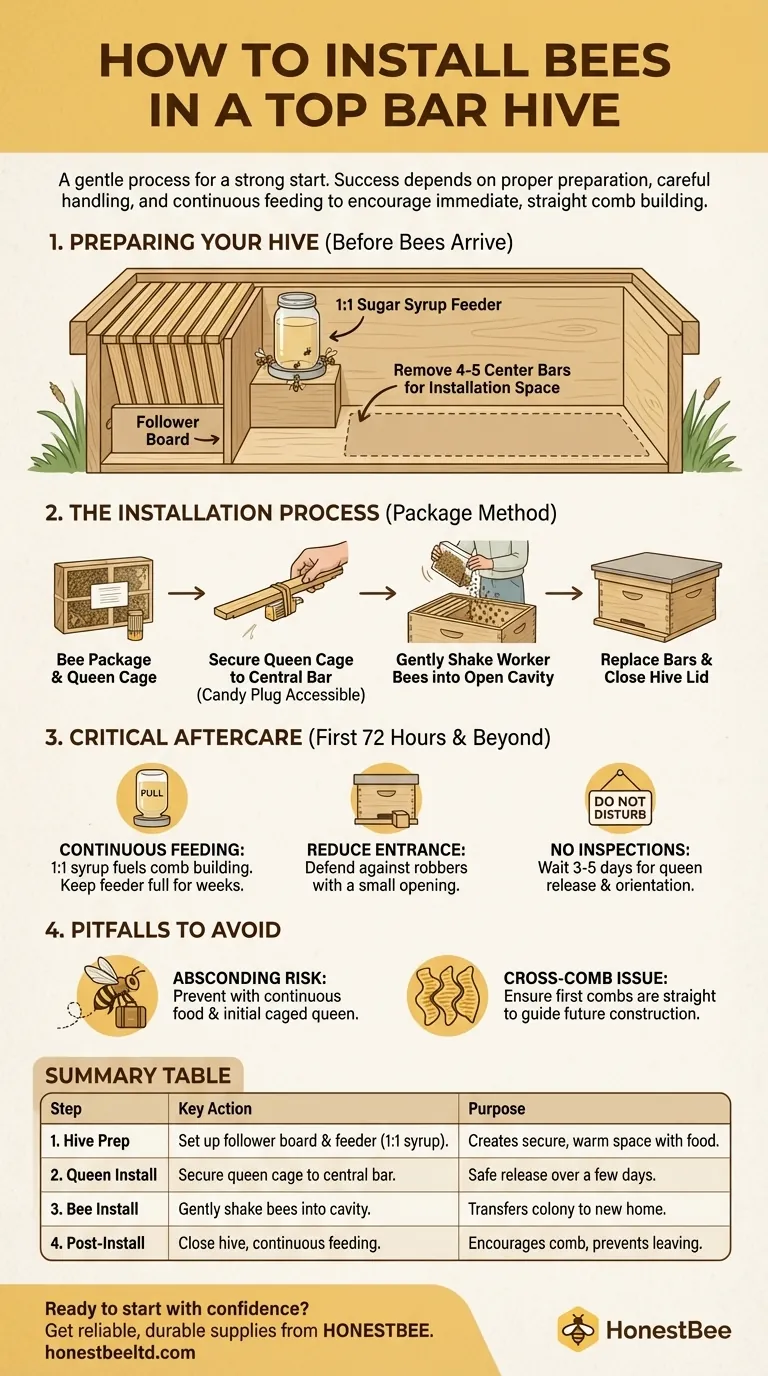
To install bees in a top bar hive, you will prepare the hive by removing several bars from the center, install the queen by securing her cage to a top bar, and then gently shake the worker bees from their package into the open space. After replacing the bars and closing the hive, you must provide a continuous supply of 1:1 sugar water to fuel the critical process of comb construction.
The core challenge of installing bees in a top bar hive isn't just getting them inside; it's creating an environment that immediately encourages them to build straight, natural comb and accept the hive as their home. Success depends on proper hive preparation, gentle handling, and consistent feeding.
Preparing Your Hive for Arrival
Before your bees arrive, your top bar hive must be properly configured. This preparation defines the colony's initial space and provides the resources they need to get started.
The Importance of a Follower Board
A follower board is a solid divider, shaped like the hive's profile, that acts as a movable wall.
Place the follower board in the hive to section off a small area, leaving space for about 8-10 bars. This concentrates the new, small colony in one area, making it easier for them to manage temperature and begin building comb efficiently.
Setting Up Your Feeder
New bees have no stored resources and must build their entire wax comb from scratch, a process that requires an immense amount of energy.
An internal feeder, typically an upside-down jar with small holes in the lid, is placed behind the follower board. Fill it with a 1:1 sugar water solution (equal parts sugar and water by weight or volume). This setup keeps the food source close but separate from the main nesting area, preventing drowning and discouraging pests.
Creating Space for the Bees
From the center of the main hive area (in front of the follower board), remove four to five top bars. This creates the open cavity into which you will pour the bees. Set these bars aside carefully so you can replace them after the installation.
The Installation Process: A Step-by-Step Guide
The exact method varies slightly depending on whether you are starting with a package, a swarm, or a nucleus colony. A package is the most common for new beekeepers.
Method 1: Installing a Package of Bees
A bee package is essentially a screened box of bees with a caged queen.
First, gently spray the package with a light sugar water mist to calm the bees and keep them occupied. Then, remove the queen cage. Check that she is alive and well.
Attach the queen cage to one of the central top bars you set aside. A rubber band, piece of string, or a dedicated metal clip works well. Position the cage so the candy plug is accessible to the worker bees, who will eat through it to release her over a few days.
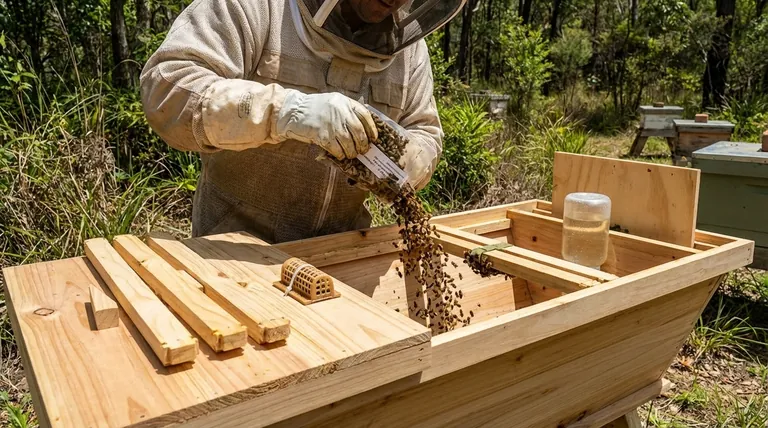
With the queen cage ready, firmly shake or "pour" the bees from the package into the open cavity in the hive. Once most bees are inside, gently replace the top bars, starting with the one holding the queen. Finally, place the feeder behind the follower board and close the hive lid.
Method 2: Hiving a Captured Swarm
A captured swarm is a natural colony split that has no established comb. The process is very similar to installing a package, but without a pre-caged queen.
Gently shake or brush the entire cluster of bees from your collection box or branch directly into the open cavity of the hive. Work calmly, as the bees are typically docile.
Once the bees are in, slowly replace the top bars, close the hive, and ensure the feeder is full. The colony will organize itself around the naturally free queen.
Critical First Steps After Installation
The first 72 hours are crucial for the colony's survival and acceptance of their new home. Your focus should be on security and resources.
Immediate and Continuous Feeding
A new colony's primary job is to draw comb. They cannot raise brood or store honey without it. The 1:1 sugar syrup you provide is the fuel for wax production.
Keep the feeder full continuously for the first several weeks, or until the bees have drawn out at least five to seven full combs. Do not stop feeding prematurely.
Securing the Hive
Reduce the hive entrance to its smallest opening. A new, small colony is vulnerable to being robbed by stronger hives in the area. A small entrance is easier for them to defend.
Do not disturb the hive for at least three to five days. Give the bees time to release the queen, orient themselves, and begin building their home in peace.
Understanding the Pitfalls to Avoid
Installing bees is straightforward, but new beekeepers can run into a few common issues that jeopardize the colony.
The Risk of Absconding
Sometimes, a new package of bees will abandon the hive within the first few days. This is called absconding. It's often caused by stress or a feeling that the location is unsuitable.
Providing a continuous food source and leaving the queen caged for a few days are the best ways to prevent this. Once they have started building comb and the queen is laying eggs, they are highly unlikely to leave.
Preventing Cross-Comb
The horizontal design of a top bar hive gives bees freedom to build comb naturally. However, they can sometimes build comb across several bars instead of parallel to them, making inspections impossible.
Ensure the first few combs they build are straight. If you see one starting to go crooked, gently nudge it back into place during your first inspection. Straight initial combs serve as a guide for all future construction.
Making the Right Choice for Your Colony's Success
Your goal is to guide the bees as they establish a self-sustaining home. The installation method is your first, most important interaction.
- If you are a new beekeeper: Start with a package of bees, as it is the most controlled and predictable installation method.
- If you have captured a local swarm: Be ready for a fast installation and provide immediate, ample syrup to capitalize on their natural drive to build.
- If you are transferring from another hive: This advanced technique requires carefully securing existing brood comb to top bars to give the colony a significant head start.
A gentle and well-prepared installation sets the foundation for a healthy, productive colony for years to come.
Summary Table:
| Step | Key Action | Purpose |
|---|---|---|
| 1. Hive Prep | Set up follower board & feeder with 1:1 sugar syrup. | Creates a warm, secure space with immediate food access. |
| 2. Queen Installation | Secure queen cage to a central top bar. | Allows worker bees to safely release the queen over a few days. |
| 3. Bee Installation | Gently shake bees from package into the open hive cavity. | Transfers the worker bee population into their new home. |
| 4. Post-Installation | Replace bars, close hive, and provide continuous feeding. | Encourages comb building and prevents colony stress/absconding. |
Ready to start your top bar hive journey with confidence?
A successful installation begins with the right equipment. At HONESTBEE, we supply the durable, well-designed top bar hives, feeders, and protective gear that commercial apiaries and distributors trust. Our wholesale-focused operations ensure you get the reliable supplies you need to build a thriving, productive colony from day one.
Contact our expert team today to discuss your beekeeping equipment needs and set your new colony up for long-term success.
Visual Guide
Related Products
- Top Bar Beehive for Beekeeping Wholesales Kenya Top Bar Hive
- Long Langstroth Style Horizontal Top Bar Hive for Wholesale
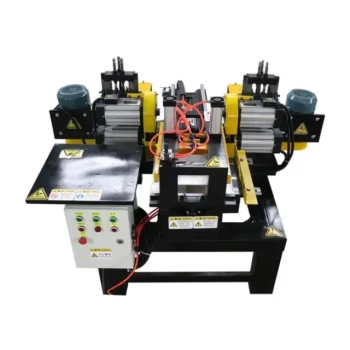
- HONESTBEE Top Bar & Bottom Bar Forming Machine | Bee Frame Machine
- HONESTBEE Square Top Hive Bee Feeder Top Bee Feeder
- HONESTBEE Round Hive Top Bee Feeder for Syrup
People Also Ask
- What is the fundamental difference between a top bar hive and a Langstroth hive? Choose the Best System for Your Apiary
- How is honey harvested from a top bar hive system? Master the Crush and Strain Method for Pure Honey and Beeswax
- What design modifications can improve top bar hive performance in hot climates? Protect Your Apiary from Heat Failure
- How is burr comb and propolis removed from a top bar hive? A Practical Guide for Hive Maintenance
- Why do top bar hives require beekeepers to detach comb? Master the Detach-then-Lift Technique for Comb Safety