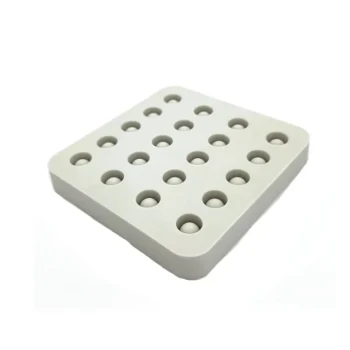
A wax foundation mold press is used by pouring purified, molten beeswax onto a prepared lower mold plate, closing the hinged press, and allowing the wax to cool into a thin sheet embossed with a uniform hexagonal cell pattern. After opening the press, the operator trims the excess wax and gently removes the finished foundation for installation in a wired hive frame. The process converts rendered hive wax into a reusable beekeeping consumable while reducing dependence on purchased foundation.
A mold press works by compressing warm, purified beeswax between textured upper and lower plates. Correct wax preparation, release-agent application, pressing, cooling, and trimming determine whether the finished foundation sheet is uniform and easy to remove.
How the Mold Press Forms Foundation Sheets
Prepare and Purify the Rendered Wax
Rendered hive wax should be cleaned and purified before it enters the press. Removing debris and contaminants helps produce a smoother sheet and reduces the risk of particles interfering with the mold’s cell pattern.
Melt the wax gradually using a double boiler, or bain-marie, rather than applying direct heat. Controlled indirect heating reduces the risk of scorching the wax and makes the material easier to handle safely.
Prepare the Mold Plates
A foundation press has hinged upper and lower plates lined with textured rubber or engraved mold surfaces. These surfaces carry the hexagonal worker-cell pattern that will be transferred to the wax.
Apply a light coating of liquid release agent to the mold leaves before pouring. Commercial operators may use a suitable soapy liquid or another manufacturer-approved lubricant to prevent the warm beeswax from adhering to the mold.
Pour the Molten Beeswax
Open the press and distribute the molten wax across the lower plate. Use enough wax to cover the mold surface and form a continuous sheet, while avoiding unnecessary excess that will increase trimming and remelting work.
Consistent pouring improves thickness and pattern quality. For repeat production, operators should use a stable wax temperature, repeatable pour quantity, and a mold maintained in good condition.
Close and Compress the Press
Lower the upper plate onto the wax and apply firm, even pressure. The plates compress the wax into a thin sheet while imprinting the foundation pattern on its surface.
The press must close evenly so that the cell pattern forms consistently from one side of the sheet to the other. Uneven pressure can create thin areas, incomplete cells, or irregular edges.
Allow the Sheet to Cool
Keep the press closed until the wax has set sufficiently to hold its shape. The exact cooling period depends on sheet thickness, mold temperature, ambient conditions, and the equipment design.
The sheet should be firm enough to remove without distortion but not so cold that it becomes unnecessarily brittle. Some operating guidance recommends removing the foundation while it remains slightly warm and pliable, often around 1.5 to 2 minutes after forming.
Open, Trim, and Remove the Foundation
Open the press carefully and inspect the newly formed sheet. Trim the excess wax around the perimeter so the foundation matches the dimensions required by the intended frame.
Gently pull the sheet from the mold rather than levering it forcefully. If the release agent and cooling conditions are correct, the foundation should separate without damaging the cell pattern.
Install the Sheet in a Frame
The finished foundation is placed into a wired wooden hive frame. The wires support the sheet as bees extend the embossed worker cells into fully built comb.
Uniform foundation helps guide bees toward orderly comb construction, which supports efficient use of hive space and can simplify later mechanical honey extraction.
Why Standardized Foundation Matters
It Guides Comb Construction
The embossed hexagonal pattern gives bees a starting geometry for building comb. This encourages more consistent spacing and reduces the likelihood of irregular comb in managed hives.
It Reuses Apiary Wax
A press allows an apiary to return rendered surplus wax to productive use. Trimmed edges and other clean offcuts can be remelted for later batches, improving material efficiency.
It Reduces Recurring Supply Costs
Producing foundation from recovered hive wax can reduce the volume of replacement foundation purchased over time. The financial benefit depends on wax quality, labor, energy use, equipment capacity, and production consistency.
It Supports Operational Independence
For beekeepers, wholesalers, and distributors serving regional apiaries, in-house or locally supplied foundation production can improve availability. A reliable supply program can also complement a broader product portfolio that includes frames, hive equipment, wax-processing tools, and other consumables.
It Improves Product Consistency
A precision mold produces repeatable cell dimensions across multiple sheets. Consistency helps standardize frame preparation and makes foundation more suitable for organized apiary operations.
Understanding the Trade-offs
A Manual Press Has Limited Throughput
A hinged casting press is relatively simple and economical, but each sheet requires separate pouring, closing, cooling, removal, and trimming. High-volume producers may need multiple presses or a roller-based foundation machine with engraved rollers for more continuous production.
Wax Quality Directly Affects Results
Dirty or poorly filtered wax can leave inclusions in the sheet, reduce visual quality, and interfere with cell formation. Wax from different sources may also vary in color, hardness, and composition, so incoming material should be assessed before production.
Release Agent Must Be Controlled
Too little release agent can cause the sheet to stick and tear during removal. Too much can leave residue on the foundation, so the mold should receive a light, even coating appropriate for beekeeping use.
Temperature and Cooling Require Consistency
Overheated wax may be damaged, while wax that is too cool may not flow evenly across the mold. Cooling too quickly or too slowly can affect flexibility, thickness, and ease of removal.
Trimming Creates Additional Handling
Pressed sheets normally include excess wax around the mold perimeter. Trimming is necessary for accurate frame fit, and the offcuts should be kept clean and returned to the melting process rather than discarded.
Equipment Selection Should Match Demand
A small apiary may be well served by a manual two-plate press. Distributors, contract producers, and larger beekeeping operations should compare mold size, cycle time, operator effort, replacement-part availability, and delivery support before selecting equipment.
How to Apply This to Your Operation
The best process depends on whether the priority is occasional recycling, standardized apiary production, or commercial supply.
- If your primary focus is reducing apiary costs: Use a manual mold press with purified rendered wax, recover all clean offcuts, and establish a repeatable melting and cooling routine.
- If your primary focus is consistent frame preparation: Select a precision mold with uniform cell dimensions and maintain controlled pouring, pressing, and trimming practices.
- If your primary focus is higher production volume: Compare multiple manual presses with roller-based foundation machines, considering throughput, labor, maintenance, and order fulfillment requirements.
- If your primary focus is distribution or resale: Source presses and compatible beekeeping consumables from a supplier that can provide a broad product range, rapid response, dependable service, and reliable delivery.
With the right mold, clean wax, and consistent operating method, rendered hive wax can be converted into uniform foundation sheets ready for use in wired frames.
Summary Table:
| Step | Action | Key Considerations |
|---|---|---|
| 1 | Purify and melt wax | Use a bain-marie; avoid overheating |
| 2 | Prepare mold plates | Apply release agent to prevent sticking |
| 3 | Pour molten wax | Distribute evenly; control quantity |
| 4 | Close press and apply pressure | Ensure even pressure for uniform pattern |
| 5 | Cool the sheet | Keep closed until set; remove while slightly warm |
| 6 | Trim and remove | Trim edges; gently pull from mold |
| 7 | Install in frame | Place in wired frame for use |
Ready to streamline your foundation production? HONESTBEE offers a wide range of wax foundation presses, hive-making machinery, and beekeeping consumables for apiaries and distributors. Benefit from one-stop sourcing, OEM/ODM support, and rapid delivery. Contact us today to discuss your needs and get a quote!
Related Products
- Beeswax Machine Press Embosser Wax Foundation Mold Printer Bee Hive Equipment Making Sheet
- Notebook Style Beeswax Foundation Mould Wax Foundation Mold
- Manual Beeswax Comb Foundation Machine Wax Foundation Mill Embossing Machine
- Colorful Silicone Beeswax Foundation Mold Mould for Beekeeping
- Electric Flatting and Embossing Machine with Tray for Beekeeping
People Also Ask
- What equipment is needed to make beeswax foundation? A Guide to DIY Wax Sheet Production
- What miscellaneous equipment is needed for making foundation? A Guide to the Essential Tools
- What miscellaneous equipment is useful when making beeswax foundation? Essential Support Tools for Beekeepers
- What specific equipment is required for making beeswax foundation? Essential Tools for High-Quality Production
- What is the recommended temperature for melting beeswax to make foundation sheets? Master the 70°C-80°C Ideal Range