To properly light a bee smoker, you begin by igniting a fast-burning starter material like newspaper at the bottom of the chamber. Once a small flame is established, you gradually add and pack in slower-burning fuel, such as pine needles or wood shavings. Use the bellows throughout this process to encourage a slow, smoldering burn that produces thick, cool, white smoke.
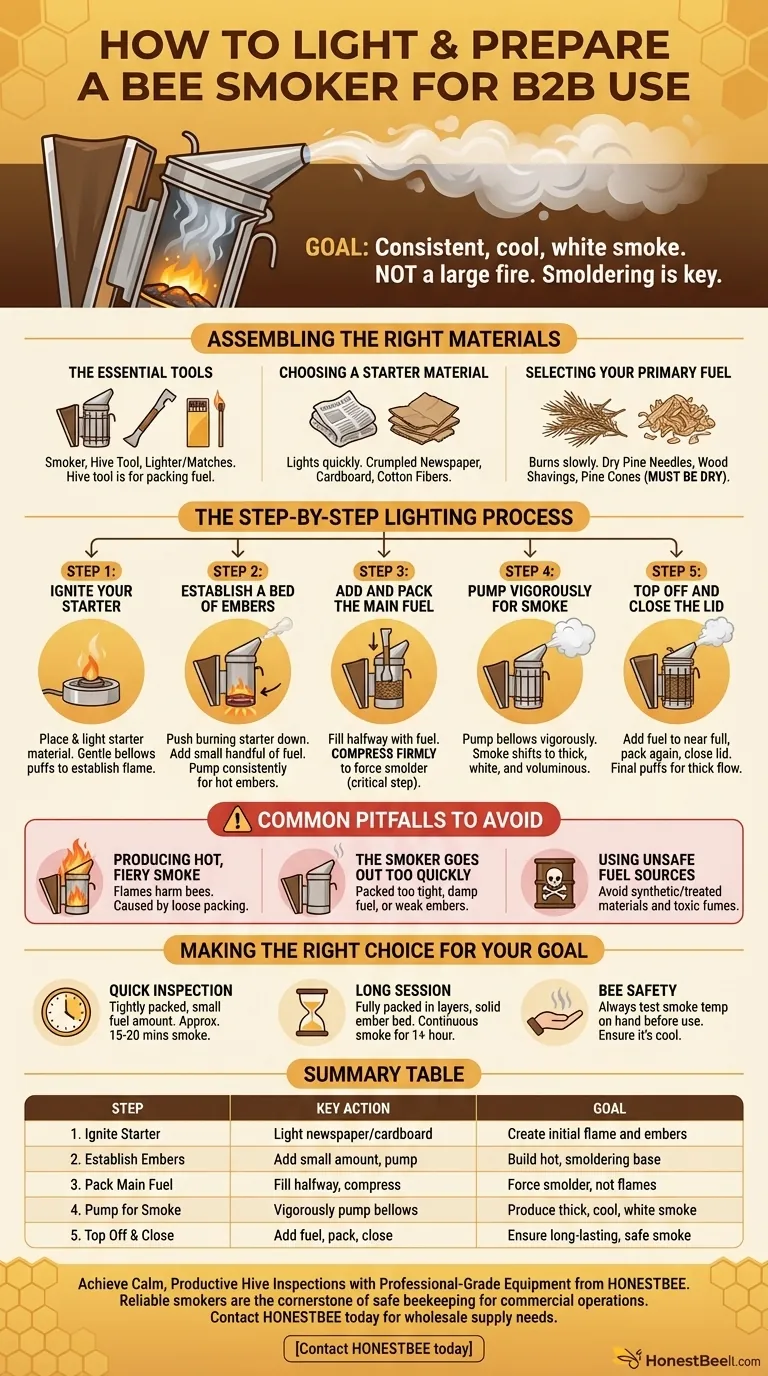
The goal is not to create a large fire, but to produce a consistent volume of cool, white smoke. This is achieved by establishing a hot bed of embers from a starter material, then smothering it with densely packed, slow-burning fuel to force it to smolder rather than flame.
Assembling the Right Materials
Before you begin, gathering the correct components will ensure a smooth and successful process. A well-lit smoker that stays lit depends entirely on having the right starter and fuel.
The Essential Tools
You will need the smoker itself, a hive tool for managing the fuel, and a lighter or matches. The hive tool is invaluable for pushing down fuel and ensuring it's packed correctly.
Choosing a Starter Material
The starter is a material that lights quickly and easily to create the initial embers.
Good options include crumpled newspaper, cardboard, or natural cotton fibers. These catch a flame instantly, providing the heat needed to ignite your primary fuel.
Selecting Your Primary Fuel
The primary fuel should be something that burns slowly and produces a great deal of smoke.
Excellent choices include dry pine needles, wood shavings, pine cones, or commercially available smoker fuels. The key is that the material must be completely dry to smolder effectively.
The Step-by-Step Lighting Process
Follow this sequence to achieve a long-lasting, smoke-producing fire every time. The key is patience and building the fire in stages.
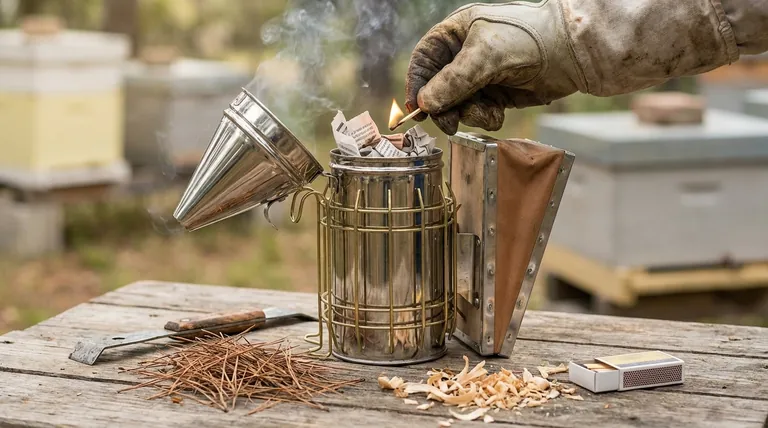
Step 1: Ignite Your Starter
Place a small amount of your starter material, like a crumpled piece of newspaper, into the bottom of the smoker chamber. Light it and give the bellows a few gentle puffs to help a small flame appear.
Step 2: Establish a Bed of Embers
Use your hive tool to push the burning starter to the bottom. Add a small handful of your primary fuel on top.
Pump the bellows gently but consistently. You are not trying to create a large fire, but rather to get the first layer of fuel burning steadily and creating a hot bed of embers.
Step 3: Add and Pack the Main Fuel
Once the initial fuel is burning well, begin adding more. Fill the chamber about halfway with your primary fuel.
Now, use the hive tool to compress this fuel down firmly. This packing is the most critical step for producing smoke instead of flames.
Step 4: Pump Vigorously for Smoke
With the fuel packed down, pump the bellows vigorously. You should see the smoke shift from thin and gray to thick, white, and voluminous. This indicates you have a good smolder.
Step 5: Top Off and Close the Lid
Add more fuel until the chamber is nearly full, packing it down once more. Close the lid before the packed fuel has a chance to burst back into flames. A few more puffs will push thick smoke out of the nozzle.
Common Pitfalls to Avoid
Understanding what can go wrong is as important as knowing the steps to get it right. These common mistakes can lead to an ineffective smoker or agitated bees.
Producing Hot, Fiery Smoke
If flames are coming out of your smoker's nozzle, the smoke is too hot and will harm or anger the bees. This is usually caused by not packing the fuel down tightly enough, which allows too much oxygen to create a fire instead of a smolder.
The Smoker Goes Out Too Quickly
A smoker that extinguishes mid-inspection is a common frustration. This is typically caused by packing the fuel too tightly, using damp fuel, or not establishing a hot enough bed of embers before adding the main fuel load.
Using Unsafe Fuel Sources
Never use synthetic materials, treated lumber, or anything that could release toxic fumes. Stick to natural, untreated materials to ensure the health of your bees and the safety of your honey.
Making the Right Choice for Your Goal
Your approach to using the smoker can be refined based on your specific needs during a hive inspection.
- If your primary focus is a quick inspection: A smaller amount of fuel packed tightly will give you about 15-20 minutes of quality smoke, perfect for a brief check.
- If your primary focus is a long session: Fully pack the smoker chamber in layers, ensuring a solid ember bed at the bottom, to provide continuous smoke for an hour or more.
- If your primary focus is bee safety: Always test the temperature of the smoke on the back of your hand before puffing it into the hive entrance to ensure it is cool.
Mastering your smoker is a foundational skill in beekeeping that provides a calm and safe experience for both you and your bees.
Summary Table:
| Step | Key Action | Goal |
|---|---|---|
| 1. Ignite Starter | Light newspaper/cardboard at bottom | Create initial flame and embers |
| 2. Establish Embers | Add small amount of primary fuel, pump bellows | Build a hot, smoldering base |
| 3. Pack Main Fuel | Fill chamber halfway, compress fuel down | Force smolder, not flames |
| 4. Pump for Smoke | Vigorously pump bellows | Produce thick, cool, white smoke |
| 5. Top Off & Close | Add more fuel, pack, close lid | Ensure long-lasting, safe smoke |
Achieve Calm, Productive Hive Inspections with Professional-Grade Equipment from HONESTBEE
A reliable smoker is the cornerstone of safe beekeeping. For commercial apiaries and distributors, having durable, high-performance equipment is non-negotiable for protecting your investment and ensuring efficient operations.
HONESTBEE supplies beekeepers and beekeeping equipment distributors with wholesale-focused, professional-grade supplies built to last. Let us help you equip your operation for success.
Contact HONESTBEE today to discuss your wholesale supply needs and ensure your beekeeping practice is built on a solid foundation.
Visual Guide
Related Products
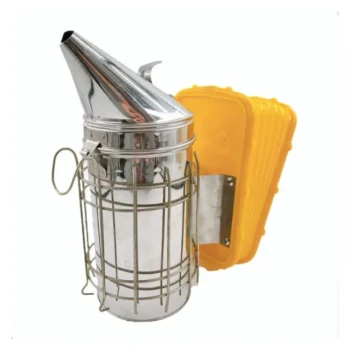
- Stainless Steel Honey Bee Smoker Hive and Honeycomb Smoker for Beekeeping
- Professional Bee Smoker with Elongated Spout and Durable Bellows for Beekeeping
- Premium Traditional Copper Bee Smoker with Bellows
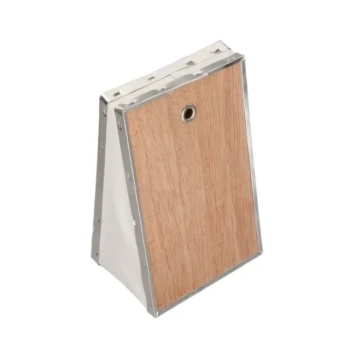
- Heavy Duty Manual Bee Smoker Blower for Beekeeping
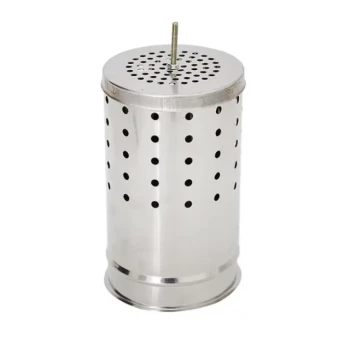
- European Stainless Steel Bee Smoker for Honey Bee Hive
People Also Ask
- What is the best material for a bee smoker? Choose the Right Fuel for a Calm Hive
- What are bee smokers made out of? Choose the Right Material for Your Apiary
- When should you add more fuel to the bee smoker? Watch for This Critical Smoke Signal
- Why is a stainless steel bee smoker considered indispensable? Master Hive Management with Cool Smoke Technology
- How do bee smokers and colored light sources work together to assist in night-time honey harvesting? Expert Strategies