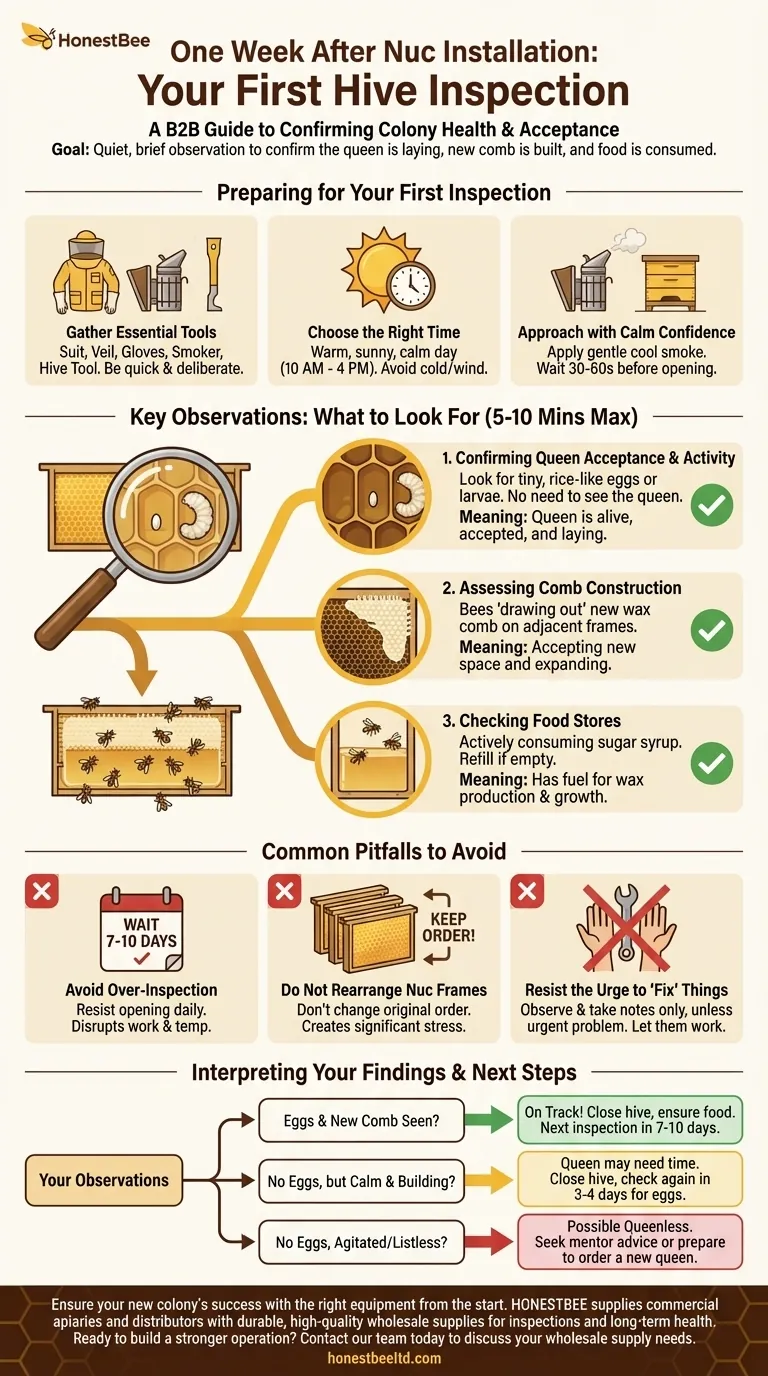
One week after installing your nucleus colony (nuc), your primary task is to perform the first hive inspection. This initial check is a quiet, brief observation designed to confirm the queen is healthy and the colony has accepted its new home, setting the stage for all future growth.
The goal of this first inspection is not to intervene, but to gather information. You are simply checking for three critical signs of success: the queen is laying, the bees are building new comb, and they are consuming their food.
Preparing for Your First Inspection
A successful inspection begins before you open the hive. The goal is to be efficient and minimize stress on the new colony.
Gather Your Essential Tools
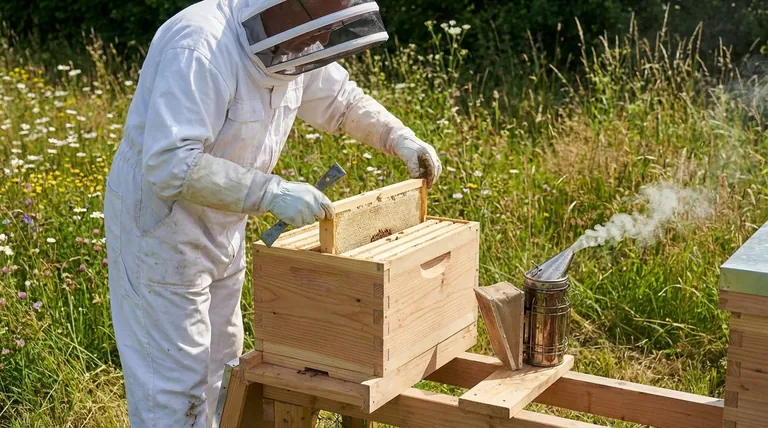
Before approaching the hive, have your equipment ready. You will need your protective gear (suit, veil, and gloves), a smoker, and a hive tool. Having everything on hand allows you to be quick and deliberate.
Choose the Right Time
Plan your inspection for a warm, sunny, and calm day, typically between 10 AM and 4 PM. Bees are less defensive in good weather. Avoid inspections during cold, rainy, or windy conditions.
Approach with Calm Confidence
Light your smoker and apply a few gentle puffs of cool, white smoke at the hive entrance. Wait 30-60 seconds before opening the hive. This interrupts the bees' alarm pheromones and encourages them to eat honey, making them calmer and easier to manage.
Key Observations: What to Look For
This inspection should be brief—no more than 5-10 minutes. Your focus is on observation, not manipulation.
Confirming Queen Acceptance and Activity
The most important sign of a healthy colony is a laying queen. You do not need to physically see the queen herself. Instead, look for evidence of her work.
Carefully and slowly lift a central frame from the original nuc. Look for tiny, rice-like eggs—one at the bottom of each cell. The presence of eggs is your definitive proof that the queen is alive, accepted, and productive. You may also see small, white larvae curled in the cells, which is an even better sign of progress.
Assessing Comb Construction
Look at the frames adjacent to the original nuc frames. You should see the bees starting to "draw out" new wax comb. This indicates they have accepted the new space and are actively expanding the nest.
Checking Food Stores
Check the feeder. The bees should be actively consuming the sugar syrup you provided. This fuel is essential for them to produce wax and build out the hive. If the feeder is empty, refill it.
Common Pitfalls to Avoid
What you don't do during this first check is as important as what you do. Restraint is the mark of a good beekeeper.
Avoid Over-Inspection
Resist the temptation to open the hive every day. Each inspection sets the colony back, disrupting their work and temperature regulation. After this one-week check, wait another 7-10 days before your next inspection.
Do Not Rearrange the Nuc Frames
When you installed the nuc, you should have kept the frames together in their original order. Do not change this order. The bees have organized their brood, pollen, and honey in a specific way, and disturbing this "brood nest" creates significant stress.
Resist the Urge to "Fix" Things
Unless you see a clear and urgent problem (like no eggs at all or signs of pests), your job is to observe, take notes, and close the hive. Let the bees do their work. A new colony needs time and peace to establish itself.
Interpreting Your Findings and Next Steps
Your observations will guide your next actions. Use this simple framework to decide what to do next.
- If you see eggs and new comb: Your colony is on the right track. Close the hive, ensure they have food, and plan your next inspection in 7-10 days.
- If you see no eggs but the bees are calm and building comb: The queen may simply need a few more days to settle in. Close the hive and check again in another 3-4 days specifically for eggs.
- If you see no eggs and the bees seem agitated or listless: The colony may be queenless. It is time to seek advice from a local beekeeping mentor or prepare to order a new queen.
This first look is your baseline, providing the crucial insight needed to guide your colony to a strong and productive future.
Summary Table:
| Key Observation | What to Look For | What It Means |
|---|---|---|
| Queen Activity | Tiny, rice-like eggs in cells | Queen is alive, accepted, and laying. |
| Comb Construction | Bees drawing out new wax on frames | Colony is expanding and accepting the new hive. |
| Food Consumption | Bees actively consuming sugar syrup | Colony has fuel for wax production and growth. |
Ensure your new colony's success with the right equipment from the start.
At HONESTBEE, we supply commercial apiaries and beekeeping equipment distributors with the durable, high-quality supplies needed for critical hive inspections and long-term colony health. From reliable smokers and hive tools to essential feeders, our wholesale-focused operations ensure you have what you need when you need it.
Ready to build a stronger operation? Contact our team today to discuss your wholesale supply needs.
Visual Guide
Related Products
- 5 Frame Wooden Nuc Box for Beekeeping
- 5 Frame Langstroth Poly Nuc Corrugated Plastic Nuc Boxes
- Styrofoam Mini Mating Nuc Box with Frames Feeder Styrofoam Bee Hives 3 Frame Nuc Box
- Automatic Heat Preservation 6 Frame Pro Nuc Box for Honey Bee Queen Mating
- Twin Queen Styrofoam Honey Bee Nucs Mating and Breeding Box
People Also Ask
- What are the characteristics of a standard nuc? Essential Guide for Professional Apiaries
- What is the procedure for moving bees from a 5-frame nuc to a 10-frame hive? 6 Steps for a Successful Colony Transfer
- How are nuc boxes used in queen rearing? The Essential Tool for Reliable Queen Mating
- What roles do five-frame nucleus boxes and ten-frame Langstroth hive boxes play in colony standardization?
- What is the most common type of standard nuc? The 5-Frame Nuc Explained


