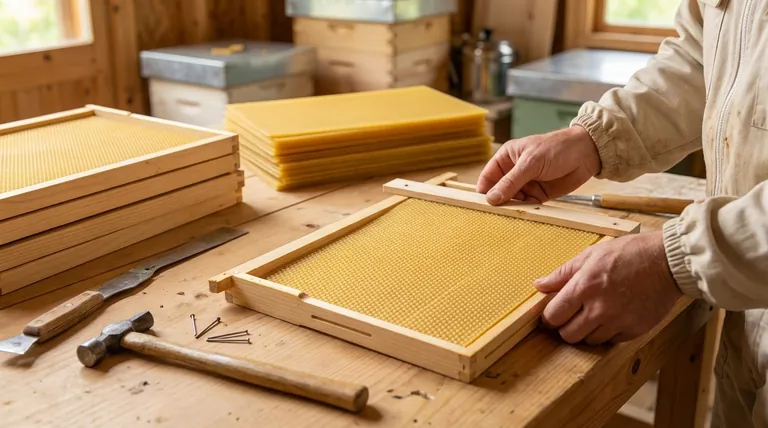
Installing wax foundation is a straightforward process that involves placing a sheet of beeswax into a frame, aligning it, and securing it so your bees have a clear guide for building their comb. The most common method uses the frame's built-in components, such as a groove for the bottom of the sheet and a wedge strip at the top that fastens over wire hooks embedded in the foundation.
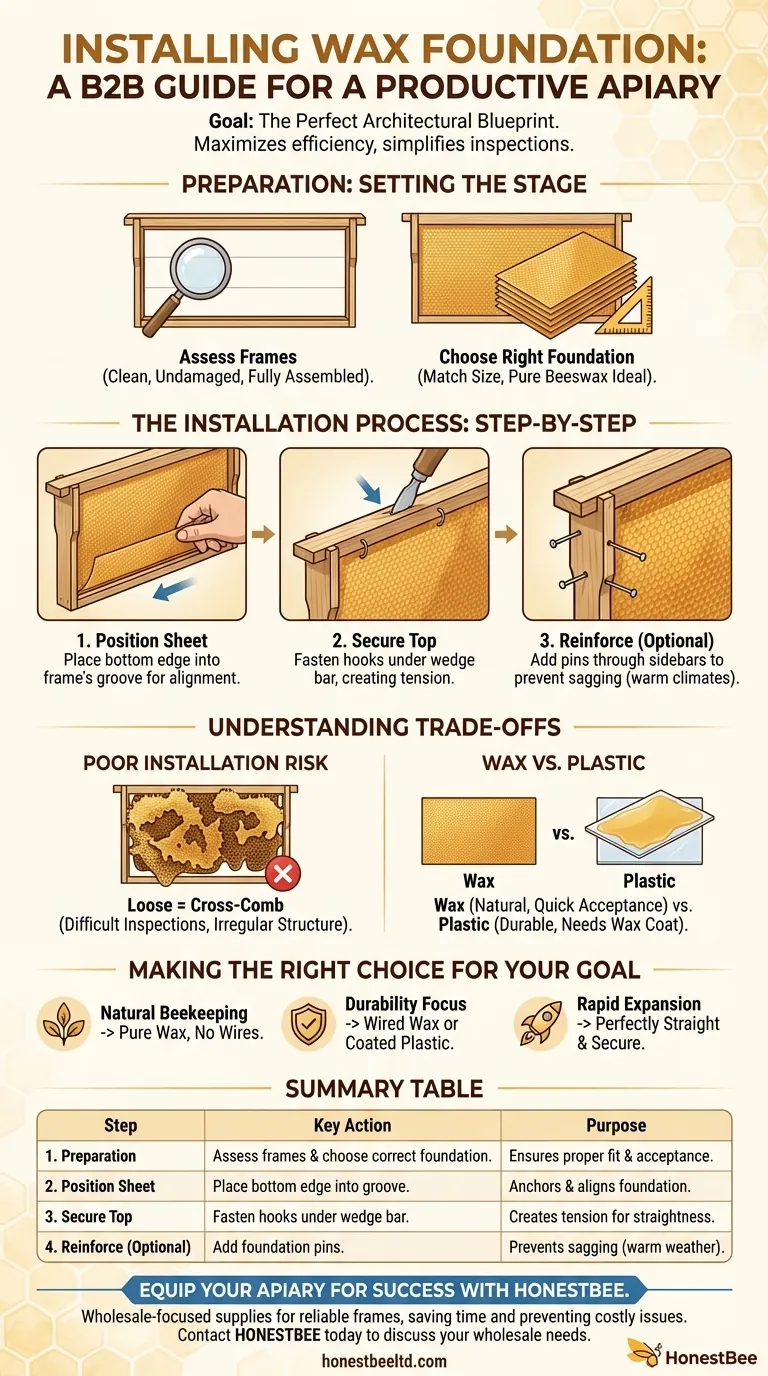
The goal of installing foundation is not merely to fill a frame, but to provide your colony with a perfect architectural blueprint. A properly installed foundation ensures the bees build straight, even combs, which maximizes their efficiency and makes hive inspections significantly easier for the beekeeper.
Preparation: Setting the Stage for Success
Before you touch a sheet of foundation, a few preparatory steps will ensure the process goes smoothly and yields the best results for your colony.
Assess Your Hive Frames
Ensure your wooden frames are clean, fully assembled, and in good condition. Any residue or damage can interfere with a proper fit and may be rejected by the bees.
Choose the Right Foundation
Your foundation must match the dimensions of your hive bodies (e.g., deep, medium, or shallow). Pure beeswax is ideal, as its natural scent encourages bees to begin working on it quickly.
The Installation Process: A Step-by-Step Guide
With your frames ready, you can now install the wax foundation. The key is to create a secure and perfectly centered guide for the bees.
Step 1: Position the Foundation Sheet
Begin by placing the bottom edge of the wax foundation sheet into the groove cut into the frame's bottom bar. This anchors the sheet and is the first step in alignment.
Step 2: Align and Secure the Top
Tilt the foundation sheet up into the frame. The top of the sheet will have small wire hooks embedded in the wax. These hooks are designed to loop over a support wire or fit under the removable wedge bar in the top of the frame.
Gently slide the frame's wedge strip into place, securing the foundation's wire hooks. This creates tension and holds the sheet firmly at the top.
Step 3: Add Optional Reinforcement
For added stability, especially in warmer climates where wax can sag, you can use additional support. Small foundation pins or nails can be pushed through the frame's sidebars and into the edge of the foundation to hold it taut.
Understanding the Trade-offs
The choices you make during installation have a direct impact on the health and productivity of your hive. Understanding the potential pitfalls is critical.
The Risk of Poor Installation
A loose or poorly aligned foundation is a significant problem. Bees may build "cross-comb," connecting multiple frames together with irregular wax structures. This makes it impossible to inspect individual frames without destroying the comb and agitating the colony.
Wax vs. Plastic Foundation
While this guide focuses on wax, some beekeepers use plastic foundation. Plastic is more durable and less prone to sagging. However, it almost always requires a fresh coat of melted beeswax to encourage the bees to accept it and build upon it, whereas pure wax foundation is typically accepted immediately.
Making the Right Choice for Your Goal
Your approach to installing foundation can be tailored to your specific beekeeping philosophy and objectives.
- If your primary focus is natural beekeeping: Use pure, high-quality beeswax foundation without any wiring or reinforcement to provide the most natural starting point.
- If your primary focus is durability and longevity: Use vertically wired wax foundation or consider plastic foundation (coated in beeswax) to prevent sagging and ensure frames last for many seasons.
- If your primary focus is rapid colony expansion: Ensure every sheet is perfectly straight and secure, as this allows the bees to draw comb with maximum speed and efficiency, accelerating brood and honey production.
By providing a stable and straight guide, you empower your bees to build an organized and productive home.
Summary Table:
| Step | Key Action | Purpose |
|---|---|---|
| 1. Preparation | Assess frames & choose correct foundation size/type. | Ensures a proper fit and encourages bee acceptance. |
| 2. Position Sheet | Place bottom edge into the frame's groove. | Anchors and aligns the foundation. |
| 3. Secure Top | Fasten wire hooks under the wedge bar. | Creates tension to hold the sheet straight. |
| 4. Reinforce (Optional) | Add foundation pins through the sidebars. | Prevents sagging, especially in warm weather. |
Equip your apiary for success with HONESTBEE.
A proper foundation installation is the first step to a healthy, productive hive. Whether you're a commercial apiary focused on maximizing honey yield or a distributor supplying beekeepers, using high-quality, durable supplies is non-negotiable.
HONESTBEE supplies beekeeping equipment and foundation to commercial apiaries and distributors through wholesale-focused operations. We provide the reliable tools you need to ensure every frame is built right, saving time and preventing costly issues like cross-comb.
Ready to strengthen your operation with premium supplies? Contact HONESTBEE today to discuss your wholesale needs and see how we can support your beekeeping goals.
Visual Guide
Related Products
- Notebook Style Beeswax Foundation Mould Wax Foundation Mold
- Beeswax Machine Press Embosser Wax Foundation Mold Printer Bee Hive Equipment Making Sheet
- Colorful Silicone Beeswax Foundation Mold Mould for Beekeeping
- Manual Beeswax Comb Foundation Machine Wax Foundation Mill Embossing Machine
- Economy Manual Beeswax Embossing Mill Wax Foundation Machine Roller
People Also Ask
- What are the negative consequences of using old or contaminated beeswax in foundations? Protect Your Hive Today
- What are the specific advantages of regular comb replacement? Boost Hive Health with New Beeswax Foundations
- How can beeswax value-addition processes be utilized to increase beekeeping revenue? Boost Your Apiary Profitability
- What is a foundation mold used for? Turn Your Wax Cappings into High-Quality Foundations
- How do you use the Foundation Mold to create beeswax foundation? Master DIY Beekeeping with Precision


