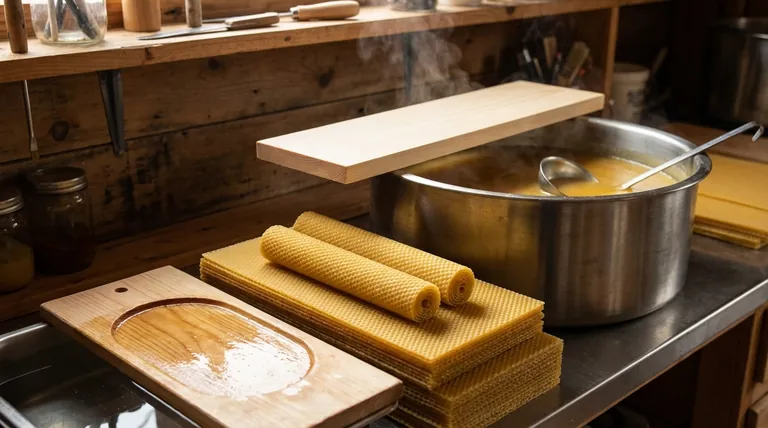
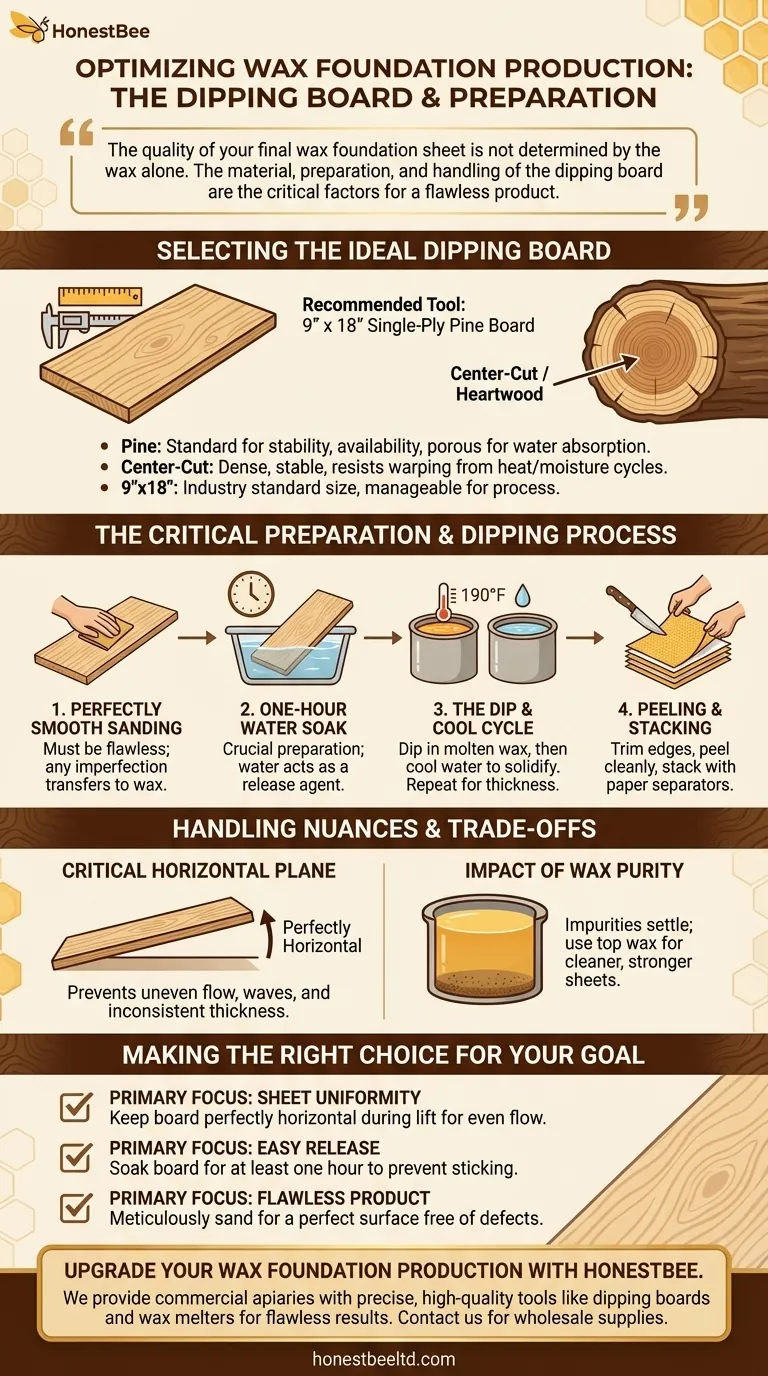
For dipping wax foundation, the recommended tool is a 9" x 18" single-ply pine board, ideally made from center-cut or heartwood. Before use, this board must be sanded perfectly smooth and then soaked in water for approximately one hour. This preparation ensures the wax film can be cooled and peeled off cleanly without sticking to the board.
The quality of your final wax foundation sheet is not determined by the wax alone. The material, preparation, and handling of the dipping board are the critical factors that ensure a uniform thickness and a flawless final product.
Selecting the Ideal Dipping Board
Choosing the right board is the foundational step. The material and cut are selected specifically to prevent issues like warping and to ensure a consistent, smooth surface for the wax.
Why Pine is the Preferred Material
Pine is the standard for dipping boards due to its stability, availability, and grain structure. It is porous enough to absorb the necessary water for release but not so much that it becomes waterlogged or warps easily.
The Importance of "Center-Cut" or "Heartwood"
A board described as center-cut or heartwood is taken from the dense, stable center of the log. This wood is less prone to warping or twisting when repeatedly exposed to cycles of heat and moisture, ensuring your board remains flat and reliable over time.
Standard Dimensions
The industry standard of 9" x 18" is a practical size. It is manageable for the dipping process and produces a standard-sized wax sheet that can be efficiently milled into foundation.
The Critical Preparation and Dipping Process
Proper preparation and technique are non-negotiable. These steps directly create the physical characteristics of the wax sheet, from its smoothness to its uniform thickness.
Step 1: Sanding for a Flawless Surface
The board must be sanded until it is perfectly smooth. Any imperfection on the surface of the wood, no matter how small, will be transferred directly to the wax sheet, creating a weak point or defect in the final foundation.
Step 2: Soaking in Water
Soaking the sanded board in water for about an hour is the most critical preparation step. The water absorbed by the wood acts as a release agent. It creates a micro-barrier that prevents the hot wax from bonding to the wood fibers, allowing the cooled wax sheet to be peeled off cleanly.
Step 3: The Dip and Cool Cycle
After dipping the board into the vat of molten wax (typically around 190°F), it is then dipped into a separate vat of cool water. This water dip rapidly cools and solidifies the wax film on the board. This process is repeated to build up the desired thickness.
Step 4: Peeling and Stacking
Once the wax sheet reaches the correct thickness, use a knife to trim the edges. Carefully peel the sheet from the board and stack it on a flat plate. Place sheets of paper between each wax sheet to prevent them from sticking together and to help retain warmth, which makes the subsequent milling process easier.
Understanding the Trade-offs and Handling Nuances
Even with the right board and preparation, poor technique will yield a poor result. The goal is absolute uniformity, which requires precise handling.
The Critical Horizontal Plane
During the dip and, more importantly, upon withdrawal from the wax vat, the board must be held perfectly horizontal. Allowing the board to tilt will cause the molten wax to flow unevenly, creating waves, lines, and an inconsistent thickness across the sheet.
The Impact of Wax Purity
While not related to the board itself, the wax you are dipping into is a critical variable. Impurities in the wax will settle at the bottom of the vat. Using wax from the top ensures a cleaner, stronger sheet. The vats should be periodically cleaned to remove this residue.
Making the Right Choice for Your Goal
Your success in creating wax foundation depends on mastering these details. The board is not just a carrier; it is a precision tool for forming the final sheet.
- If your primary focus is sheet uniformity: Always keep the board perfectly horizontal as you lift it from the wax to ensure an even flow and consistent thickness.
- If your primary focus is easy release: Soaking the board in water for at least one hour is the most important step to prevent the wax from sticking.
- If your primary focus is a flawless product: Meticulously sand the board until it is perfectly smooth, as any defect will transfer directly to your wax foundation.
By treating the dipping board with this level of precision, you transform a simple piece of wood into a reliable tool for creating high-quality wax foundation.
Summary Table:
| Step | Key Action | Purpose |
|---|---|---|
| 1 | Select a 9x18" center-cut pine board | Ensures stability and prevents warping |
| 2 | Sand the board perfectly smooth | Creates a flawless surface for the wax sheet |
| 3 | Soak the board in water for 1 hour | Acts as a release agent for easy wax peeling |
| 4 | Hold the board perfectly horizontal during dipping | Guarantees uniform wax thickness |
Upgrade your wax foundation production with professional-grade supplies from HONESTBEE. We provide commercial apiaries and beekeeping equipment distributors with the precise, high-quality tools needed for flawless results. Whether you need dipping boards, wax melters, or other essential equipment, our wholesale-focused operations ensure you get reliable products at competitive prices. Contact us today to discuss your needs and elevate your beekeeping operation.
Visual Guide
Related Products
- Notebook Style Beeswax Foundation Mould Wax Foundation Mold
- Colorful Silicone Beeswax Foundation Mold Mould for Beekeeping
- Beeswax Machine Press Embosser Wax Foundation Mold Printer Bee Hive Equipment Making Sheet
- Electric Flatting and Embossing Machine with Tray for Beekeeping
- Beeswax Foundation Sheets Beehive Foundation for Wholesale
People Also Ask
- What are the technical advantages of beeswax foundations and feeding tools? Optimize Your Bee Breeding Phase
- What are the negative consequences of using old or contaminated beeswax in foundations? Protect Your Hive Today
- How do you use the Foundation Mold to create beeswax foundation? Master DIY Beekeeping with Precision
- What is a foundation mold used for? Turn Your Wax Cappings into High-Quality Foundations
- How can beeswax value-addition processes be utilized to increase beekeeping revenue? Boost Your Apiary Profitability


