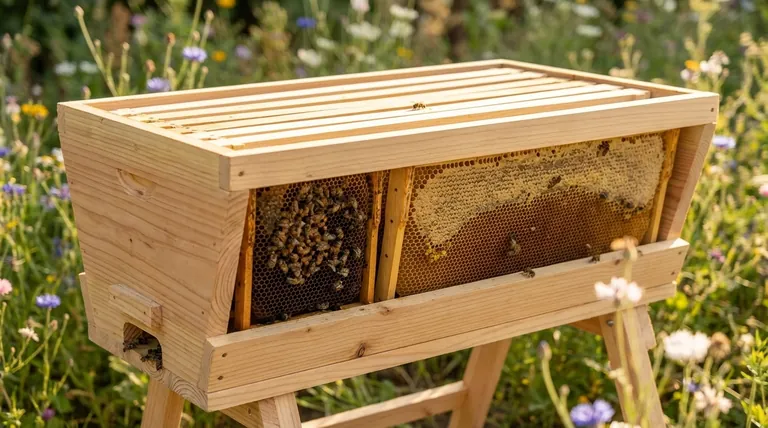
In a top bar hive, the honey combs are almost always located at the very back of the hive, farthest away from the entrance. The colony organizes its home in a predictable, linear fashion, starting with the brood nest (the nursery) near the front and pushing its long-term honey stores to the rear.
The key to understanding a top bar hive is recognizing its natural, logical layout. Bees build their home like a well-organized pantry: daily-use items are up front, while long-term storage is kept safe and secure in the back.
The Logic of the Top Bar Hive Layout
Bees are incredibly efficient architects. The linear shape of a top bar hive encourages them to build their nest in a highly organized pattern that mirrors their priorities for survival and growth.
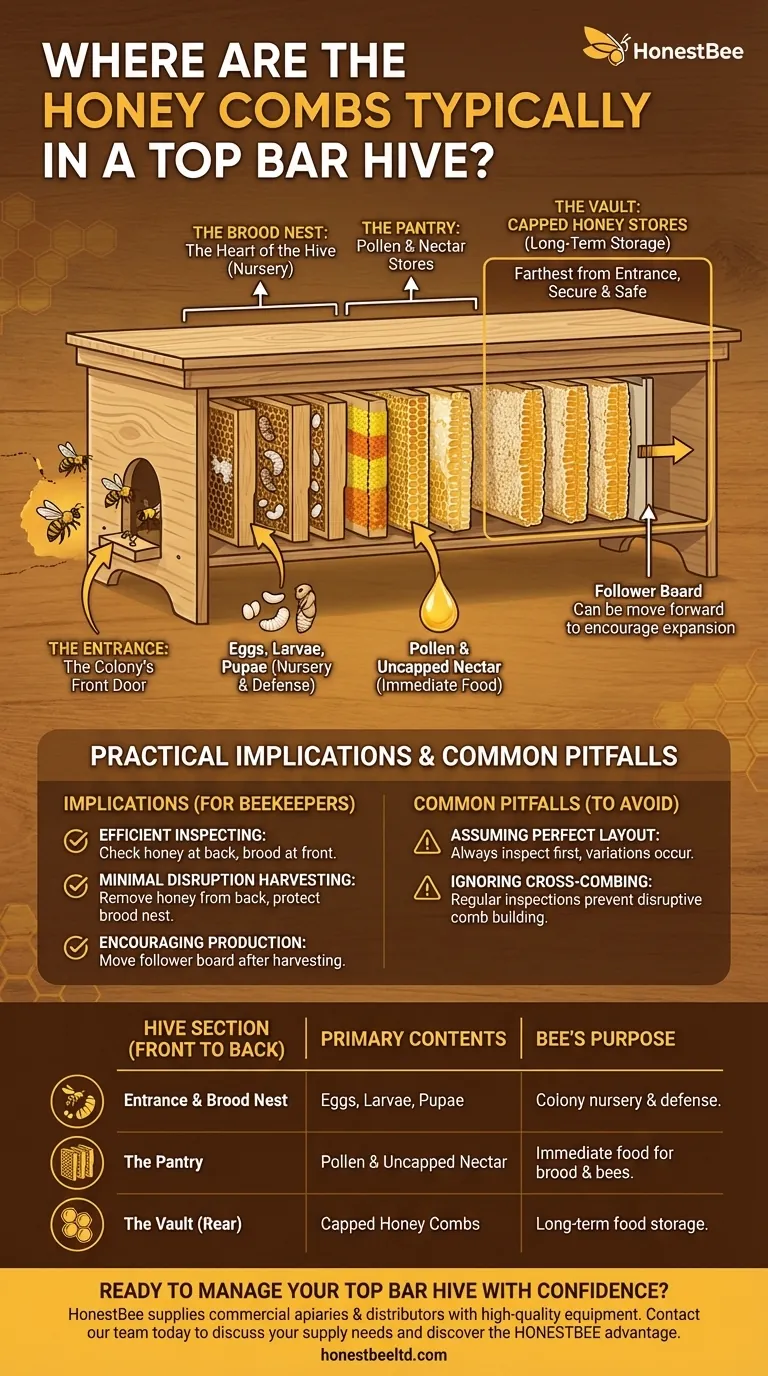
The Entrance: The Colony's Front Door
The hive's activity and structure begin at the entrance. This is the single point of entry and exit for all foragers and is the first line of defense against predators.
The Brood Nest: The Heart of the Hive
Just inside from the entrance, the queen establishes the brood nest. This is the colony's nursery, containing eggs, larvae, and pupae. Placing it near the front allows for efficient temperature regulation and quick defense.
The Pantry: Pollen and Nectar Stores
Immediately surrounding the brood nest, you will find combs containing a band of pollen (often called "bee bread") and uncapped nectar. This is the colony's active pantry, providing immediate food for the developing brood and worker bees.
The Vault: Capped Honey Stores
Farthest from the entrance and the activity of the brood nest, the bees place their long-term honey stores. They fill these combs with nectar, dehydrate it into honey, and cap it with wax for future use. This "vault" is strategically placed at the back to protect the colony's critical winter food supply from pests and robbery.
Practical Implications for Beekeepers
Understanding this natural layout makes managing your top bar hive simpler, less disruptive, and more intuitive.
Inspecting Your Hive Efficiently
Knowing the layout means you don't have to search for what you need. You can check on honey stores by looking at the last few bars, or assess the queen's laying pattern and brood health by examining the combs near the entrance.
Harvesting with Minimal Disruption
This is the single greatest advantage of this layout. You can harvest honey by simply removing a few bars from the very back of the hive. This procedure causes almost no disturbance to the crucial brood nest at the front, reducing stress on the colony.
Encouraging Honey Production
After harvesting bars from the back, you can move the "follower board" (the hive's adjustable back wall) forward. This encourages the bees to continue building new comb and storing more honey in the space behind the brood nest.
Common Pitfalls to Avoid
While bees are predictable, they don't always follow a perfect blueprint. Awareness of potential variations is crucial for effective management.
Assuming a Perfect Layout
Always inspect your hive before taking action. While the back is the typical place for honey, a colony might occasionally store it in an unusual location, especially if the hive is very full or has unique conditions.
Ignoring Cross-Combing
Sometimes, bees may build a single comb across two or more top bars. This "cross-combing" can disrupt the hive's linear organization and make it impossible to remove individual bars without destroying the comb and agitating the bees. Regular inspections help you catch and correct this early.
Making the Right Choice for Your Goal
Your approach should be guided by your specific objective during a hive inspection.
- If your primary focus is harvesting honey: Confidently work from the rear of the hive, as this is where the fully capped honey combs will be located with the least disturbance to the colony.
- If your primary focus is checking colony health: Begin your inspection on the combs just behind the brood nest and work your way forward to assess the queen's laying pattern and the health of the larvae.
- If your primary focus is encouraging expansion: Add empty top bars between the last brood comb and the first fully stored honey comb to give the bees a clear space to build.
By understanding the bees' own logic, you can manage your hive in a way that works with their natural instincts, not against them.
Summary Table:
| Hive Section (Front to Back) | Primary Contents | Bee's Purpose |
|---|---|---|
| Entrance & Brood Nest | Eggs, Larvae, Pupae | Colony nursery & defense. |
| The Pantry | Pollen & Uncapped Nectar | Immediate food for brood & bees. |
| The Vault (Rear) | Capped Honey Combs | Long-term food storage. |
Ready to manage your top bar hive with confidence?
At HONESTBEE, we supply commercial apiaries and beekeeping equipment distributors with the high-quality, durable supplies needed for efficient and successful hive management. Whether you need top bars, hive tools, or protective gear, our wholesale-focused operations are designed to support your business.
Contact our team today to discuss your supply needs and discover the HONESTBEE advantage.
Visual Guide
Related Products
- Top Bar Beehive for Beekeeping Wholesales Kenya Top Bar Hive
- Long Langstroth Style Horizontal Top Bar Hive for Wholesale
- HONESTBEE Top Bar & Bottom Bar Forming Machine | Bee Frame Machine
- HONESTBEE Square Top Hive Bee Feeder Top Bee Feeder
- Professional Hive Top Bee Feeder for Beekeeping
People Also Ask
- How is burr comb and propolis removed from a top bar hive? A Practical Guide for Hive Maintenance
- How is honey harvested from a top bar hive system? Master the Crush and Strain Method for Pure Honey and Beeswax
- What is the fundamental difference between a top bar hive and a Langstroth hive? Choose the Best System for Your Apiary
- Why do top bar hives require beekeepers to detach comb? Master the Detach-then-Lift Technique for Comb Safety
- How does comb construction differ between a top bar hive and a Langstroth hive? Choose the Best Method for Your Apiary