To correctly install the mesh in a feeder box, you must treat the ladder and the barrier as two separate components with distinct functions. The mesh ladder is stapled along the top edge of the interior wall to give bees a climbing surface, while the separate barrier piece is stapled to the outer edges of the box and bent downward to prevent bees from accessing the main syrup reservoir.
The goal of the installation is not just to attach mesh, but to create two separate zones: a small, safe access area for the bees and a large, inaccessible reservoir for the syrup. The ladder provides safe access, and the barrier enforces this critical separation.
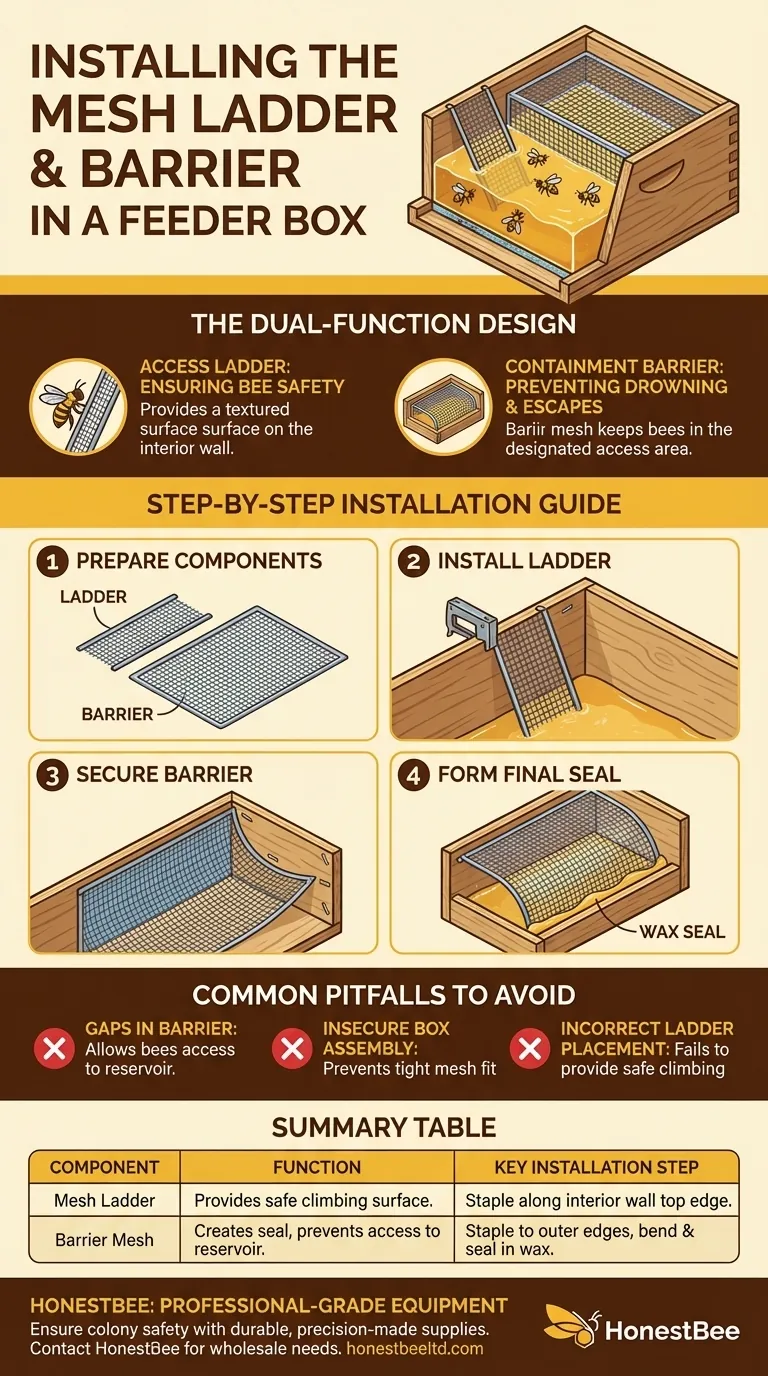
Understanding the Dual-Function Design
The mesh system serves two purposes that are vital for the health of your colony during feeding. Misunderstanding this design is the most common point of failure.
The Access Ladder: Ensuring Bee Safety
The first piece of mesh acts as a simple ladder. Bees can drown easily in open syrup.
This ladder is installed on the interior wall of the feeder, providing a textured surface for the bees to securely climb down to the syrup and back up again.
The Containment Barrier: Preventing Drowning and Escapes
The second, larger piece of mesh is a barrier. It keeps the vast majority of bees out of the main syrup tank, where they could drown en masse.
It also prevents bees from flying out of the feeder and escaping when you open the hive for a refill, containing them within their designated access area.
Step-by-Step Installation Guide
Proper installation requires careful attention to the placement and sealing of both the ladder and the barrier.
Preparing the Mesh Components
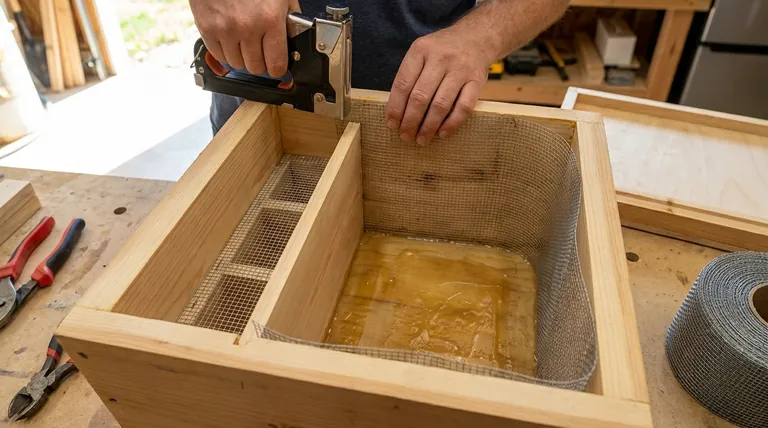
Before installation, cut the barrier mesh to match the outer width of the feeder box. The ladder mesh is a smaller piece that will fit along the top of the interior wall.
Installing the Ladder
Take the smaller ladder mesh and staple it securely along the top edge of the interior wall. This piece remains entirely within the small feeding section of the box.
Securing the Barrier
Drape the larger barrier mesh over the entire top of the box. Staple it along the top edges of the back and side walls, leaving the front open. The mesh should now cover both the main reservoir and the smaller feeding area.
Forming the Final Seal
Trim the section of the barrier mesh that covers the small feeding area. Bend this trimmed edge downward, creating a vertical wall that spans the gap between the box's outer wall and the interior divider wall.
Finally, press the bottom edge of this bent mesh firmly into the wax on the floor of the box. This creates a bee-proof seal, ensuring they cannot crawl under the barrier into the main tank.
Common Pitfalls to Avoid
A poorly installed mesh system can be more dangerous than having no mesh at all. The details are critical to success.
Gaps in the Barrier
If the barrier mesh is not bent properly or the bottom edge is not sealed in wax, bees will find the gap. This allows them to access the main reservoir, which leads to mass drowning.
Insecure Box Assembly
The mesh installation depends on a solid foundation. If the feeder box itself is not assembled squarely or if the wood splits from driving screws without pilot holes, you will struggle to get the mesh to fit tightly and form a proper seal.
Incorrect Ladder Placement
The ladder must be stapled securely to the interior wall. If it is loose, it can fall into the syrup, failing to provide a safe climbing surface for the bees.
Making the Right Choice for Your Goal
Follow these recommendations to ensure your feeder is both safe and effective.
- If your primary focus is preventing bee drowning: Confirm the barrier mesh is bent cleanly and the bottom edge is pressed firmly into the floor wax to create a perfect seal.
- If your primary focus is ensuring easy feeding access: Make sure the ladder mesh is securely stapled and provides a clear, uninterrupted path for bees to climb.
- If your primary focus is long-term durability: Assemble the wooden box with care first, using pilot holes for screws and ensuring all joints are square before attempting to install the mesh.
Proper mesh installation is the critical step that transforms a simple box into a safe and efficient feeding station for your colony.
Summary Table:
| Component | Function | Key Installation Step |
|---|---|---|
| Mesh Ladder | Provides a safe climbing surface for bees. | Staple along the top edge of the interior wall. |
| Barrier Mesh | Creates a seal to prevent access to the main syrup reservoir. | Staple to outer edges, bend downward, and seal into floor wax. |
Ensure the safety of your colony with professional-grade equipment from HONESTBEE.
A correctly installed feeder is vital for successful beekeeping. HONESTBEE supplies durable, precision-made beekeeping supplies and equipment to commercial apiaries and distributors through our wholesale-focused operations. Our products are designed for easy, effective installation and long-term reliability.
Let us help you build a safer, more productive operation. Contact HONESTBEE today to discuss your wholesale needs and how our equipment can benefit your business.
Visual Guide
Related Products
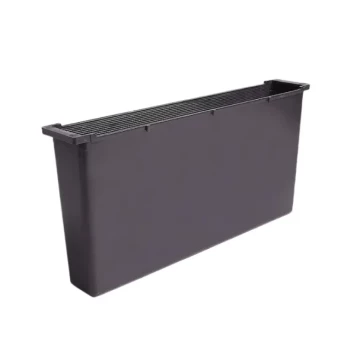
- Professional In-Hive Bee Feeder HONESTBEE Frame for Beekeeping
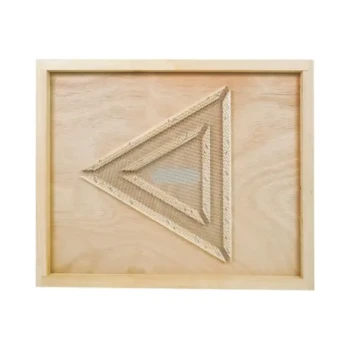
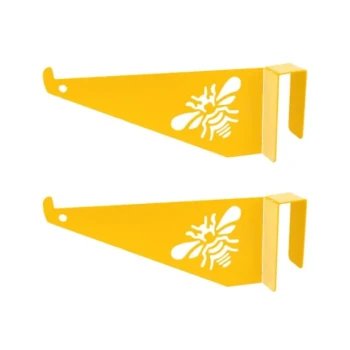
- HONESTBEE Wooden Bee Escape Board with Triangle Mesh Design for Beekeeping
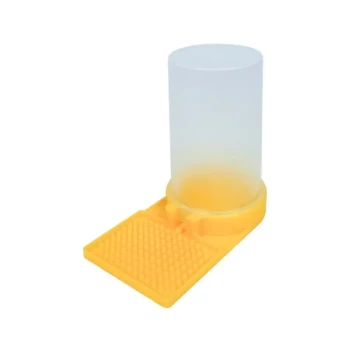
- White Plastic 0.5L Beekeeping Entrance Feeder for Bees
- Professional In-Hive Frame Bee Feeder by HONESTBEE
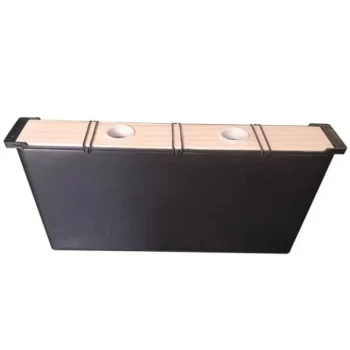
- In-Hive Dual Compartment Frame Bee Feeder for Targeted Colony Nutrition
People Also Ask
- Why should sugar syrup or dry sugar not be left out in the open when feeding bees? Avoid a Dangerous Feeding Frenzy
- Why and how are feeders used in beekeeping? Essential Strategies for Colony Survival and Health
- How do specialized feeders contribute to effective artificial feeding? Scientific Apiary Management & Colony Health
- Why is the use of a beekeeping feeder for syrup supplementation important? Boost Colony Growth and Survival
- What precautions should be taken when feeding bees inside the hive? Safeguard Your Colony from Robbing and Leaks