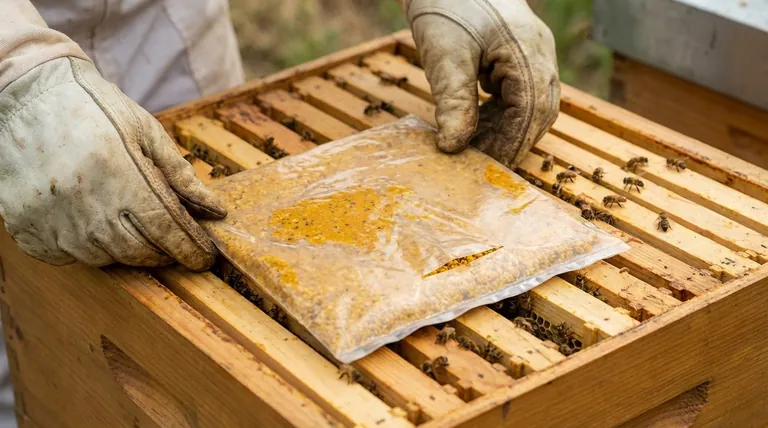
To prepare a pollen substitute for feeding, the pre-mixed substance is first sealed in bags. At the apiary, these bags are placed directly on top of the brood frames under the crown board. A slit is cut in the bag to allow the bees direct access to the feed.
The core principle is not about the specific recipe, but about the placement. The pollen substitute must be positioned directly above the brood cluster, keeping it moist and easily accessible to the nurse bees who need it most.
The Step-by-Step Application Process
Properly applying a pollen substitute ensures the colony can use it efficiently without attracting pests or causing problems within the hive. The process is straightforward and focuses on preparation, placement, and protection.
Step 1: Prepare the Hive
Before opening the hive, have your pollen substitute patties ready. Gently smoke the bees down from the top of the frames and the underside of the crown board. This creates a clear working space.
Step 2: Clean the Top Bars
It is crucial to scrape the top bars of the brood frames clean of any burr comb or propolis. A clean, flat surface ensures the pollen bag sits flush against the frames, preventing gaps and providing the bees with the best possible access.
Step 3: Place the Pollen Substitute
Take the flattened bag of pollen substitute and cut a slit along one side. Lay the bag directly across the top bars of the brood frames with the slit side facing down. This position allows the bees to move up from between the frames and consume the substitute directly.
Step 4: Close the Hive
Once the substitute is in place, carefully replace the crown board. Finish by putting the hive roof back on. This setup protects the pollen substitute from the elements and helps maintain its soft consistency from the hive's natural heat and humidity.
Understanding the Placement Strategy
The specific method of placing the pollen substitute is designed to maximize its benefit to the colony's health and development.
Proximity to the Brood
The brood nest is where young larvae are being raised, and it is the epicenter of protein demand. Placing the substitute directly above this area ensures that nurse bees—the primary consumers of pollen—can access it without traveling far from their duties.
Maintaining Moisture
Pollen substitutes can dry out and become unpalatable to bees. By keeping it inside the bag with a single slit, you limit its exposure to air. The natural humidity within the hive helps keep the patty soft and desirable for a longer period.
Controlled Access
The slit in the bag acts as a controlled feeding port. It allows the bees to consume the substitute as needed while preventing the entire patty from being exposed at once, which would lead to rapid drying and potential contamination.
Common Pitfalls to Avoid
While supplemental feeding is beneficial, there are potential downsides to consider for the health of your colony.
Attracting Pests
Pollen substitutes can be a major attractant for pests like Small Hive Beetles and wax moths. Only feed what the colony can reasonably consume in a week or two. If you notice the bees are not eating the patty, it's best to remove it to avoid infestation.
Feeding Unnecessarily
Supplemental feeding is a tool for specific situations, such as stimulating brood rearing in early spring or supporting a colony during a pollen shortage. Feeding when there is an abundance of natural pollen can be a waste of resources and may not be consumed by the bees.
Blocking Ventilation
Ensure the pollen patty does not completely cover the ventilation hole in your crown board or inner cover. Proper airflow is essential for moisture control within the hive.
Making the Right Choice for Your Goal
Your reason for feeding will determine how and when you apply a pollen substitute.
- If your primary focus is stimulating early brood rearing: Provide the substitute in late winter or early spring, placing it directly over the winter cluster to fuel colony growth.
- If your primary focus is supporting a colony during a pollen dearth: Monitor the hive's natural pollen stores and provide a substitute immediately when you see them decline to prevent a break in the brood cycle.
- If your primary focus is preventing pests: Use smaller patties and monitor consumption closely, removing any uneaten substitute to keep the hive clean and safe.
Ultimately, effective supplemental feeding is about providing the right resource at the right time and in the right place.
Summary Table:
| Step | Action | Key Benefit |
|---|---|---|
| 1 | Prepare the hive and clean the top bars. | Creates a flat, accessible surface for feeding. |
| 2 | Cut a slit in the pre-mixed bag. | Provides controlled access for bees. |
| 3 | Place the bag slit-side down on the brood frames. | Puts food directly above the nurse bees. |
| 4 | Replace the crown board and roof. | Protects the feed and maintains moisture. |
Ensure your colonies thrive with the right supplies. Proper nutrition is key to a healthy, productive apiary. HONESTBEE supplies commercial apiaries and beekeeping equipment distributors with high-quality, reliable feeding supplies and equipment through our wholesale-focused operations. Let us help you build a stronger operation.
Contact HONESTBEE today to discuss your wholesale needs!
Visual Guide
Related Products
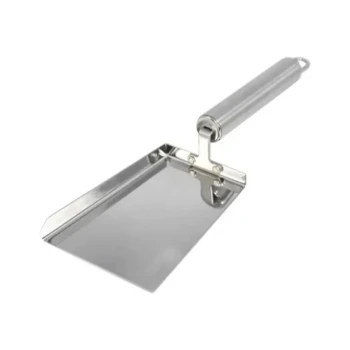
- Heavy-Duty Ergonomic Stainless Steel Pollen Shovel
- Heavy-Duty Ergonomic Grip Galvanized Pollen Shovel
- Removable Plastic Pollen Trap With Ventilated Tray for Bees Pollen Collector
- Plastic Bee Pollen Trap Strips Comb Catcher Collector
- 30 cm Plastic Entrance Hole Bee Pollen Trap and Collector
People Also Ask
- How can harvested bee pollen be cleaned to remove impurities? Efficient Methods for Commercial and Hobbyist Beekeepers
- Why should commercial apiaries focus on the collection of diversified bee products? Maximize Your Hive’s Profit Potential
- What are the primary functions of a stainless steel hive tool? Essential Equipment for Professional Beekeeping
- Which technical challenges in hive maintenance are addressed by using a professional stainless steel hive tool?
- How is pollen cleaned after it has been dried? Master Efficient Separation for Pure Bee Pollen