At its core, a hive tool is used during an inspection to gently pry apart and separate hive components that bees have sealed together with a substance called propolis. You insert the flat end of the tool between hive bodies or between a frame and the hive body, then apply careful leverage to break the seal with minimal disruption to the colony.
The hive tool is far more than a simple pry bar; it is the beekeeper's essential multi-tool. Mastering its use is not just about opening the hive, but about performing a clean, efficient, and low-stress inspection for the health of your bees.
The Primary Functions: Separating and Lifting
The most frequent use of your hive tool is overcoming the strong, sticky propolis, or "bee glue," that bees use to seal every crack and seam in their home.
Prying Apart Hive Bodies
Bees seal the space between hive boxes (supers) and between the top cover and the top box. To separate them, slide the flat, beveled end of your hive tool into the seam and gently twist or pry upwards. Work your way around the box to loosen the entire seal before lifting.
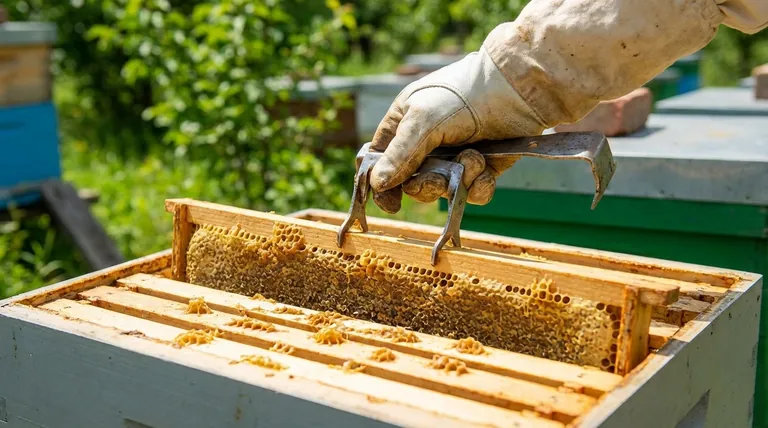
Loosening and Lifting Frames
Frames are often tightly sealed to the hive body with propolis and burr comb. Use the hive tool to gently pry the end of the first frame loose. If you have a J-hook style tool, you can then use the hook to catch the underside of the frame's top bar and lift it straight up, which prevents rolling and crushing bees.
The Hive Tool as a Cleaning Instrument
A healthy hive is a clean hive. Your hive tool is your primary means of maintaining this internal hygiene during an inspection.
Scraping Propolis and Burr Comb
Bees will build burr comb in any space larger than a "bee space" (about 3/8 of an inch). Use the flat edge of your hive tool to scrape this excess comb and propolis from the top bars of your frames and the inside of the hive bodies. This keeps frames from getting stuck together and maintains proper spacing.
Clearing the Bottom Board
The bottom board can accumulate debris, including wax cappings, pollen, and pests. Scraping the bottom board clean allows for better ventilation and makes it easier to monitor for issues like Varroa mite drop or Small Hive Beetle (SHB) presence.
Advanced Inspection and Diagnostic Uses
The hive tool allows for more detailed examination of the colony's health and the presence of pests.
Checking Brood Health
The pointed end of the tool can be used to carefully uncap a few drone brood cells. This is a key method for checking the infestation level of Varroa mites, as they preferentially reproduce in drone brood.
Removing Pests
If you spot pests like Small Hive Beetles or wax moth larvae, the hive tool is a precise instrument for crushing or removing them without causing a major disturbance in the hive.
Removing Stingers
If you are stung through your glove or clothing, you can use the flat edge of the tool to scrape the stinger out. Scraping, rather than pulling, prevents you from squeezing more venom from the venom sac.
Understanding the Trade-offs and Best Practices
While indispensable, the hive tool must be used with care and intention to avoid harming the colony.
The J-Hook vs. Standard Tool
A standard hive tool is essentially a small pry bar with a scraping edge. A J-hook tool adds a curved hook on one end specifically designed for lifting frames, providing better leverage and control. Choosing between them is a matter of personal preference.
The Importance of Gentle Movements
Every movement with the hive tool should be slow and deliberate. Avoid sudden, jarring motions that can agitate the bees, provoke a defensive response, or crush bees between frames and hive bodies.
The Risk of a Sharpened Edge
Some beekeepers sharpen one edge of their hive tool for cutting things like weeds or packaging. While useful, this creates a significant hazard. A sharpened tool can easily cut you or damage woodenware if it slips.
Making the Right Choice for Your Goal
Your use of the hive tool will adapt based on the specific goal of your inspection.
- If your primary focus is a quick check: Concentrate on using the tool to cleanly separate hive bodies and lift a few central frames to check for the queen's laying pattern.
- If your primary focus is hive hygiene: Use the flat edge to methodically scrape excess burr comb and propolis from all ten top bars and the frame rests.
- If your primary focus is pest management: Use the tool's edge to check the bottom board for debris and its point to uncap drone brood for Varroa mite inspection.
Ultimately, the hive tool is an extension of your hands, enabling you to work precisely and gently within the complex world of the beehive.
Summary Table:
| Primary Function | Key Action | Tool Part Used |
|---|---|---|
| Separating Hive Components | Prying apart boxes and frames sealed with propolis | Flat, beveled end |
| Lifting Frames | Gently lifting frames without crushing bees | J-hook (if available) or flat end |
| Hive Hygiene | Scraping excess burr comb and propolis | Flat edge |
| Pest Inspection | Uncapping drone brood to check for Varroa mites | Pointed end |
Equip your apiary with the best tools for the job. A clean, efficient hive inspection starts with a high-quality hive tool. At HONESTBEE, we supply durable, professional-grade beekeeping supplies and equipment designed for the demands of commercial apiaries and beekeeping equipment distributors.
Let us help you work smarter and protect your investment. Our wholesale-focused operations ensure you get the reliable gear you need to maintain healthy, productive hives.
Contact our team today to discuss your equipment needs and request a wholesale catalog.
Visual Guide

Related Products
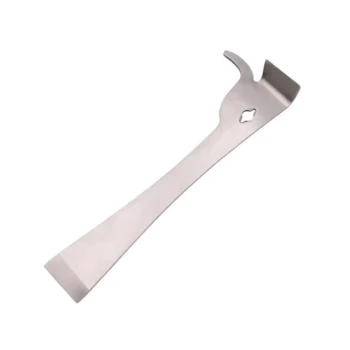
- HONESTBEE Professional Long Handled Hive Tool with Precision Cutting Blade
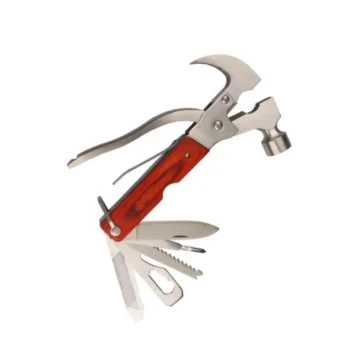
- Professional Multi-Function Stainless Steel Hive Tool
- HONESTBEE Premium Italian Style Hive Tool with Hardwood Handle
- Ergonomic Plastic Frame Spacer Tool for Rapid Hive Management Beekeeping
- Professional Grade Foldable Beehive Handles
People Also Ask
- What are the common construction features of hive tools? Key Insights for Superior Beekeeping Efficiency
- Which intervention materials and management tools are used in commercial apiaries? Protect Your Bees from Pesticides
- How do professional beekeeping tools impact apiary productivity? Scale Your Commercial Honey Yield with Precision
- What are the different types of hive tools available? Choose the Right Tool for Your Apiary
- What are hive tools and what are their primary uses in beekeeping? Essential Equipment for Apiary Success