To properly light a smoker, you must create a layered fire designed for smoldering, not open flames. This is achieved by igniting a fast-burning starter material at the bottom of the chamber, then gradually adding and compressing slower-burning fuel on top while using the bellows to manage airflow and produce thick, cool smoke.
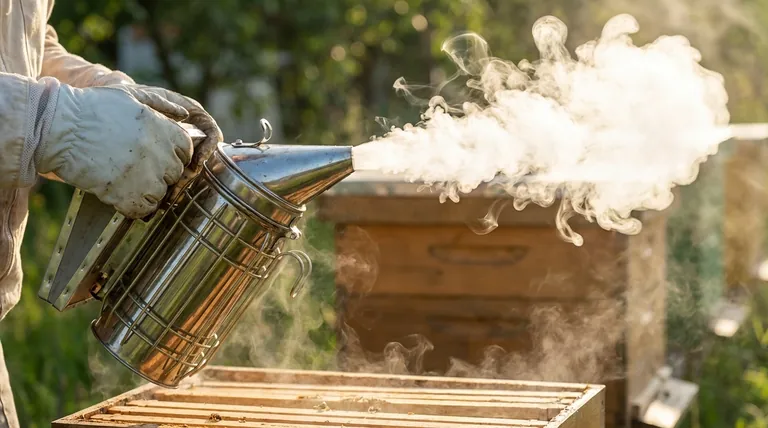
The goal is not simply to create a fire, but to engineer a specific type of incomplete combustion. A properly lit smoker produces cool, dense, white smoke from smoldering fuel, which is what calms bees, whereas hot flames will only agitate them.
The Principles of a Perfect Smoker Fire
Understanding the "why" behind the process transforms it from a chore into a skill. The perfect smoker fire is built on three core principles: fuel choice, layering, and airflow management.
It's About Smoldering, Not Flaming
The calming effect of smoke masks the bees' alarm pheromones. Hot, thin smoke from an open flame is ineffective and can harm or anger the bees.
Your objective is to create a low-oxygen fire that smolders and produces a large volume of cool, white smoke. This is achieved by carefully packing the fuel chamber.
The Two-Stage Fuel Strategy
A long-lasting smoker fire requires two distinct types of fuel.
- Starters: These materials ignite easily and burn quickly to create the initial heat and embers needed to light the main fuel.
- Main Fuel: This is denser, slower-burning material that will smolder for an extended period, providing the consistent smoke needed for a hive inspection.
Airflow is Your Control Knob
The bellows are more than just a starter tool; they are your primary control.
Pumping the bellows introduces oxygen, which increases the burn rate. Gentle puffs help establish the fire, while vigorous puffs can revive a dying one. Once lit, the smoker needs occasional puffs to stay active.
A Step-by-Step Guide to Lighting Your Smoker
Follow these steps to build a reliable, long-lasting fire every time.
Step 1: Choose Your Fuel Wisely
Select materials that are dry and free of any toxins, chemicals, or plastics.
- Excellent Starters: Crumpled newspaper, paper egg cartons, cardboard, or natural dryer lint.
- Excellent Main Fuels: Pine needles, wood shavings, burlap strips, dry grass clippings, hay, or untreated tree bark.
Step 2: Ignite the Starter
Place a small amount of your starter material in the bottom of the empty smoker chamber. Light it with a match or lighter.
Use the bellows to give a few gentle puffs, fanning the material until a small, steady flame is established.
Step 3: Build Your Main Fuel Layer
Once the starter is burning well, begin adding your main fuel.
Start with a small handful on top of the flames and pump the bellows to help it catch. Continue adding the main fuel in layers until the chamber is nearly full.
Step 4: Compress for Smoke
Once you have a strong fire with visible flames, use your hive tool to gently compress the burning fuel down into the bottom half of the chamber.
Add another layer of fresh fuel on top of the compressed bed. Pump the bellows vigorously. This action forces the fire to smolder rather than flame, which is the key to producing thick, white smoke.
Step 5: Close the Lid and Test the Smoke
Close the lid before the top layer of fuel bursts back into flames.
Give the bellows a few more pumps. The smoke coming from the nozzle should be thick, white, and cool to the back of your hand.
Common Pitfalls to Avoid
Even experienced beekeepers run into issues. Understanding the cause is the key to fixing it.
The Fire Goes Out Too Quickly
This is the most common problem. It's usually caused by not building a sufficient coal bed with the starter fuel, using damp fuel, or packing the main fuel so tightly that it chokes off all airflow.
The Smoke is Too Hot
If your smoker is puffing out hot air or sparks, you have an open flame instead of a smoldering fire. This means the fuel is not compressed enough. Open the lid, use your hive tool to tamp it down again, and add more fresh fuel on top.
Using Unsafe Materials
Never use materials treated with chemicals, such as pressure-treated wood, glossy magazine paper, or synthetic fabrics. Burning these can release toxins harmful to you and your bees.
How to Safely Extinguish Your Smoker
A lit smoker is a fire hazard and must be extinguished properly after every use.
Method 1: Smothering
Plug the smoker's spout firmly with a non-flammable material like a wine cork or a wad of fresh, wet green grass. This cuts off the oxygen supply. Lay the smoker on its side on a fire-proof surface like concrete or gravel until it is completely cool.
Method 2: Dousing
Carefully empty the hot contents of your smoker into a fire-safe container, such as a metal bucket or a fire pit. Douse the embers thoroughly with water until they are fully extinguished.
Making the Right Choice for Your Goal
The fuel you choose can be tailored to the task at hand.
- If your primary focus is a quick 10-minute inspection: A simple starter of newspaper topped with dry grass clippings will light quickly and provide sufficient smoke.
- If your primary focus is a long hive session: You need longevity. Build a solid coal bed and use a dense, slow-burning fuel like compressed pine needles or burlap.
- If your primary focus is using what's on hand: Dried, non-toxic yard waste like tree bark, hay, or pesticide-free clippings are excellent and sustainable options.
Mastering your smoker is about controlling fuel and airflow to create the calm, cool smoke your bees respect.
Summary Table:
| Key Principle | Purpose | Key Action |
|---|---|---|
| Fuel Choice | Select safe, dry materials for starters and main fuel. | Use newspaper/pine needles. |
| Layering | Create a smoldering coal bed, not open flames. | Ignite starter, add main fuel in layers. |
| Airflow Control | Manage smoke density and temperature with bellows. | Pump gently to start, vigorously to smolder. |
| Compression | Force fuel to smolder, not flame. | Tamp down with hive tool after adding fuel. |
Ready to master your beekeeping setup? A properly lit smoker is just the beginning. At HONESTBEE, we supply commercial apiaries and beekeeping equipment distributors with the durable, reliable tools needed for efficient hive management. From high-quality smokers to full protective gear, our wholesale-focused operations ensure you get professional-grade equipment that supports calm, productive beekeeping. Contact our team today to discuss your supply needs and keep your colonies thriving.
Visual Guide

Related Products
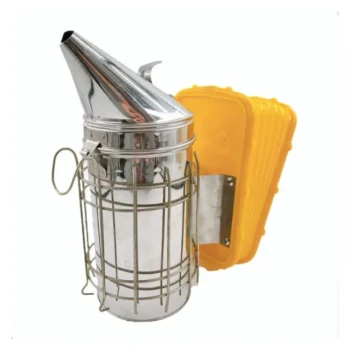
- Professional Bee Smoker with Elongated Spout and Durable Bellows for Beekeeping
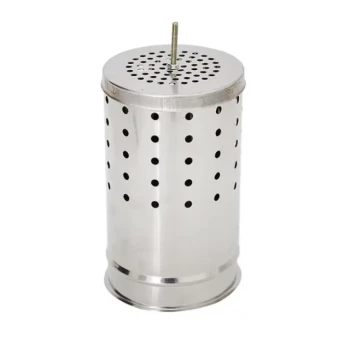
- Stainless Steel Honey Bee Smoker Hive and Honeycomb Smoker for Beekeeping
- European Stainless Steel Bee Smoker for Honey Bee Hive
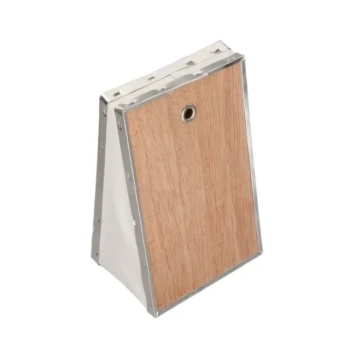
- Premium Traditional Copper Bee Smoker with Bellows
- Heavy-Duty Bee Smoker with Durable Plastic Bellows for Beekeeping
People Also Ask
- What technical advantages do professional bee smokers provide? Master Cool Smoke Technology for Hive Safety
- What is the significance of using professional bee smokers in colony collapse research? Ensure Data Integrity
- How does the use of a professional bee smoker improve the quality of honey harvesting? Boost Yield and Colony Safety
- How do professional bee smokers facilitate bee management? Enhancing Forest Beekeeping Safety and Efficiency
- Why is the use of professional bee smokers and specialized fuel essential? Protect Honey Purity & Colony Safety