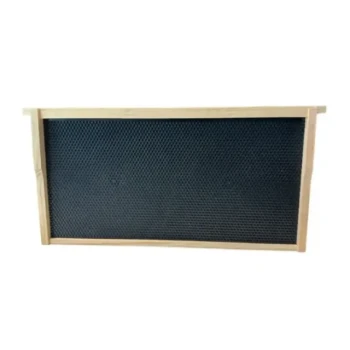
The standard process is to install package bees or nuc colonies promptly, calmly, and with immediate access to feed. Keep both types cool and shaded before installation, lightly spray package bees with 1:1 sugar syrup, and complete installation within 48 hours of arrival. Package bees are introduced around a caged queen, while nuc colonies are transferred with their established frames, brood, stores, and queen intact.
Core takeaway: Package bees require careful queen-cage placement and worker-bee release; nucs require careful frame transfer in their original arrangement. In both cases, reduce early disturbance, provide 1:1 syrup, and inspect the colony about one week later.
Preparing for Installation
Store Bees Correctly Before Transfer
Keep package bees and nuc colonies in a cool, shaded, well-ventilated location before installation. Avoid prolonged exposure to direct sun, excessive heat, or rough handling.
Lightly spray package bees with 1:1 sugar water before installation. This supplies immediate energy and makes the bees less likely to fly during handling.
Install Within 48 Hours
Installation should occur as soon as practical and preferably within 48 hours of arrival. Delays increase handling risk and can weaken the colony before it occupies the new equipment.
Prepare the Hive Equipment
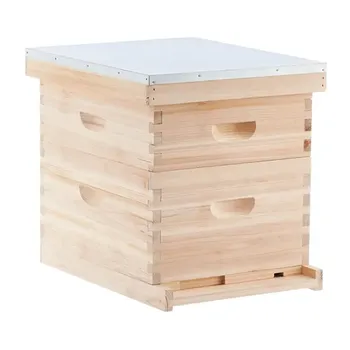
Use a prepared brood box with correctly sized frames, protective clothing, a smoker, a hive tool, and an immediate feed source such as an internal, hive-top, or pail feeder.
Create an opening in the middle of the brood box by moving several frames aside. This provides space for the package bees or nuc frames and keeps the initial colony concentrated.
Transferring Package Bees
Position the Queen Cage
Remove the queen cage from the shipping package before releasing the worker bees. Place the cage between the central frames, where the workers can contact the queen.
Open or pierce the candy barrier according to the queen cage design so the workers can release her gradually. Do not simply discard the cage or release the queen unprotected before the colony has been introduced.
Introduce the Worker Bees
Remove the package feeder can and open the shipping package. Gently shake the package over the open hive so the worker bees fall into the space between the frames.
Alternatively, position the open package beside the hive entrance and allow the bees to migrate into the hive. This method is slower but can reduce rough handling.
Provide Immediate Feed
Place a feeder containing 1:1 sugar syrup in or above the hive. Nearby syrup also encourages package bees to remain near the new equipment while they orient themselves.
Any bees remaining in the shipping package can be left beside the hive entrance so they can join the colony naturally.
Close the Hive Carefully
Once most bees have entered, replace the frames, inner cover, and outer cover without crushing bees or disturbing the queen cage. Keep the entrance reduced initially so the new colony can defend the hive more effectively.
A second brood box may be added after approximately 5 to 6 weeks of colony growth when the first box has been adequately occupied and the colony requires additional space.
Transferring Nucleus Colonies
Decide Between Natural Migration and Frame Transfer
A nuc can sometimes be placed directly beside the prepared hive with its entrance aligned to the new hive entrance. Remove the nuc screens or blocking material so the bees can migrate naturally over 24 to 48 hours.
Direct frame transfer is generally the more controlled method when the nuc contains standard removable frames. It also allows the beekeeper to inspect the comb, brood, food stores, disease symptoms, and physical damage during installation.
Calm the Colony
Wear appropriate protective equipment and use one or two light puffs of cool smoke at the nuc entrance and beneath the lid. Smoke should calm the bees without overheating or heavily saturating the colony.
Open the new hive and move empty frames aside to create space in the center. Work efficiently while handling each frame gently.
Preserve Frame Order and Orientation
Lift the nuc frames directly into the full-sized hive body, keeping their original order and orientation. This preserves the colony's established organization and reduces unnecessary disruption.
Place brood frames in the center, resource frames containing honey and pollen on either side, and new empty frames toward the outer edges.
Transfer Remaining Bees
After moving the frames, shake or brush residual bees from the nuc box into the new hive. The empty nuc box can also be placed near the entrance so remaining bees can enter on their own.
Check carefully for the queen before closing the hive and avoid crushing bees between frame lugs or against the box walls.
Manage Space and Feeding
Add the remaining frames, keeping them tightly aligned. A dummy board or similar spacing aid can help close unused gaps and maintain proper frame position.
Install a feeder filled with 1:1 sugar syrup immediately after transfer, particularly before reliable natural nectar is available. Give the colony enough space to expand and draw new comb, but avoid adding excessive equipment before the bees can occupy it.
Post-Installation Management
Reduce the Entrance
Use an entrance reducer or similar method to narrow the entrance to approximately 1 to 2 inches during the early establishment period. A smaller entrance helps a newly installed colony defend the hive.
Minimize Early Disturbance
Avoid repeated opening of the hive immediately after installation. The colony needs time to release or accept the queen, organize its frames, begin drawing comb, and establish normal foraging activity.
Confirm Queen Activity
Conduct a full inspection approximately 5 to 9 days after installation. A focused inspection around 5 to 7 days is commonly sufficient for an early check, while the wider range allows for weather, transport, and handling conditions.
Look for evidence of queen acceptance, active laying, healthy brood development, adequate food stores, and normal colony establishment.
Understanding the Trade-offs
Package Bees Require More Establishment
Package bees arrive without established comb, brood, or stored food. They therefore depend more heavily on feeding and favorable conditions while they build comb and develop the colony.
Their main operational risk is incorrect queen handling. The queen should remain protected in her cage while the workers are introduced and should be released through the candy barrier.
Nucs Offer Faster Development
A nuc already contains established comb, brood, food stores, and an integrated queen. This usually gives the colony a faster start in full-sized equipment.
The trade-off is that nuc frames must be compatible with the receiving hive and should be inspected carefully for disease, damage, pests, and abnormal brood patterns.
Natural Migration Takes Longer
Allowing a nuc to migrate naturally can reduce direct frame handling and may be useful when the equipment or frame format does not permit immediate transfer. However, it takes longer and provides less opportunity for a thorough inspection during installation.
Overfeeding and Overexpansion Can Create Problems
Feeding supports early establishment, but equipment and feed should be matched to the colony's actual strength. Giving a small colony too much space can make temperature control and defense more difficult, while insufficient space can restrict expansion.
Delivery Quality Affects Installation Success
For distributors and commercial suppliers, packaging condition, arrival timing, temperature control, responsive customer service, and clear installation instructions directly affect customer outcomes. A broad equipment and feed portfolio is most valuable when it supports rapid fulfillment of the complete installation requirement.
How to Apply This to Your Project
The correct workflow depends mainly on whether the shipment is a package or an established nuc.
- If your primary focus is package-bee installation: Prepare the brood box and feeder in advance, keep the queen protected in her cage, introduce the workers gently, and maintain 1:1 syrup feeding during establishment.
- If your primary focus is nuc-colony transfer: Move the established frames into the new hive in their original order and orientation, inspect brood and stores during transfer, and provide controlled expansion space.
- If your primary focus is commercial distribution: Source bees, hive bodies, frames, feeders, protective equipment, and replacement components as one coordinated order to reduce installation delays.
- If your primary focus is colony health: Use the transfer inspection to check for disease, damage, queen presence, brood quality, and adequate stores, then reinspect within 5 to 9 days.
- If your primary focus is rapid fulfillment: Prioritize suppliers that can provide reliable arrival coordination, fast response, complete product availability, and clear post-delivery handling guidance.
A successful installation combines correct equipment, careful bee handling, immediate feed, controlled space, and timely follow-up inspection.
Summary Table:
| Step | Package Bees | Nuc Colonies |
|---|---|---|
| Preparation | Store cool & shaded; spray with 1:1 syrup; install within 48 hrs | Store cool & shaded; install within 48 hrs |
| Queen handling | Place queen cage between frames; allow gradual release | Queen usually present on frames; preserve her location |
| Transfer method | Shake workers into hive; position cage | Transfer frames in original order; brush remaining bees |
| Feeding | Provide 1:1 syrup immediately | Provide 1:1 syrup immediately |
| Post-install | Reduce entrance; inspect after 5-9 days | Reduce entrance; inspect after 5-9 days |
Ensure a smooth start for your new colonies with HONESTBEE's complete beekeeping equipment. From hive bodies and frames to feeders and protective gear, we supply everything you need for efficient package and nuc installation. Our rapid response and dedicated support help minimize delays and maximize colony survival. For distributors and commercial beekeepers, we offer competitive wholesale pricing, OEM/ODM customization, and reliable supply chain management. Contact us today to streamline your beekeeping operations and boost your bottom line! Get in touch.
Related Products
- Plastic Transporting Bee Packages and Nuc Boxes for Beekeeping
- 5 Frame Wooden Nuc Box for Beekeeping
- 4 Frame Plastic Nuc Boxes for Beekeeping Bee Nuc Box
- Automatic Heat Preservation 6 Frame Pro Nuc Box for Honey Bee Queen Mating
- Black 2 Pack Beekeeper Queen Grafting Tool for Bee Queen Larva Transferring Needle
People Also Ask
- What role do bee package boxes play in the commercial transport and expansion of honeybee colonies? - Logistic Essentials
- What are beekeeping boxes called? A Guide to Hive Bodies and Box Types
- How do standardized bee packages serve as a recovery mechanism for commercial beekeeping? Ensure Business Continuity
- What is the commercial value of using standardized bee packages? Drive Scalability in Large-Scale Apiaries
- Why is the timely introduction of high-quality bee packages critical? Save Your Apiary from Asian Hornet Invasions