Properly preparing your hive is the single most important factor in the successful introduction of a new queen. Before she arrives, you must ensure the colony is not only physically ready but, more importantly, socially receptive to her. This involves confirming the hive is queenless, removing any rival queen cells, and having all necessary tools and feed on hand to minimize stress on the colony.
The core principle of queen introduction is not just placing a new queen in a box, but creating a situation where the colony needs and welcomes her. Your preparation efforts are focused entirely on engineering that acceptance.
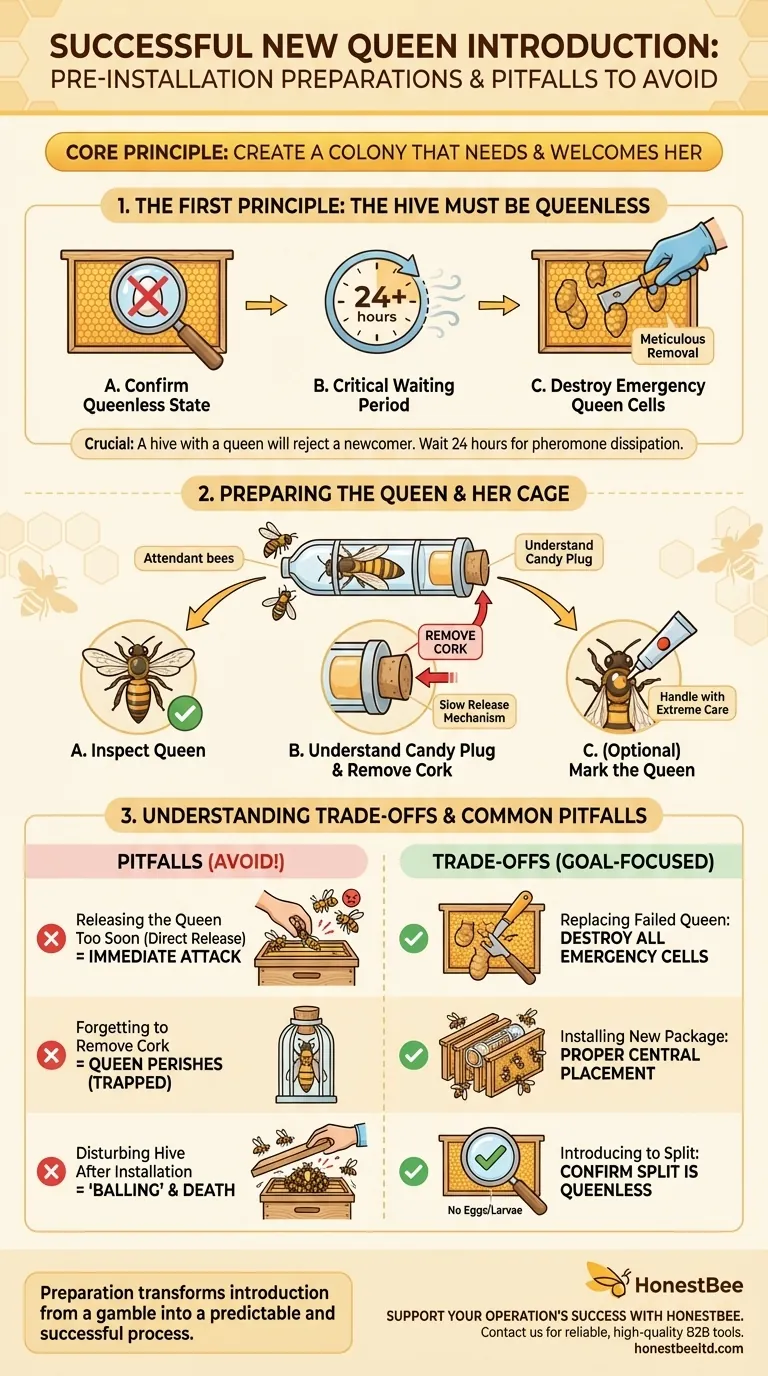
The First Principle: The Hive Must Be Queenless
The most critical preparation is ensuring the colony knows it needs a new monarch. A hive that believes it has a queen will almost certainly reject and kill a newcomer.
Confirming a Queenless State
Before your new queen even arrives, you must verify the old queen is gone. This could be due to a planned replacement (requeening), a swarm, or an unexpected loss.
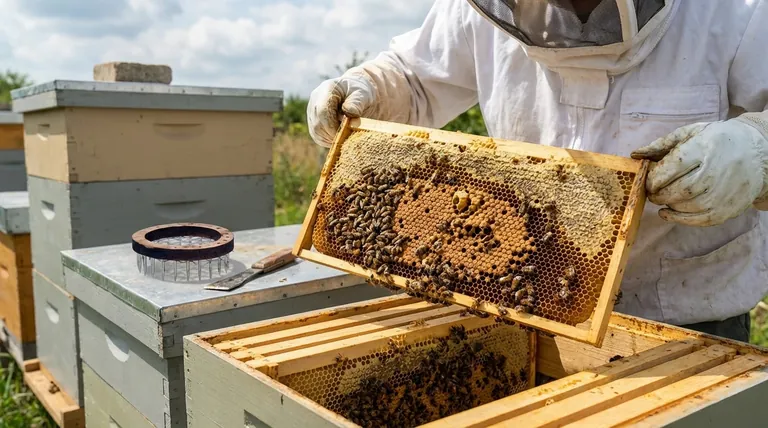
A thorough hive inspection is required. Look for the old queen herself, and more importantly, look for evidence of her presence: freshly laid eggs, one per cell, standing on end. If you see fresh eggs, the hive is not queenless.
The Critical Waiting Period
Once you have removed the old queen or confirmed she is gone, you must wait at least 24 hours before introducing the new one.
This waiting period allows the old queen's pheromones to dissipate throughout the hive. It is during this time that the colony collectively recognizes its queenless state, making them far more receptive to a replacement.
Destroying Emergency Queen Cells
After about 24-48 hours of being queenless, the workers will often begin creating "emergency" queen cells to raise a new queen from existing larvae.
Before you install your new queen cage, you must perform another inspection and destroy every single one of these queen cells. If you leave even one, the bees will likely favor their own homegrown queen and kill the one you introduce.
Preparing the Queen and Her Cage
The new queen typically arrives in a small wooden or plastic cage with a few attendant bees and a "candy plug" at one end.
Inspect the Queen
Upon arrival, check that the queen is alive and moving well. Ensure her attendant bees are also alive, as dead attendants can be a sign of stress or other issues.
Understand the Candy Plug
The hard, white sugar candy in one end of the cage is a slow-release mechanism. The bees inside and outside the hive will slowly eat through the candy, giving the colony several days to get used to the new queen's scent and pheromones before she is fully released. Do not manually release her.
The Option to Mark the Queen
Marking your queen with a small dot of non-toxic, color-coded paint on her thorax makes her much easier to find during inspections. This is an optional step you can perform before installation.
If you choose to do this, handle her with extreme care using a queen marking tube or cage. Getting paint anywhere other than her thorax can cause the colony to see her as damaged and reject her.
Understanding the Trade-offs and Common Pitfalls
Successful queen introduction is often about avoiding simple, but critical, mistakes.
Pitfall: Releasing the Queen Too Soon
The slow release via the candy plug is your greatest tool for ensuring acceptance. Manually releasing the queen, known as a "direct release," is extremely risky and almost always results in the bees immediately attacking and killing her.
Pitfall: Forgetting to Remove the Cork
Many queen cages ship with a small cork or plastic cap over the hole to the candy plug. You must remove this cork before placing the cage in the hive. Forgetting this step means the bees can never release the queen, and she will perish in her cage.
Pitfall: Disturbing the Hive After Installation
Once the queen cage is installed, leave the hive alone for 5 to 7 days. Opening the hive too soon can cause a disturbance, making the bees agitated and potentially causing them to "ball" and kill the newly released queen. Patience is essential.
Making the Right Choice for Your Goal
Your specific preparations ensure the colony is calm, well-fed, and ready to focus on their new queen.
- If your primary focus is replacing a failed queen: Your priority is to find and destroy every single emergency queen cell the colony has created before introducing the new one.
- If your primary focus is installing a brand new package of bees: Your priority is to properly install the queen cage between two central frames where the bees can easily access and care for her.
- If your primary focus is introducing a queen to a recent hive split: Your priority is a meticulous inspection to be 100% certain the queenless half of the split has no eggs, larvae, or existing queen cells.
Ultimately, your preparation transforms queen introduction from a gamble into a predictable and successful process.
Summary Table:
| Preparation Step | Key Action | Purpose |
|---|---|---|
| Confirm Queenless State | Inspect for fresh eggs; wait 24+ hours after removal. | Allows old queen's pheromones to fade, making bees receptive. |
| Destroy Queen Cells | Meticulously find and remove all emergency queen cells. | Prevents colony from favoring a homegrown queen over the new one. |
| Prepare the Queen Cage | Inspect queen is alive; remove cork from candy plug; do not release manually. | Ensures a slow, safe introduction via the bees eating the candy plug. |
| Post-Installation Care | Avoid disturbing the hive for 5-7 days after placing the cage. | Prevents agitation and 'balling' that could kill the new queen. |
Ready to ensure a successful requeening?
Proper preparation is the foundation of a thriving apiary. HONESTBEE supplies commercial apiaries and beekeeping equipment distributors with the reliable, high-quality tools needed for every step of the process—from durable hive tools for inspections to secure queen cages for safe introductions.
Let our wholesale-focused expertise support your operation's success. Contact HONESTBEE today to discuss your equipment needs and build a stronger, more productive apiary.
Visual Guide
Related Products
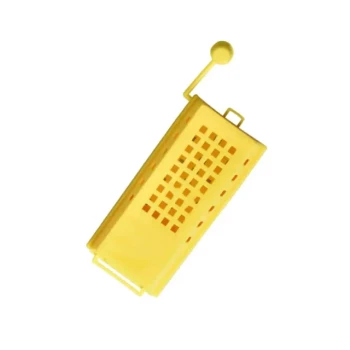
- Durable Galvanized Steel Spring Queen Bee Cage
- Portable Queen Bee Incubator with 12V Car Adapter for Safe Transport
- Professional Queen Bee Introduction and Transport Cage
- Heavy Duty Stainless Steel Queen Bee Catcher Clip
- Queen Bee Catcher Plastic Bee Marker Bottle with Piston Marking Tube
People Also Ask
- What is the mechanism of action for using temporary queen bee cages? Master Successful Queen Introduction
- Why are specialized queen bee cages used for the banking of mated queen bees? Maximize Commercial Apiary Storage Efficiency
- What is the step-by-step process for installing a queen bee's cage onto a frame? Ensure Hive Acceptance Safely
- What materials are required to install a queen bee's cage into a hive? Essential Tools for Successful Queen Integration
- What should be done if the queen is still inside her cage when the hive is inspected? Master Queen Introduction Safety