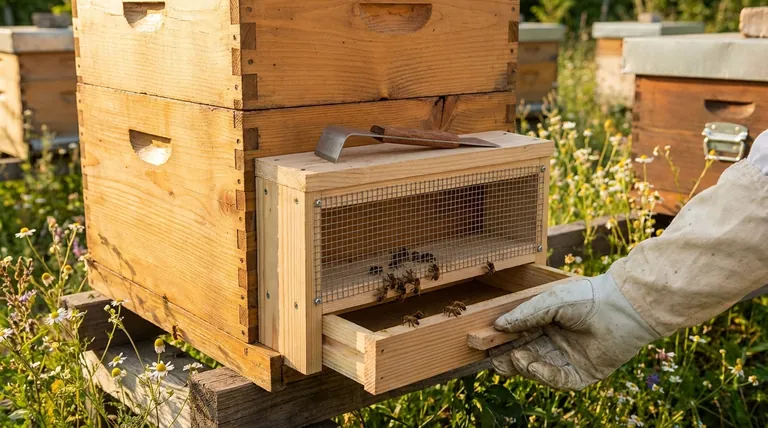
Installing a pollen trap is a simple process that involves forcing all bee traffic through a single, new entrance. You must first close any alternative entrances to the hive, then physically mount the trap, and finally, give the colony a period of several hours to a few days to orient themselves to the new pathway.
The core challenge of installing a pollen trap isn't mechanical; it's behavioral. Your goal is to gently guide your colony to accept a new entrance with minimal stress, ensuring the health of the hive while enabling collection.
Understanding the Mechanism: How a Pollen Trap Works
Before installation, it’s crucial to understand what you are asking your bees to do. A pollen trap is a device that alters their natural entry process to harvest pollen.
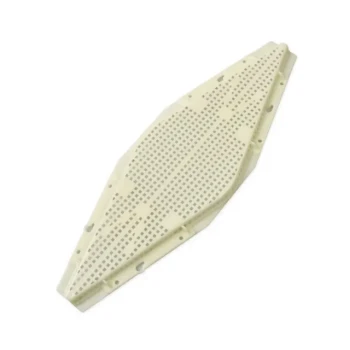
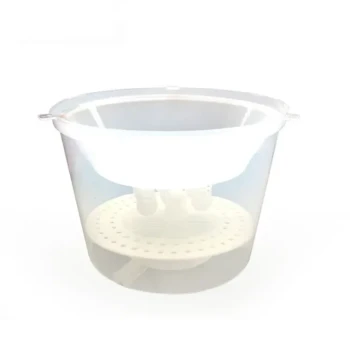
The Pollen Stripping Screen
Returning forager bees are forced to crawl through a screen with small openings. These openings are just large enough for the bee but small enough to scrape the pollen pellets from their hind legs.
The Collection Tray
The dislodged pollen pellets fall through a mesh floor into a collection drawer or tray below, which can be emptied by the beekeeper.
Unrestricted Exit and Incomplete Capture
A well-designed trap does not impede bees leaving the hive. It also intentionally allows some foragers to pass through with their pollen intact, ensuring the colony still receives the protein it needs to raise brood and thrive.
The Step-by-Step Installation Process
Following these steps methodically will ensure a smooth transition for your bees and a successful harvest for you.
Step 1: Seal All Alternative Entrances
This is the single most critical step. Bees will always choose the path of least resistance. You must meticulously inspect your hive bodies, bottom board, and inner cover for any cracks or holes and seal them completely. If any other entrance exists, bees will use it, and your trap will collect nothing.
Step 2: Choose the Right Time
Install the trap on a cool day or during the late afternoon. This helps prevent hive overheating, as the trap structure can slightly reduce ventilation at the main entrance.
Step 3: Mount the Trap
Fit the pollen trap securely over the main hive entrance. Ensure it is stable and there are no gaps around the edges where bees could bypass the stripping screen.
Step 4: Monitor the Adjustment Period
Bees will need time to adjust. For the first few hours, you may see confused bees congregating or "bearding" on the front of the hive. This is normal. Within a day or two, they should learn the new route and traffic should resume.
Understanding the Trade-offs and Risks
A pollen trap is an intervention, and it's important to be aware of the potential impacts on the colony.
Hive Stress and Adjustment
The initial confusion can cause minor stress. The key is to allow the bees to adapt without further disturbance. Avoid opening the hive or making other changes during this adjustment period.
Reduced Ventilation
By partially obstructing the entrance, a pollen trap can reduce airflow. This is why installation on hot days is discouraged. Always monitor for signs of overheating on exceptionally warm days while the trap is installed.
Special Consideration for Top-Mounted Traps
If you are using a top entrance trap, the adjustment period is more significant. You must pre-orient the bees to using a top entrance for one to two weeks before you install the trap mechanism itself. This is done by adding a new top entrance and closing the bottom one, allowing the colony to fully adapt to the new flight path first.
Making the Right Choice for Your Goal
Your installation priorities will depend on your specific goals as a beekeeper.
- If your primary focus is a smooth transition: Install on a cool, calm day and allow the bees several days to fully adapt before you begin collecting.
- If your primary focus is hive health: Monitor the colony's behavior closely after installation and ensure the trap design allows sufficient pollen to pass through for the brood.
- If your primary focus is maximum collection efficiency: Be absolutely certain you have sealed every single alternative crack and entrance to the hive.
Ultimately, successful pollen harvesting is a partnership that balances the needs of the beekeeper with the well-being of the colony.
Summary Table:
| Step | Key Action | Purpose |
|---|---|---|
| 1 | Seal All Alternative Entrances | Forces all bee traffic through the trap |
| 2 | Choose the Right Time (Cool Day/Late PM) | Prevents hive overheating |
| 3 | Mount the Trap Securely | Creates a single, stable entry point |
| 4 | Monitor the Adjustment Period (1-2 Days) | Allows bees to re-orient to the new entrance |
Ready to equip your apiary with reliable pollen traps and beekeeping supplies? As a trusted wholesale supplier for commercial apiaries and distributors, HONESTBEE provides the durable equipment you need for efficient and ethical pollen harvesting. Our products are designed to support hive health while maximizing your operational yield. Contact our team today to discuss your specific needs and explore our wholesale catalog!
Visual Guide

Related Products
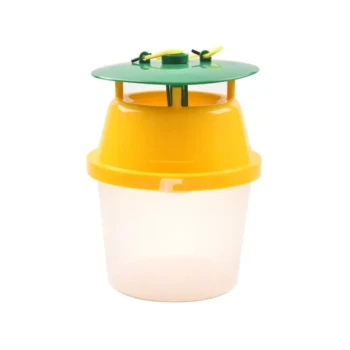
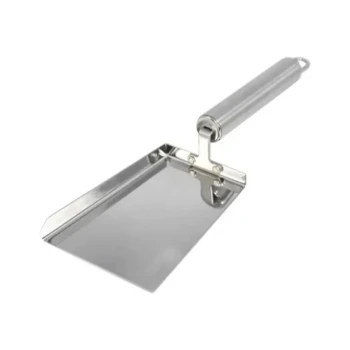
- Removable Plastic Pollen Trap With Ventilated Tray for Bees Pollen Collector
- 30 cm Plastic Entrance Hole Bee Pollen Trap and Collector
- Plastic Bee Pollen Trap Strips Comb Catcher Collector
- High-Efficiency Diamond Maze Bee Escape for Clearing Supers
- Professional Bucket Style Wasp and Moth Pheromone Trap
People Also Ask
- Why should beekeepers avoid swarming or requeening with a pollen trap on? Prevent Queen Loss and Colony Collapse
- What functions do pollen traps serve for bee bread production? Optimize Your Raw Material Collection
- How frequently should pollen be harvested from the traps? Ensure Optimal Hive Health & Superior Quality
- What role do pollen traps play in assessing pollen resource availability? Transform Your Hive Into a Bio-Monitoring Unit
- How do specialized beekeeping tools assist in diversifying products? Boost Income with Pollen Traps & Grafting Needles