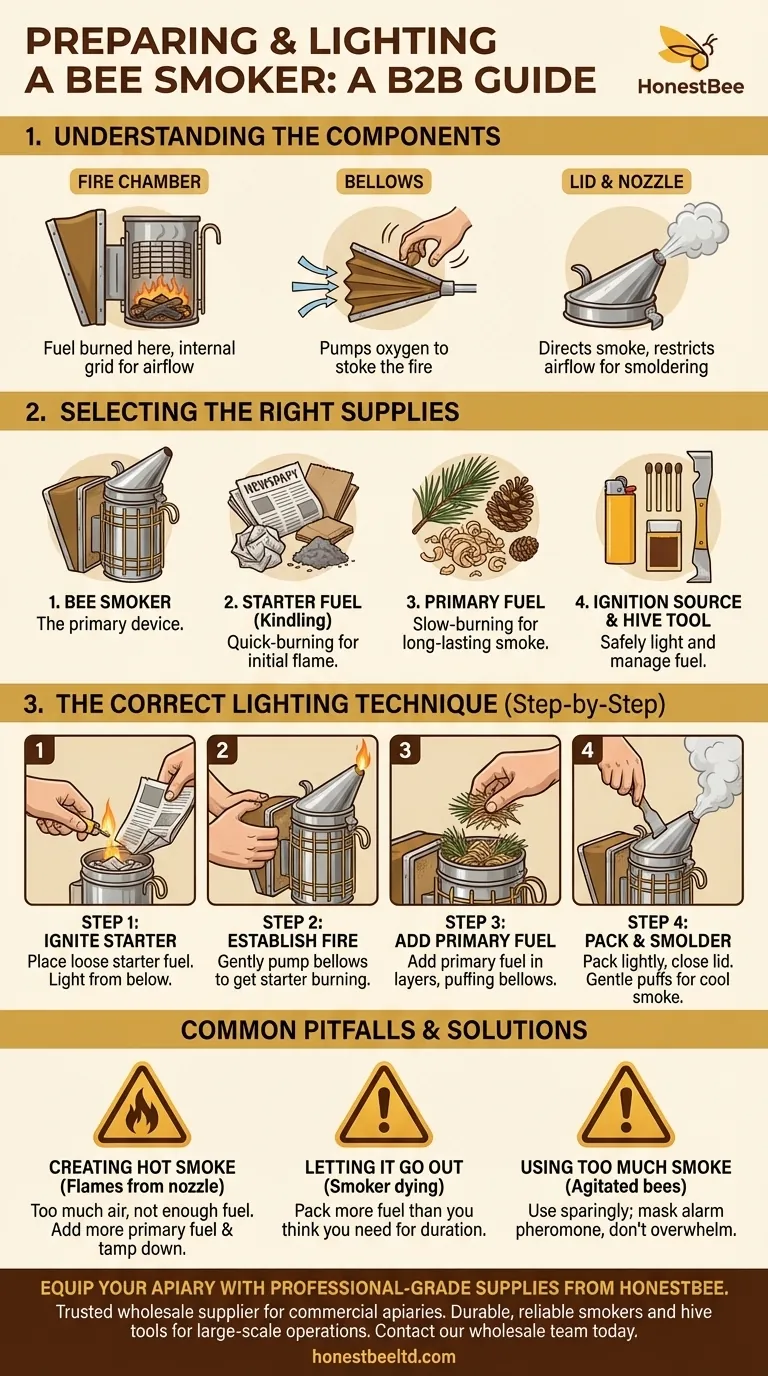
To properly prepare and light a bee smoker, you need four key items: the smoker itself, a fast-burning starter material like newspaper or cardboard, a slower-burning primary fuel such as wood shavings or pine needles, and an ignition source like a lighter or match. A hive tool is also highly recommended for safely managing the fuel inside the hot chamber.
The goal is not to create a large, hot fire, but to produce a steady supply of cool, white smoke. This is achieved by layering a quick-lighting starter fuel at the bottom with a denser, slow-burning fuel on top.
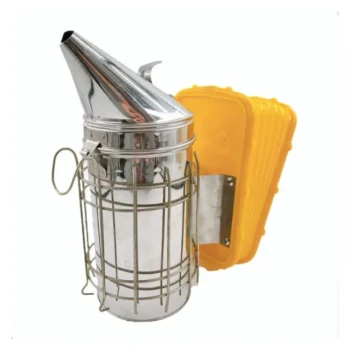
Understanding the Components of Your Smoker
Before lighting your smoker, it's essential to understand its basic parts. This knowledge makes the entire process more intuitive.
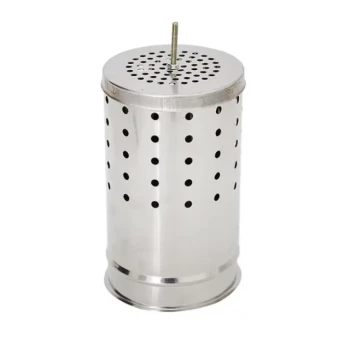
The Fire Chamber
This is the main cylinder where the fuel is burned. It's often designed with an inner grid or cup to hold the fuel off the absolute bottom, which helps maintain airflow.
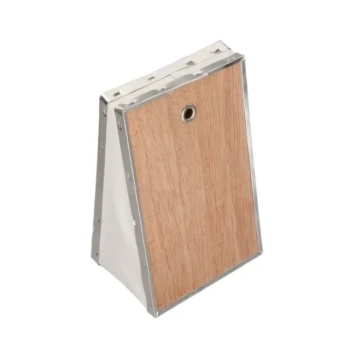
The Bellows
The bellows are the hand-pumped device attached to the fire chamber. Squeezing them forces a jet of fresh oxygen into the chamber, which stokes the fire and produces a puff of smoke.
The Lid and Nozzle
The hinged lid allows you to add fuel and directs the smoke out through the nozzle. By restricting airflow when closed, the lid helps the fuel smolder rather than burn with an open flame.
Selecting the Right Supplies
The success of your smoker depends entirely on the materials you choose. You need two distinct types of fuel.
Starter Fuel (Kindling)
This material must catch fire easily and quickly. The purpose is to create a small, stable flame that can ignite your primary fuel.
Excellent choices include crumpled newspaper, untreated cardboard, cotton dryer lint, or scraps of natural burlap.
Primary Fuel
This is the material that will smolder and produce smoke for the duration of your hive inspection. It should be dense and slow-burning.
Common and effective options are pine needles, pine cones, wood shavings (not sawdust), or commercially prepared smoker fuels.
Ignition and Management Tools
You will need a reliable ignition source, such as a long-nosed lighter or matches.
A hive tool is invaluable for tamping down fuel, moving embers, and ensuring everything is safely extinguished after your work is complete.
The Correct Lighting and Management Technique
Follow these steps to produce a consistent, cool smoke that keeps your bees calm without going out mid-inspection.
Step 1: Ignite the Starter
Place a small, loose ball of your starter fuel (like newspaper) into the bottom of the fire chamber. Light it from below.
Step 2: Establish the Fire
Gently pump the bellows a few times to get the starter fuel burning well. You should see a small, active flame.
Step 3: Add Primary Fuel
Once the starter is lit, begin adding your primary fuel on top. Add it in layers, puffing the bellows gently after each addition to ensure it catches.
Step 4: Pack and Smolder
Continue adding primary fuel until the chamber is nearly full. Pack it down lightly with your hive tool, but not so tightly that it chokes off airflow.
Close the lid. A few more gentle puffs on the bellows should now produce thick, cool, white smoke from the nozzle.
Common Pitfalls to Avoid
Using a smoker correctly is a skill. Avoiding these common mistakes will make your hive inspections safer and more effective.
Creating Hot Smoke
An open flame produces hot, thin smoke that can burn and anger the bees. If you see flames coming from the nozzle, you have too much air and not enough fuel. Add more primary fuel and tamp it down.
Letting the Smoker Go Out
A common frustration is having the smoker die out in the middle of an inspection. Always pack more fuel than you think you will need to ensure it lasts.
Using Too Much Smoke
The goal is to mask the bees' alarm pheromone, not overwhelm the hive. A few gentle puffs at the entrance and under the lid are usually sufficient. Using too much smoke can agitate the colony and may taint the taste of nearby honey.
Making the Right Choice for Your Goal
Your approach may vary slightly depending on your specific needs during a hive inspection.
- If your primary focus is a long-lasting burn: Pack the smoker generously with a dense primary fuel like compressed wood pellets or pine cones.
- If your primary focus is a quick and easy start: Ensure your starter fuel is completely dry and use a fast-catching primary fuel like pine needles.
- If your primary focus is maximum bee safety: Prioritize producing cool, white smoke by ensuring the fuel is smoldering, not flaming, and use it sparingly.
Mastering your smoker is a fundamental step toward becoming a confident and effective beekeeper.
Summary Table:
| Essential Supply | Purpose & Key Characteristics |
|---|---|
| Bee Smoker | The main device; includes a fire chamber, bellows, and a lid/nozzle to produce and direct smoke. |
| Starter Fuel | Quick-burning material (e.g., newspaper, cardboard) to create an initial flame. |
| Primary Fuel | Slow-burning, dense material (e.g., wood shavings, pine needles) for long-lasting, cool smoke. |
| Ignition Source | Lighter or matches to safely light the starter fuel. |
| Hive Tool | For safely managing and tamping down hot fuel inside the smoker chamber. |
Equip your apiary with professional-grade supplies from HONESTBEE.
As a trusted wholesale supplier for commercial apiaries and beekeeping equipment distributors, we provide the durable, reliable equipment you need for efficient and safe hive management. From high-quality smokers to essential hive tools, our products are designed to meet the demands of large-scale operations.
Ready to streamline your beekeeping supplies? Contact our wholesale team today to discuss your needs and discover how HONESTBEE can support your business's growth and success.
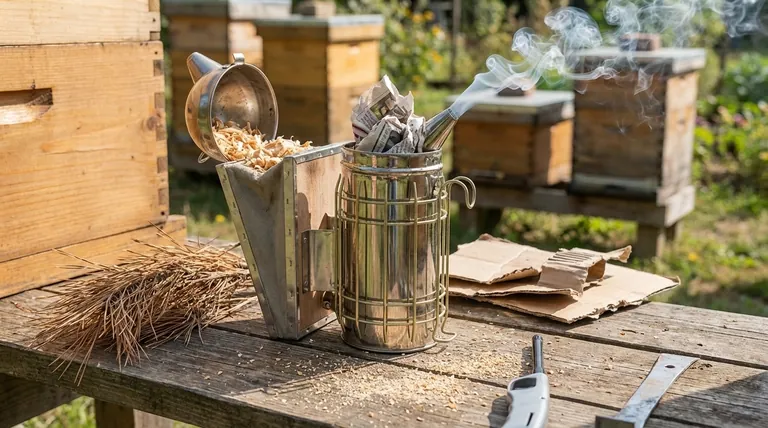
Visual Guide
Related Products
- Stainless Steel Honey Bee Smoker Hive and Honeycomb Smoker for Beekeeping
- Professional Bee Smoker with Elongated Spout and Durable Bellows for Beekeeping
- Premium Traditional Copper Bee Smoker with Bellows
- Heavy Duty Manual Bee Smoker Blower for Beekeeping
- European Stainless Steel Bee Smoker for Honey Bee Hive
People Also Ask
- How should a beekeeper use a smoker when approaching a hive? A Guide to Calm, Safe Inspections
- What is the best material for a bee smoker? Choose the Right Fuel for a Calm Hive
- Why is a smoker important in beekeeping? Essential for Safe and Calm Hive Management
- What type of bee smoker is recommended for a beginner? Top Picks for Easy Hive Management
- When should you add more fuel to the bee smoker? Watch for This Critical Smoke Signal