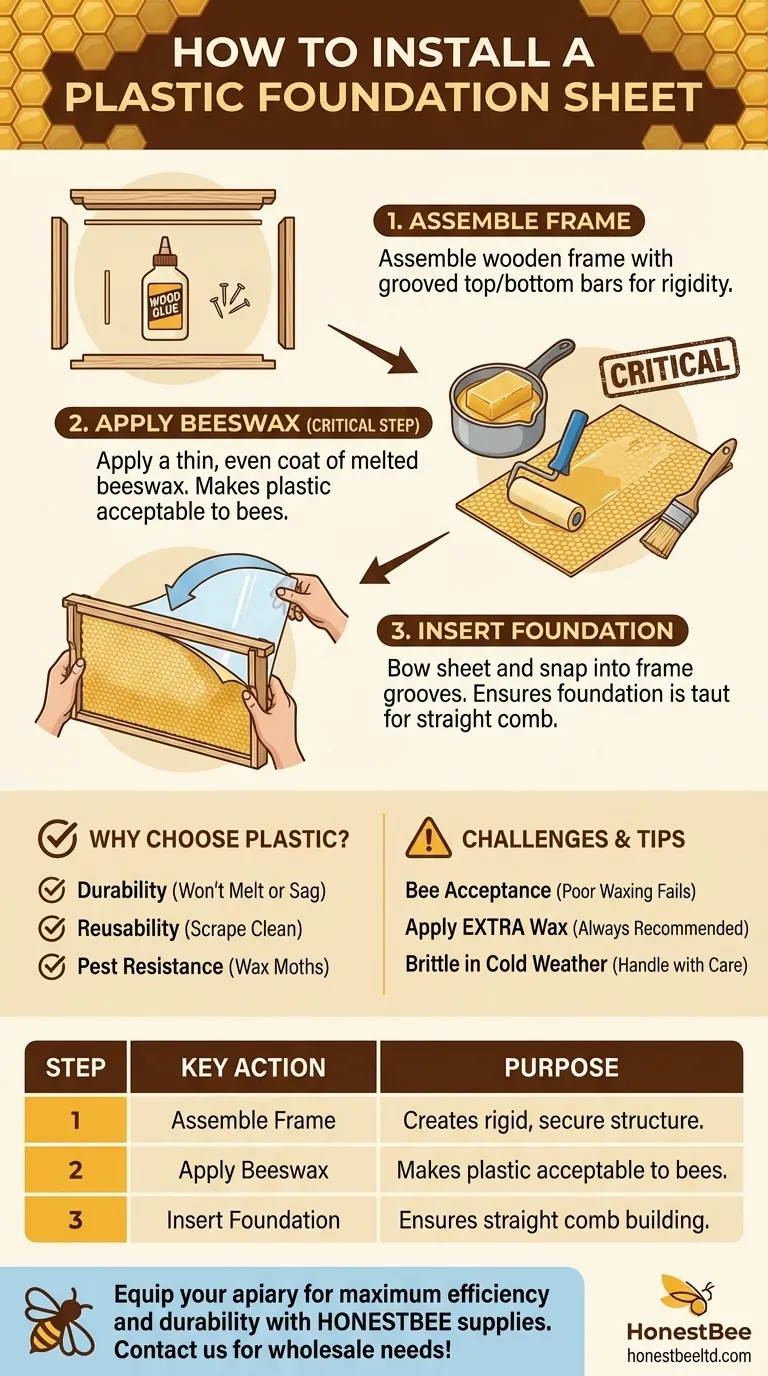
To install a plastic foundation sheet, you must first assemble your frame, then apply a thin coat of melted beeswax to the plastic sheet to encourage the bees to use it. Once coated, the flexible plastic sheet is bowed slightly and snapped into the grooves of the frame's top and bottom bars, creating a durable and reusable base for the bees to build their honeycomb.
The core principle is not just inserting the plastic, but making it acceptable to the bees. A proper beeswax coating is the critical step that bridges the gap between a synthetic material and a natural, productive hive.
Why Choose Plastic Foundation?
Plastic foundation serves as a modern alternative to traditional beeswax foundation. Its primary purpose is to provide a rigid, pre-formed hexagonal pattern that guides bees in building straight, uniform honeycomb.
The Appeal of Durability
The main advantage of plastic is its durability. Unlike wax foundation, it will not melt in high heat or sag under the weight of heavy honey stores. This structural integrity makes it ideal for use in honey extractors, as the comb is less likely to blow out during high-speed spinning.
Reusability and Pest Resistance
Plastic foundations are also reusable. After extracting honey, the frames can be scraped clean and placed back in the hive. They are highly resistant to damage from pests like wax moths, which can devastate stored wax combs.
A Step-by-Step Guide to Installation
Proper installation is key to ensuring your bees readily accept and build upon the plastic foundation. Missing a step can lead to the bees ignoring the foundation entirely.
Step 1: Assemble Your Frames
First, ensure you have the correct type of frame. You need wooden frames that have a groove in both the top and bottom bars to hold the sheet securely.
Assemble these frames using wood glue and small nails for maximum rigidity. A well-built frame will withstand years of use and the stress of honey extraction.
Step 2: Apply a Beeswax Coating
This is the most critical step. Bees are naturally hesitant to build on a foreign plastic surface. Applying a coating of real beeswax makes the foundation smell and feel familiar, encouraging them to get to work.
You can purchase foundation that comes pre-waxed, but adding an extra coat is always a good practice. To do this, gently melt pure beeswax and apply a thin, even layer to both sides of the plastic sheet using a small foam roller or paintbrush.
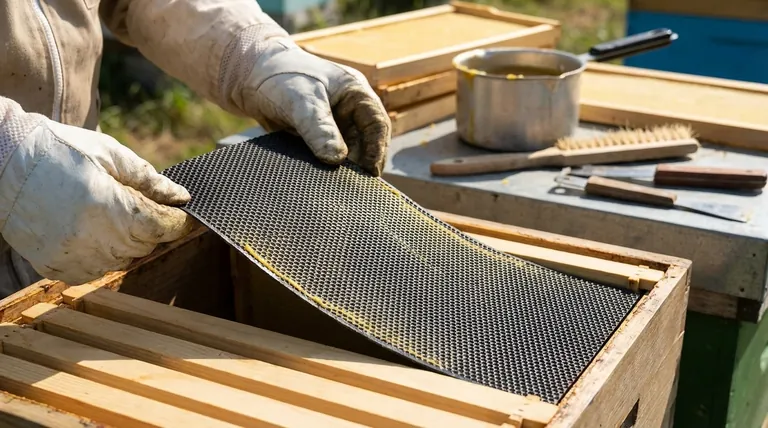
Step 3: Insert the Foundation into the Frame
With the frame assembled and the foundation waxed, you can now insert the sheet.
Gently bow the plastic sheet by pushing the ends toward each other. Slide one edge into the groove of the top bar, then guide the other edge until it snaps securely into the groove of the bottom bar. The foundation should be held taut within the frame.
Understanding the Trade-offs
While plastic foundation offers significant benefits, it's important to understand its limitations to avoid common problems.
The Primary Challenge: Bee Acceptance
The biggest pitfall is poor bee acceptance. If the foundation has an insufficient or non-existent wax coating, the bees may refuse to draw comb on it. They might even build rogue, messy "burr comb" in the empty space instead.
A thin, factory-applied wax coat is often not enough. Always be prepared to add your own fresh coat of beeswax for the best results.
Environmental and Handling Considerations
Plastic is, by its nature, less natural than beeswax. Some beekeepers prefer to keep their hives entirely free of plastic materials for philosophical or organic certification reasons.
While durable, the plastic can become brittle in very cold weather, so care must be taken when handling frames during winter inspections.
Making the Right Choice for Your Hive
Your decision to use plastic foundation should align with your beekeeping goals.
- If your primary focus is durability and efficiency: Plastic foundation is an excellent choice due to its reusability and strength, especially if you plan on frequent honey extraction.
- If your primary focus is the most natural hive environment: Traditional beeswax foundation may be a better fit, though it requires more careful handling.
- If your primary focus is successful bee adoption: Always apply an extra coat of fresh, pure beeswax to any plastic foundation, regardless of whether it came pre-waxed.
Properly preparing your foundation is a direct investment in the health and productivity of your colony.
Summary Table:
| Step | Key Action | Purpose |
|---|---|---|
| 1 | Assemble wooden frame with top/bottom grooves | Creates a rigid, secure structure. |
| 2 | Apply a thin, even coat of melted beeswax | Makes the plastic acceptable to bees by providing a familiar scent and surface. |
| 3 | Bow the sheet and snap into frame grooves | Ensures the foundation is held taut for straight comb building. |
Equip your apiary for maximum efficiency and durability. HONESTBEE supplies high-quality beekeeping supplies and equipment, including robust plastic foundation frames, to commercial apiaries and beekeeping equipment distributors through our wholesale-focused operations. Ensure your colonies have the best foundation for success. Contact HONESTBEE today to discuss your wholesale needs!
Visual Guide
Related Products
- Food Grade Plastic bee Foundation for Bee Frames
- Beeswax Foundation Sheets Beehive Foundation for Wholesale
- Beeswax Machine Press Embosser Wax Foundation Mold Printer Bee Hive Equipment Making Sheet
- Assembled Wooden Bee Frames with Plastic Foundation for Durability and Convenience by HONESTBEE
- Plastic Bee Frame Beekeeping Hive Frames for Wholesale
People Also Ask
- When is it advantageous to use plastic foundation in beehive frames? Enhance Durability and Extraction Efficiency
- What is the recommended method for re-waxing plastic bee frame foundation? Master the Foam Brush Technique
- What are the benefits and limitations of using plastic foundation for beehive frames? Boost Efficiency & Durability
- What are the advantages of using plastic foundation in a beehive? Boost Efficiency and Durability in Your Apiary
- Are plastic bee frames good? A Guide to Durability, Efficiency & Bee Acceptance