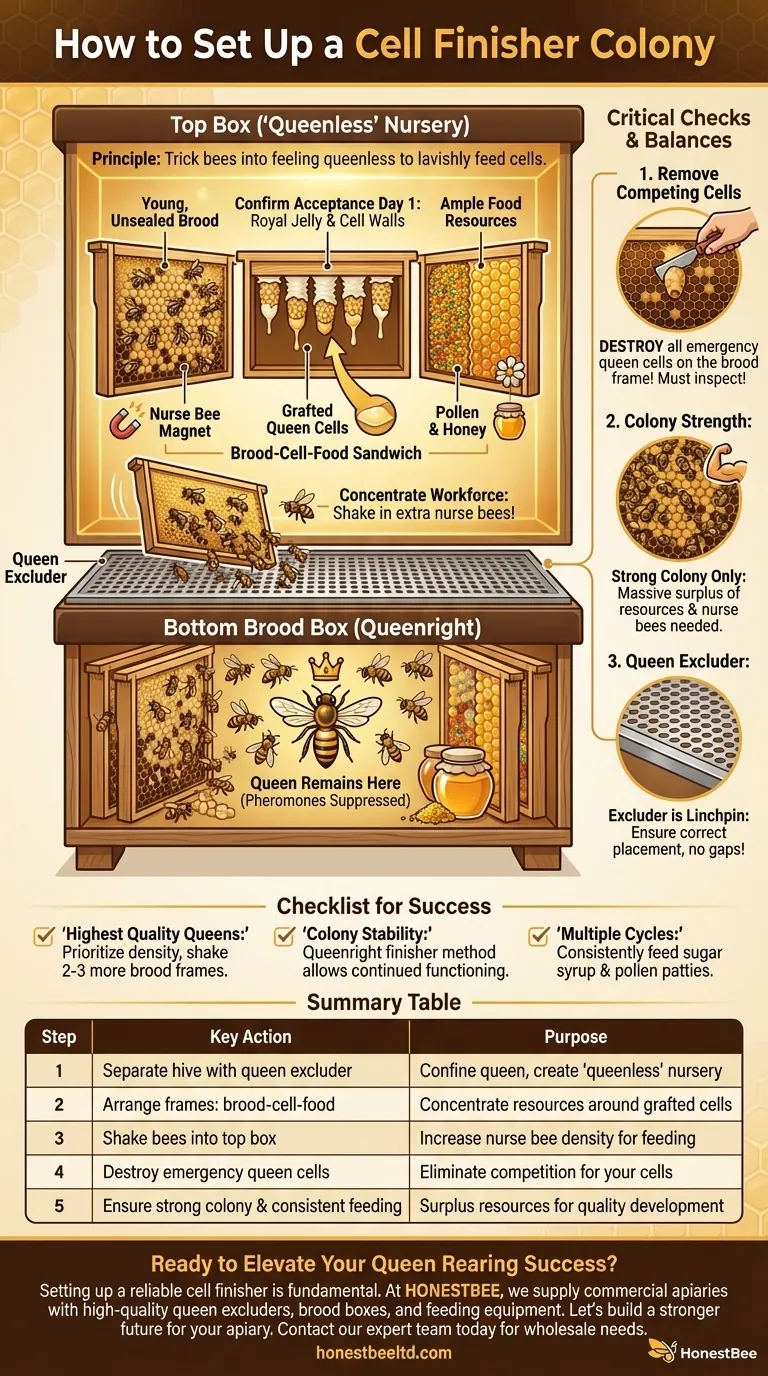
To set up a cell finisher colony, you create a strong, two-story hive separated by a queen excluder. The queen remains in the bottom box, while the upper box is arranged to concentrate a large population of nurse bees around your grafted queen cells, a frame of young brood, and frames of food. This "queenright finisher" configuration tricks the bees in the top box into feeling queenless, compelling them to lavishly feed and complete the development of the queen cells you've provided.
The core challenge in queen rearing is convincing a colony to raise queens from cells they did not create. The most reliable solution is to engineer a "resource-rich nursery" within the hive, separating the queen below an excluder while concentrating nurse bees, open brood, and ample food around your grafted cells in the box above.
The Principle: Creating a "Queenless" Nursery in a Queenright Hive
A successful finisher colony works by manipulating the bees' natural instincts. The queen's pheromones, which normally suppress queen rearing, are weakest in the top box, far from where she is laying.
By adding a frame of very young, unsealed brood to this top box, you create a powerful "nurse bee magnet." This ensures the bees best equipped to produce royal jelly are drawn right to the area where you place your grafted cells.
The Critical First Step: Confirming Cell Acceptance
A finisher is for finishing, not starting. Before setting it up, you must confirm your grafts have been accepted in a "cell starter" colony.
Look for clear signs of success on Day 1 after grafting: a bed of royal jelly in the base of the cell and visible extension of the wax cell walls by the bees. Only accepted cells should be moved to the finisher.
Arranging the Finisher Box for Success
The precise arrangement of the top box is designed to focus the colony's resources. This setup happens on Day 1, immediately after you've confirmed the cells have been started.
- Make Space: In the upper brood box, push the existing frames to the outer walls to create a gap in the center.
- Transfer Key Frames: Move three frames, typically from the lower brood box, into this central gap. Their order is critical.
- Position the Frames: Place your frame of grafted queen cells in the very center. On one side, place a frame with young, unsealed brood. On the other side, place a frame rich in pollen and honey.
- Concentrate the Workforce: After arranging the frames, shake the bees from several additional brood frames into the top of the hive. This dramatically increases the density of nurse bees in the finisher box.
This "brood-cell-food" sandwich creates an ideal micro-environment where nurse bees are attracted by the open brood and have immediate access to the protein (pollen) and carbohydrates (honey) needed to feed the developing queens.
Understanding the Critical Checks and Balances
Simply assembling the components is not enough. You must actively manage the colony to ensure your chosen cells receive the bees' full attention.
Remove All Competing Queen Cells
The frame of open brood you added will not only attract nurse bees but will also trigger them to create their own "emergency" queen cells.
You must inspect this frame and destroy any emergency cells. If you don't, the bees will likely favor their own and may abandon your grafted cells. This check should be performed when setting up the finisher and again a few days later.
Colony Strength is Non-Negotiable
A weak or moderately sized colony will not make a good finisher. Raising high-quality queens requires an enormous surplus of resources and a massive population of young nurse bees.
Only your strongest hives should be used as finishers. They must be bursting with bees to generate the necessary heat and produce enough royal jelly for dozens of queen cells.
The Queen Excluder is the Linchpin
The entire system depends on the queen excluder. It keeps the queen and her strong pheromonal signal confined to the bottom box. This isolation is what creates the "queenless" impulse in the top box that drives the bees to care for your cells. Ensure it is correctly placed with no gaps.
A Checklist for a Successful Finisher Setup
Follow these steps to configure your hive for maximum success.
- If your primary focus is raising the highest quality queens: Prioritize creating an overwhelming density of nurse bees by shaking bees from at least two to three additional brood frames into the top box.
- If your primary focus is colony stability and efficiency: The queenright finisher method is ideal, as it allows the colony to continue functioning without the disruption of being made permanently queenless.
- If you are managing multiple grafting cycles: Ensure the finisher colony is consistently fed with sugar syrup and pollen patties to prevent any nutritional deficits between batches.
By meticulously managing population, resources, and competition, you create the ideal nursery for raising strong, well-fed queens.
Summary Table:
| Step | Key Action | Purpose |
|---|---|---|
| 1 | Separate hive with queen excluder | Confine queen to bottom box, create 'queenless' top nursery |
| 2 | Arrange frames in top box: brood-cell-food | Concentrate nurse bees & resources around grafted cells |
| 3 | Shake bees into top box | Increase nurse bee density for optimal feeding & warmth |
| 4 | Destroy emergency queen cells | Eliminate competition for your grafted cells |
| 5 | Ensure strong colony & consistent feeding | Provide surplus resources for high-quality queen development |
Ready to Elevate Your Queen Rearing Success?
Setting up a reliable cell finisher colony is fundamental to producing vigorous, productive queens. At HONESTBEE, we supply commercial apiaries and beekeeping equipment distributors with the high-quality, wholesale-focused supplies needed to build and manage these essential systems efficiently.
From durable queen excluders and brood boxes to essential feeding equipment, our products are designed to support your most demanding operations.
Let's build a stronger future for your apiary together. Contact our expert team today to discuss your wholesale needs.
Visual Guide
Related Products
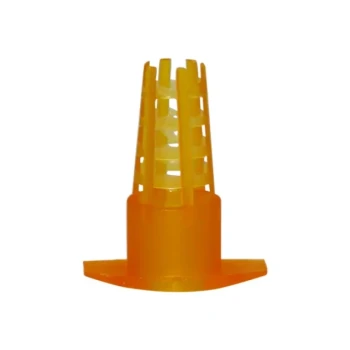
- JZBZ Style Shipping Cell Protector for Queen Rearing Kit
- Premium Nicot Style Cell Bar Holder and Queen Cell Cup Holder System
- JZBZ Style Push-In Cell Protector for Professional Queen Rearing Kits
- Clear Black Plain Polystyrene Queen Bee Grafting Cell Cups No Lug for Bee Queen Cup
- JZBZ Type Wide Base Plastic Queen Cell Cups for Base Mounting and Queen Rearing
People Also Ask
- What is the purpose of using queen cell protectors or introduction cages? Maximize Your Queen Rearing Success
- What is the purpose of queen cell protectors? Safeguard Your Queen Rearing Success
- What is the purpose of queen cell protectors in a hive? Secure Your Hive's Future with Professional Protection
- What is the role of queen cell protectors and emergence cages? Secure Your Genetic Stock and Hive Stability
- What are some methods to protect a queen cell from being destroyed by bees? Essential Protection for Successful Queen Rearing