To prepare a frame for grafting, you must first select a frame with appropriately aged larvae from your breeder colony. Carefully remove all the bees, transport it to a well-lit grafting station, and immediately cover it with a damp cloth to protect the delicate larvae from drying out while you work.
The entire preparation process is not just a series of steps, but a race against time to preserve the viability of the larvae. Your primary goal is to maintain their moisture and prevent physical damage from the moment the frame leaves the hive until the graft is complete.
Selecting the Right Foundation: The Larvae Frame
Successful grafting begins long before you pick up a tool. The quality of your chosen frame and the larvae within it determines the potential of your future queens.
Identifying the Ideal Larvae
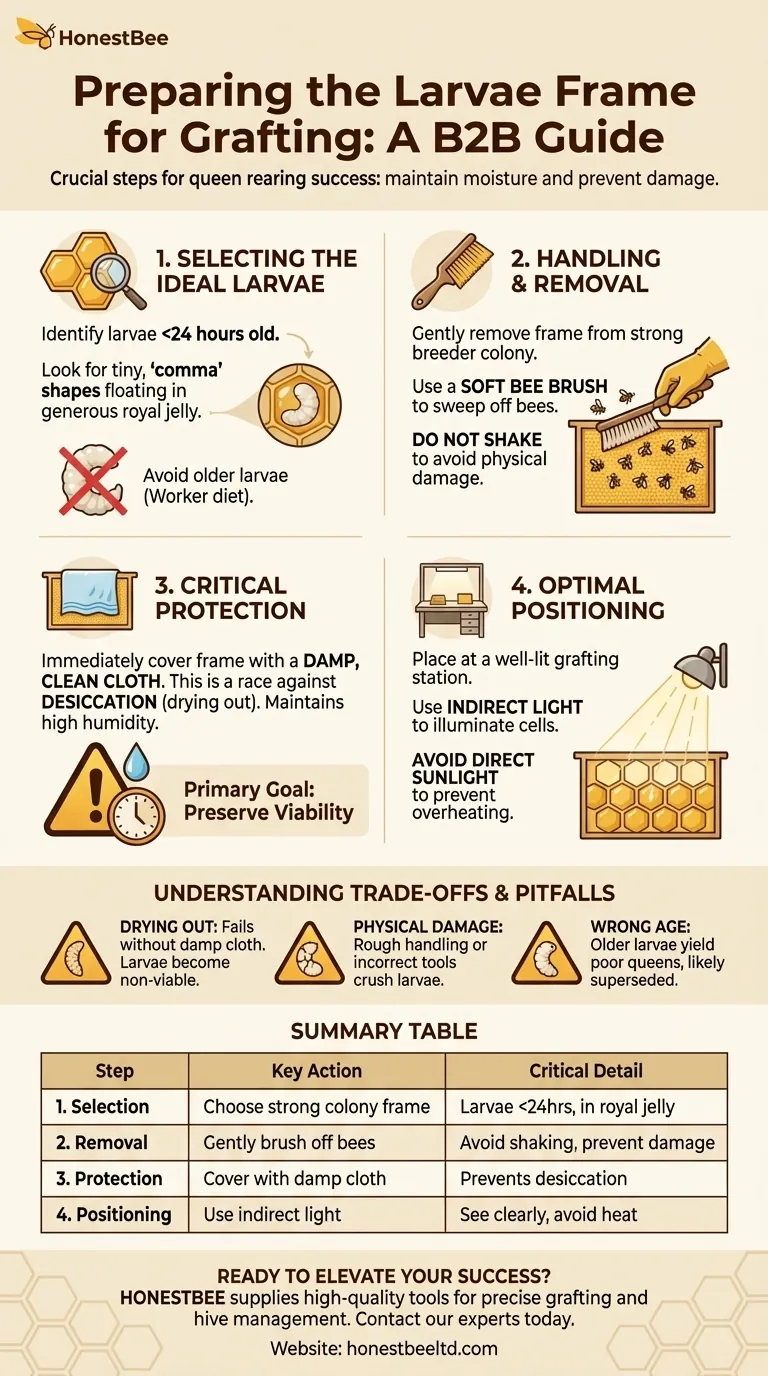
The most critical factor is the age of the larvae. You must select larvae that are under 24 hours old from the point of hatching.
These ideal larvae are very small, have a slight "comma" or crescent shape, and are visibly floating in a generous bed of royal jelly. Avoid older larvae, which are larger and have a more pronounced "C" shape, as they will not develop into high-quality queens.
Sourcing from a Strong Breeder Colony
The frame you select should come from a strong, healthy, and productive breeder colony. The genetics and vitality of this colony are directly passed down, and a strong hive will provide well-fed larvae with ample royal jelly, which is crucial for their initial survival.
The Critical Handling Process
Once the ideal frame is selected, every action you take is focused on protecting the larvae from environmental shock and physical harm.
Removing the Frame from the Hive
Gently remove the chosen frame from the breeder colony. The nurse bees covering the brood must be removed with care.
Use a soft bee brush to gently sweep the bees off the comb. Shaking the frame can dislodge or damage the delicate larvae, ruining them for grafting.
Maintaining the Larval Environment
Larvae are extremely susceptible to drying out (desiccation). This is the single greatest threat to a successful graft.
As soon as the bees are brushed off, drape a damp, clean towel or cloth over the frame. This maintains high humidity around the larvae, mimicking the environment inside the hive and preventing them from drying out as you transport it and during the grafting process.
Positioning the Frame for Grafting
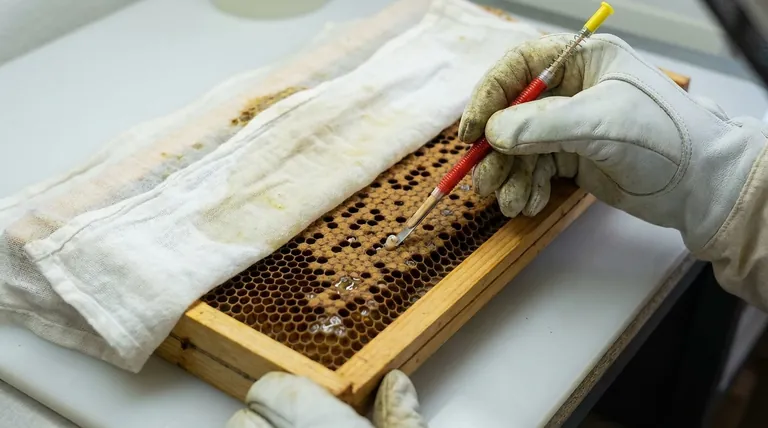
Place the frame at your grafting station in a position that is both comfortable for you and provides excellent visibility.
The area should be well-lit, but you must avoid direct sunlight, as its heat can quickly kill the larvae. Arrange the frame so that the light source shines directly into the cells, making it easy to see the tiny larvae against the wax.
Understanding the Trade-offs and Common Pitfalls
Mistakes during preparation are common and can lead to complete graft failure. Understanding these risks is key to avoiding them.
The Danger of Drying Out
Dehydration is the primary enemy of a successful graft. A larva that begins to dry out is no longer viable. Failing to use a damp cloth or working too slowly in a dry environment are the most common causes of failure.
The Risk of Physical Damage
Larvae are incredibly fragile. Rough handling, such as shaking the frame or using a grafting tool incorrectly, will crush or injure them. A damaged larva will be rejected by the nurse bees or will die in the cell cup.
Choosing Larvae of the Wrong Age
Grafting larvae that are too old is a wasted effort. Even if the bees accept them, they will have been fed a worker-larva diet for too long. The resulting queen will be poorly developed and likely superseded by the colony.
How to Apply This to Your Project
Your focus during preparation will dictate the success of your queen-rearing efforts.
- If your primary focus is maximizing acceptance rate: Ensure your cell bars have been in a hive for at least 24 hours so bees can clean and polish them before you begin.
- If your primary focus is ensuring larval survival: Never skip the damp cloth step and work efficiently to minimize the time the frame is out of the hive.
- If your primary focus is improving your technique: Position your frame under good, indirect light so you can clearly see the larva and slide the tool under its back without touching it.
Mastering this careful preparation is the foundation upon which every successful queen is built.
Summary Table:
| Step | Key Action | Critical Detail |
|---|---|---|
| 1. Selection | Choose frame from strong breeder colony. | Larvae must be under 24 hours old, floating in royal jelly. |
| 2. Removal | Gently brush bees off the frame. | Avoid shaking to prevent physical damage to larvae. |
| 3. Protection | Immediately cover frame with a damp cloth. | Prevents larvae from drying out (desiccation). |
| 4. Positioning | Place at a well-lit grafting station. | Use indirect light to see larvae clearly; avoid direct sunlight. |
Ready to elevate your queen-rearing success? Proper grafting starts with the right equipment and knowledge. HONESTBEE supplies commercial apiaries and beekeeping equipment distributors with the high-quality, reliable tools needed for precise grafting and hive management. Contact our experts today to discuss how our wholesale-focused supplies can support your operation's growth and efficiency.
Visual Guide
Related Products
- Assembled Wooden Bee Frames with Plastic Foundation for Durability and Convenience by HONESTBEE
- Wooden Bee Hive Frames for Beekeeping and Wholesale
- Plastic Bee Frame Beekeeping Hive Frames for Wholesale
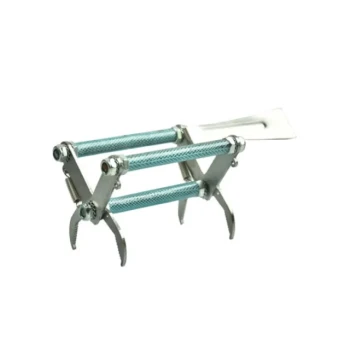
- Durable Galvanized Steel Frame Grip
- Professional Galvanized Steel Frame Rest for Beehives
People Also Ask
- What are bee frames and how are they sized? A Professional Guide to Standardization & Material Choice
- How should frames be rearranged as a bee colony grows? Master Hive Expansion and Nest Management
- How do you re-wax bee frames? A Simple Guide to Faster Comb Building
- When should bee frames be thrown away? A Beekeeper's Guide to Hive Health & Biosecurity
- Do bee frames need foundation? Choose the Right Approach for Your Apiary